


Page 32
Appendix B - IP Address Settings of Host PC
The process is slightly different based on which version of Windows is being used.
Below are some examples
Windows 7
Click on the Start Bar and select Contro
l Panel, select “Network and Sharing Centre”.
Select “Change adapter settings”, Right Click on the Local Area Connection and select “Properties”
Select “Internet Protocol Version 4” and click the “Properties” button. Select “Use the following IP
address
” and enter the desired IP address and Subnet Mask to suit SmartScan. Click OK to save
settings.
Windows 10
Select Start, then select Settings > Network & Internet .
For an Ethernet network, select Ethernet
, then select the Ethernet network you’re conne
cted to.
Under IP assignment, select Edit.
Under Edit IP settings, select Automatic (DHCP) or Manual.
Under Edit IP settings, choose Manual, then turn on IPv4.
To specify an IP address, in the IP address, Subnet prefix length, and Gateway boxes, type Set your
IP address settings and DNS server address.
When you’re done, select
Save.
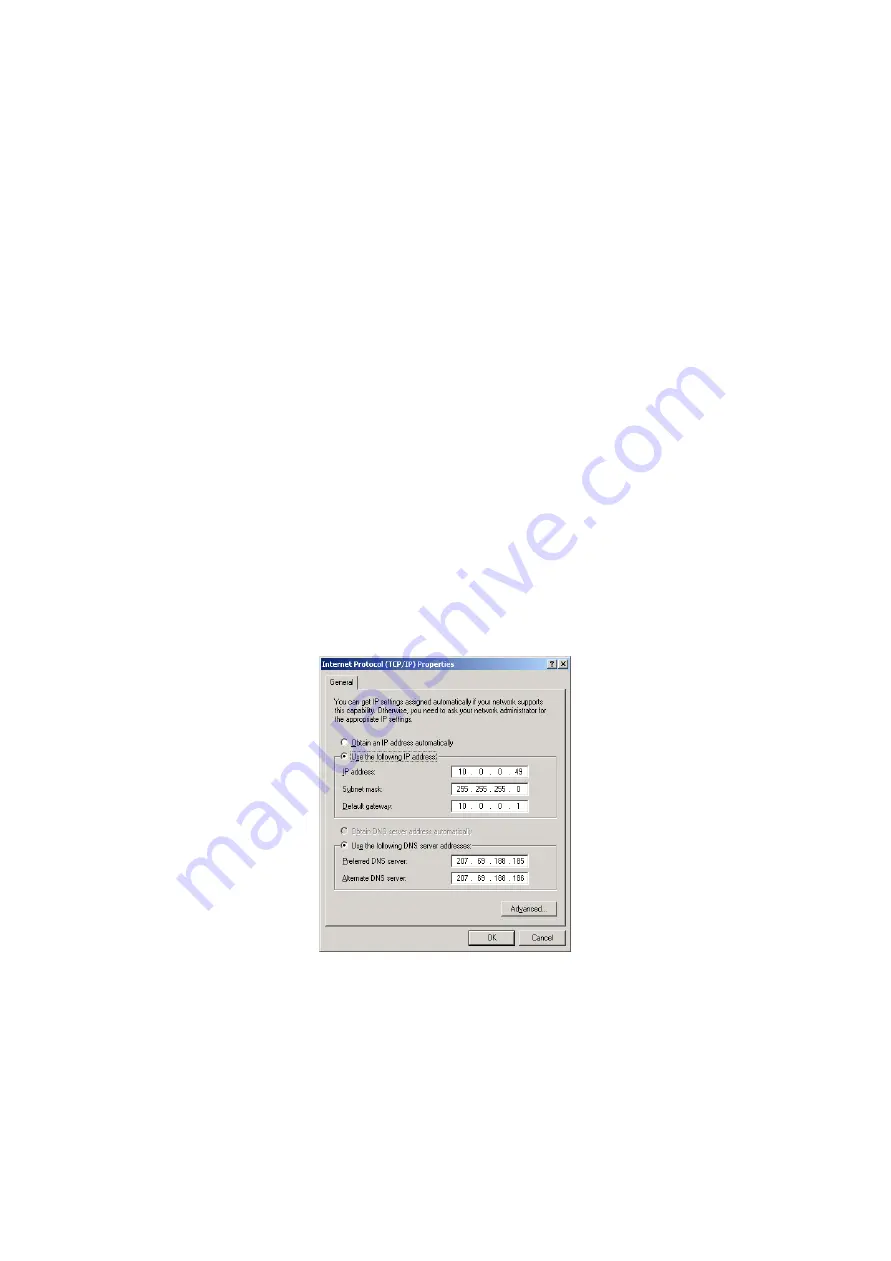
In each case, the network settings should look similar to the below
Figure 29
–
example SmartScan network settings
After using S
martScan, to reconnect to a Local Area Network follow the same process and select “Obtain an
IP address automatically”.


