


Page 19
Instrument Setup
–
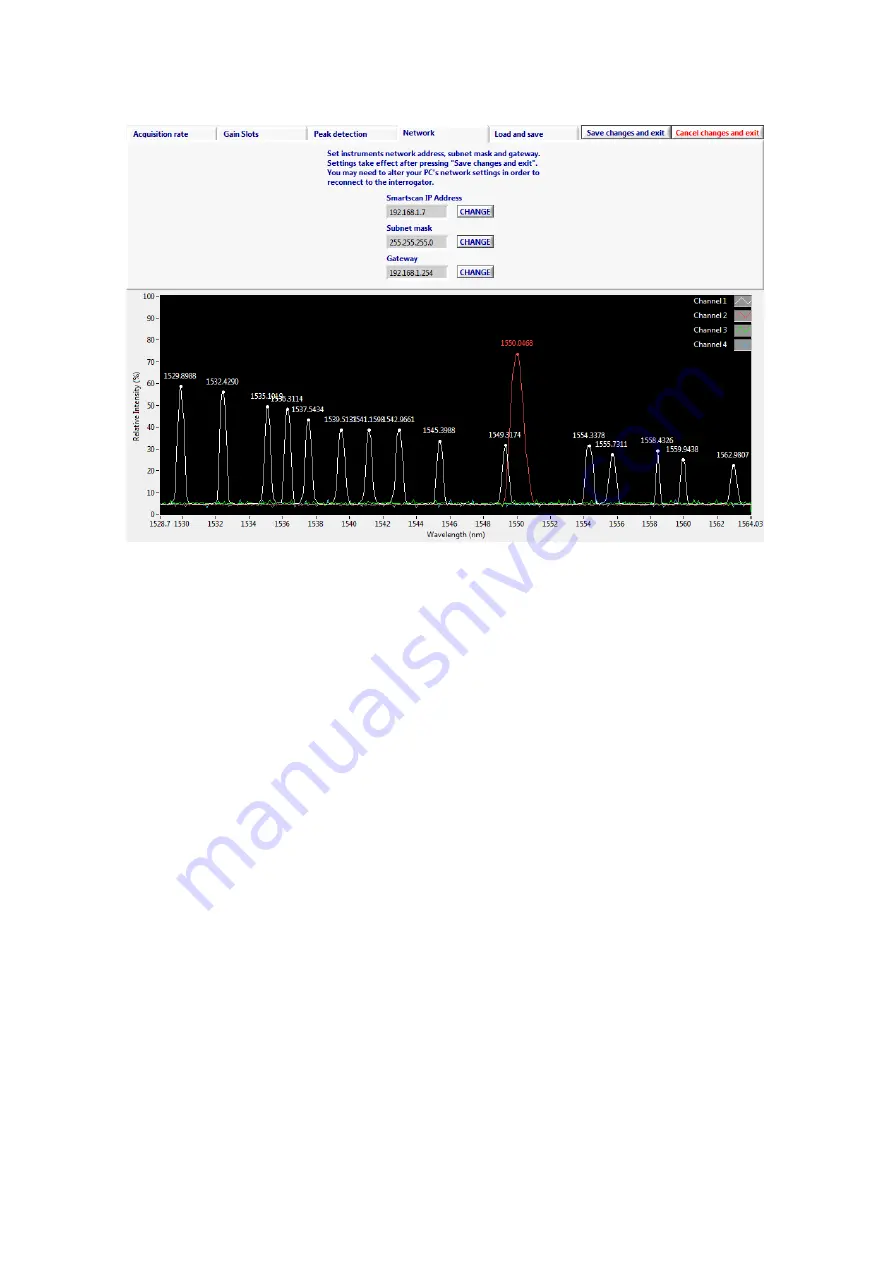
Network Tab
Figure 13 - Instrument Setup
–
Network Tab
On the Network tab the user can change the IP settings of the SmartScan. This is usually only necessary
when a SmartScan is to be used on a Local Area Network. Be aware that the IP settings of the host PC may
need to change in order to maintain connectivity.
If you are connecting the SmartScan to a network instead of a direct connection to a host PC, make sure to
set the gateway address to match the network router or gateway PC's LAN address and that the
SmartScan's IP address is unique on the network and not in the pool of addresses assigned to any DHCP
servers on the network.
If there is a firewall or NAT router between the SmartScan and the host PC you may need to open TCP port
80 and UDP ports 30001 to 30003, 30070 to 30072 and 30075 to allow SmartSoft to communicate with the
interrogator.
See Preparing for Use section and Appendix B for further details and if necessary consult your Network
Administrator.


