background image

12

www.smartavi.com

Inputs/Outputs:  

Enter the number of Inputs/Outputs your CATXPro has. For now, although the CATXPro can 

have up to 64 inputs and 64 outputs,  we will assume that there are 16 inputs and 16 outputs.

Com Port:  


Select the appropriate com port that your computer is using to access the router.

Router Time out:  

By default this is 0 meaning the computer acknowledges commands almost instantly.    


Sometimes a computer takes longer to respond. This setting should be left at 0. If you need to  


change it, it should be no higher than 0.2.

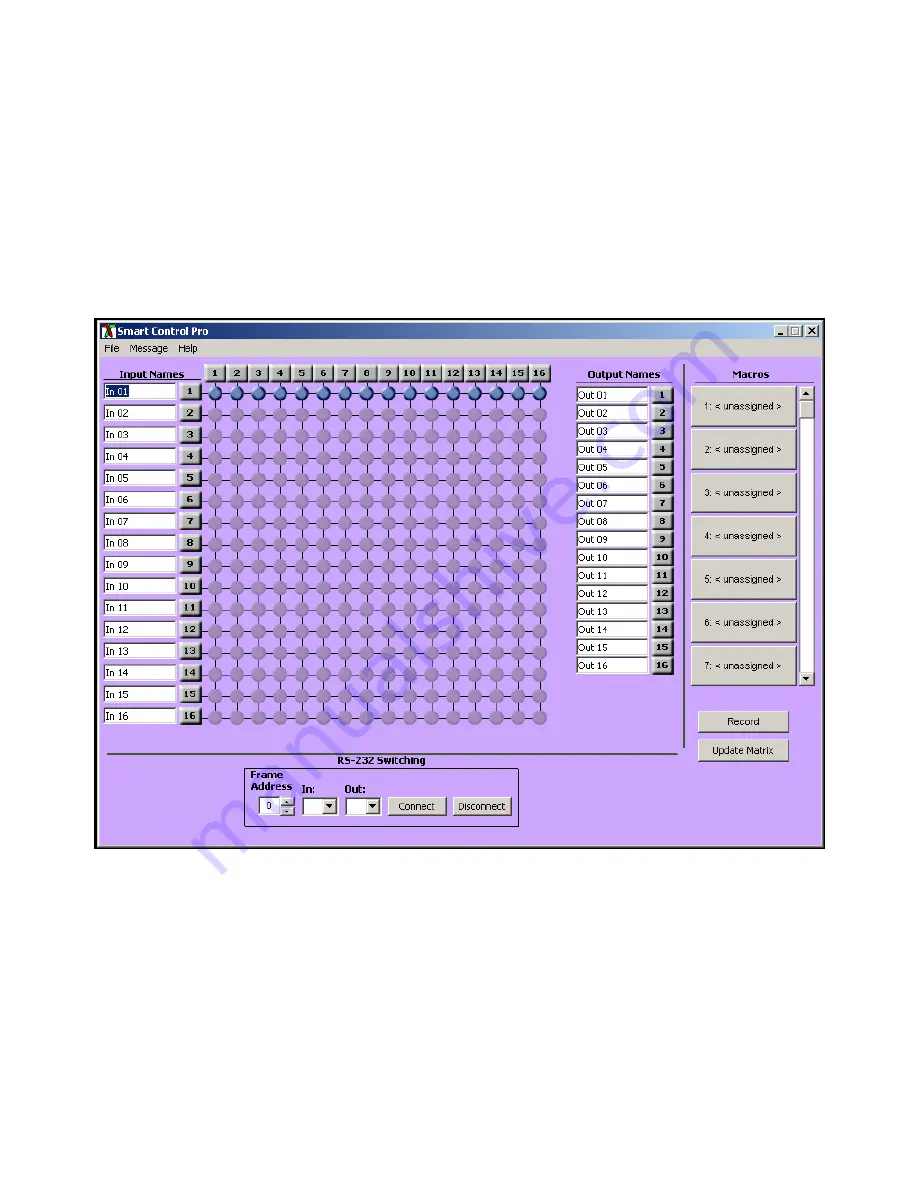
After you have entered in the necessary information click OK. This will now take you to the Main Routing Window 

where you can route the different video/audio connections.

On this screen you will notice the input buttons running down the left side while the output buttons run across the 

top. They are each labeled 1 through 16. 

Note: The three small colored buttons at the lower right labeled ALL, VIDEO, and AUDIO are not available if AV Split 

was not checked when you configured your router.

Main

 CATXPro 

window

Software Operation (continued)

Содержание CATXPro

Страница 1: ...site Video and S Video with full stereo audio support and full IR RS232 non blocking matrix switching Switch up to 64 remote devices to 64 remote displays located up to 1 000 feet away CATXPro 64 port...

Страница 2: ...maintains optimum integrity throughout the system Special remote boxes offer compatibility with Video Composite UXGA Component Video and S Video Features Supports high resolution video up to 1920x1200...

Страница 3: ...IN X 32 OUT Matrix with RS 232 Control Includes CSWX16X32 SM CSW CCPWR06US CSWX16X48S CAT5 Audio Video and IR RS232 16 IN X 48 OUT Matrix with RS 232 Control Includes CSWX16X48 SM CSW CCPWR06US CSWX16...

Страница 4: ...al is Crucial Medical Remote Operation Away from Sensitive Magnetic Equipment Recording for Large Studios where Editing Mixing Stations are Compact and or Require Complete Silence Applications Applica...

Страница 5: ...hat will connect to the receiver XTAV RX Adjusting and Tuning the Signal In order to fine tune the signal adjust the individual dials one at a time starting with GREEN then BLUE and lastly RED As you...

Страница 6: ...ect to the receiver XTW RX NOTE You can not use RS232 and IR at the same time Installation continued Connecting XTWALL Receiver Connecting The Receiver 1 Connect CAT5 cable coming from the transmitter...

Страница 7: ...dials you will notice the colors slightly change as you increase or decrease the strength All dials should be around the same distance Connecting the XTPro transmitter Connecting The Transmitter 1 Co...

Страница 8: ...out connectors on the front of the receiver 3 Connect a set of external speakers to the audio output connections on the front of the unit Standard 3 5mm stereo Miniplug Adjusting and Tuning the Signa...

Страница 9: ...n the back of the CATXPro 2 Connect the CAT5 cable to the RJ45 and mark each cable with the number of the receivers 3 REPEAT steps for all receivers cables After all connection are made you can turn o...

Страница 10: ...Bidirectional Brown 8 CAT5 Preparation The CATXPro is a point to point video extender switcher The system does not allow to connecting the Cat5 via hubs or any kind of switches that the point to point...

Страница 11: ...tion CD that came with your CATXPro unit This CD has the SmartControlPro software that you will need in order to control the unit using a computer Insert the CD into your CD ROM On the CD you should s...

Страница 12: ...respond This setting should be left at 0 If you need to change it it should be no higher than 0 2 After you have entered in the necessary information click OK This will now take you to the Main Routi...

Страница 13: ...e the numbered buttons across the top and left sides Click an output button on the top and then click an input button on the left Options for using the Button Panel Output Options To select multiple o...

Страница 14: ...ed and these routes will be added to the recording This makes it possible to combine the routes of two or more macros into one bigger macro 4 When finished click the Save Macro button You will be inst...

Страница 15: ...ot always available in all boxes in order to interface the remote control with the matrix The way the remote control the matrix is as follows Xx enter yy enter When XX is the output YY is the input To...

Страница 16: ...th automated third party control software Applications Server Collocation Digital Signage Airports Dealer Rooms Control Rooms Audio Visual Presentations Hotels Resorts KVM Switches Features Supports H...

Страница 17: ...ection that has DHCP enabled If your network does not support DHCP please see page 22 of this manual for instructions 4 Power on the computer and run a terminal program such as Hyperterminal to open a...

Страница 18: ...s that is indicated You will be prompted to enter a username and password 9 The default login case sensitive is as follows User ID Admin Password Pass 10 Once connected to the SMTCP 2 you will see the...

Страница 19: ...ave a preset simply configure your crosspoints and press the SAVE button next to the desired preset To recall a preset simply click on the button with its name To edit the preset names see the Device...

Страница 20: ...inputs outputs and presets reset the names and reset the system to factory defaults To begin set the type of device you are using from the drop down menu labeled Device Type and specify the Matrix Dim...

Страница 21: ...ge the user name and password for the SMTCP 2 The default user name for the SMTCP 2 is Admin and the password is Pass Once you modify the login information press the Submit button to make the changes...

Страница 22: ...he SMTCP 2 press and hold Shift 1 exclamation until a command prompt appears 6 Press enter to show the network configuration help screen as follows Command Network Configuration help Enter a command f...

Страница 23: ...h pegs Weight 6 lbs or 36 kg XTPRO SPECIFICATIONS Receiver with local monitor Audio and IR RS 232 support VGA Data Format RGBHV RGsB YUV Y C CVBS Resolution Up to 1900 x 1200 VGA SVGA XGA SXGA Connect...

Страница 24: ...CVBS Resolution Up to 1900 x 1200 VGA SVGA XGA SXGA Connector Type HD 15 socket Audio Signal Type Stero unbalanced Connector 3 5 mm jack socket RS232 DB9M TXD RXD Gnd 9600 bps Power Requirements 5VDC...

Страница 25: ...he cable to the RS 232 compliant device 3 Power on the device Establish a connection to your RS 232 compliant device Setting up the Terminal application Hyperterminal Settings 1 Open Hyperterminal on...

Страница 26: ...ave established a connection to your device use the following commands CHK stands for CHECKSUM the CHK value is calculated by performing an XOR of the full com mand string For example F00M12I03 will X...

Страница 27: ...27 www smartavi com How to properly test an RS 232 connection between a PC and most SmartAVI RS 232 compliant devices RS 232 Commands continued RS 232 Specifications continued...

Страница 28: ...0 0 M 0 3 I 0 2 CHK CR 2F 2F 46 30 30 4D 30 33 49 30 32 43 0D input_3_output_3 F 0 0 M 0 3 I 0 3 CHK CR 2F 2F 46 30 30 4D 30 33 49 30 33 42 0D input_4_output_3 F 0 0 M 0 3 I 0 4 CHK CR 2F 2F 46 30 30...

Страница 29: ...6 30 30 4D 30 37 49 30 33 46 0D input_4_output_7 F 0 0 M 0 7 I 0 4 CHK CR 2F 2F 46 30 30 4D 30 37 49 30 34 41 0D input_5_output_7 F 0 0 M 0 7 I 0 5 CHK CR 2F 2F 46 30 30 4D 30 37 49 30 35 40 0D input_...

Страница 30: ...30 www smartavi com...

Страница 31: ...uct to SmartAVI 5 Any replacement product could be new or like new provided that it has functionality at least equal to that of the product being replaced 6 SmartAVI limited warranty is valid in any c...

Страница 32: ...or any particular purpose Smart AVI will not be liable for errors contained herein or for incidental or consequential damages in connection with the furnishing performance or use of this material No p...

Отзывы: