Electrical Connection
SMA America, LLC
40
SB8-10TL-IUS103811
Installation Guide
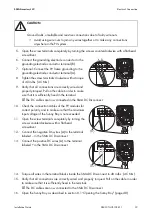
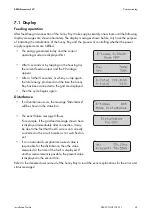
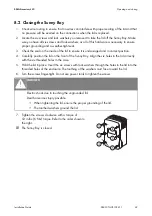
22. Torque all wires in the terminal blocks inside the Sunny Boy to 40 in-lb.
23. Verify that all connections are correctly wired and properly torqued. Pull on the cable in order
to make sure that it is sufficiently fixed in the terminal.
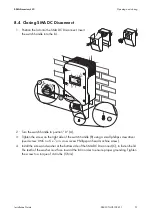
24. Close the SMA DC Disconnect as described in section 8.4 ”Closing SMA DC Disconnect”
25. Close the Sunny Boy as described in section 8.2 ”Closing the Sunny Boy” (page 49).
☑ The DC cables are now connected in the Sunny Boy.
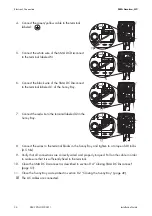
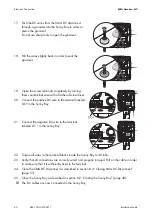
17. Push the DC wires from the SMA DC disconnect
through a grommet into the Sunny Boy in order to
pierce the grommet.
Do not use sharp tools to open the grommet.
18. Pull the wires slightly back in order to seal the
grommet.
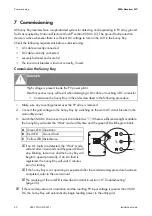
19. Open the screw terminals completely by turning
them counterclockwise with a flat-head screwdriver.
20. Connect the positive DC wire to the terminal labeled
DC+ in the Sunny Boy.
21. Connect the negative DC wire to the terminal
labeled DC − in the Sunny Boy.
Содержание SUNNY BOY 10000TL?US
Страница 2: ......
Страница 10: ...Table of Contents SMA America LLC 10 SB8 10TL IUS103811 Installation Guide...
Страница 21: ...SMA America LLC Mounting Installation Guide SB8 10TL IUS103811 21 Dimensions of the wall mounting bracket...
Страница 71: ......
Страница 72: ...4 NFSJDB 1SPEVDUJPO XXX TNB BNFSJDB DPN 4 NFSJDB 1SPEVDUJPO XXX 4 NFSJDB DPN...

