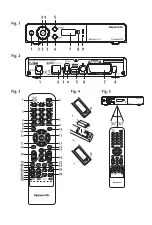
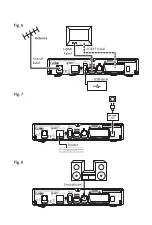
background image

8

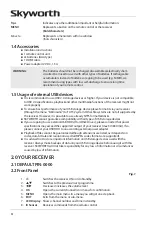
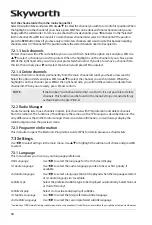
Subtitles Display

:   Select 

On

 to display subtitles whenever they are available, select 

Off

 if you don’t need 

them to be shown.*

Aspect Ratio

 Use this option to select the aspect ratio of the connected TV. The options are: 

4:3

 for a 

4:3 TV (black bars on top and bottom of picture) and 

16:9

 for 16:9 TV sets.

Scan mode

 Select 

All

 to store scrambled and free-to-air channels or select 

Free

 to store only free-to-

air channels.

Connection

 Use this option to select the established connection to your TV set. Select 

HDMI

 or 

TV 

SCART

.

* Availability of DVB/HoH subtitles depends on the broadcast. If subtitles are not supported, they can be activated via Videotext if available.

When all settings have been made, press the 

gReen


Next

 button to continue.

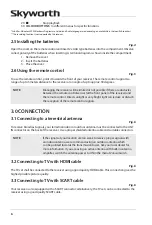
4.3 aerial adjustment

This part of the wizard will help you to setup your antenna and check signals.
Use 

pq

 to select the setting and 

t


u

 to change these values. The following settings are available:

Antenna Power

:   Set  to 

On

 if you use an active antenna (with built-in amplifier). When set to 

On

,5 V will 

be present at the ANT IN connector of the receiver. Select 

Off

 for passive antennas.

Channel No.

 Select a channel which is known to carry a broadcast signal in your region. The 

Signal 

Strength

 and 

Signal Quality

 bars give a visual indication of the reception. Adjust your 

antenna to achieve the maximum signal strength and quality.

When all settings have been made, press the 

gReen


Next

 button to start the channel scan.

The receiver will search for all available channels. When the scan is finished, the receiver switches to 

viewing mode. Now you can enjoy watching your favourite TV channels. If you get the message “No 

channels found”, then check again the antenna, coaxial cable, connector and in menu if you have 

reception. When this has been checked, reset the unit and follow the installation wizard again as shown 

below.

Tip:


 If the receiver won’t start after switching on the receiver for the first time, 
reset the receiver to factory settings by pressing the 

menu

 button and 

selecting 

Load Factory Setting

 in the menu 

Installation

(defauLT pin: 0000)

.

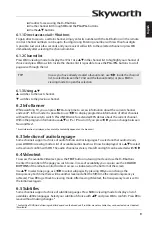
5.0 QuicK guide TO using YOuR ReceiveR

We at SKYWORTH understand that you can’t wait to enjoy your new high definition digital terrestrial 

receiver. The following quick guide will make you familiar with the basic operation of this device. We do, 

however, advice you to read the full manual to get the best performance from your receiver.
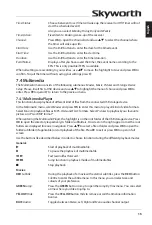
To switch your receiver ON or into Standby press 

q

 on the remote control or front panel of your receiver.

Choose the desired channel with 

pq

. Alternatively, you can enter the channel number with the 

0~9


buttons on the remote control or press 

OK

 in viewing mode to display the channel list. The volume can 

be adjusted with 

t


u

 and within the menus and in Videotext use 

vOL+/-

 additionally you can use 

!

 to 

mute all audio outputs. Use 

p+/p-

 buttons to scroll in list modes for your convenience.

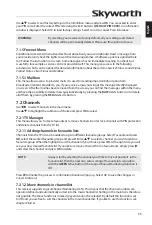
6.0 OpeRaTiOn

Your new receiver is equipped with several features to make watching TV a true pleasure. This chapter 
describes these features. Please do also read chapter 

7.0

 to get familiar with the menu of your receiver.

6.1 changing channels

Following ways are possible for changing channels with your new receiver:

Содержание SKW-T20

Страница 1: ...User Manual Inhaltsverzeichnis Empf nger f r hochaufl sendes Antennenfernsehen SKW T20 SM...

Страница 2: ......

Страница 3: ......

Страница 4: ...06 Oct 2016 15 43 Supplied by STRONG Co Japan Represented by STRONG Ges m b H Franz Josefs Kai 1 1010 Vienna Austria Email support_at strong tv...

Страница 5: ...re programs protected under international and U S copyright laws as unpublished works They are confidential and proprietary to Dolby Laboratories Their reproduction or disclosure in whole or in part o...

Страница 6: ...ories 4 1 5 Usage of external USB devices 4 2 0Your Receiver 4 2 1 DEFAULT PIN 0000 4 2 2 Front Panel 4 2 3 Rear Panel 5 2 4 Remote control 5 2 5 Installing the batteries 6 2 6 Using the remote contro...

Страница 7: ...ting cables be sure that the receiver is disconnected from the mains supply voltage Wait a few seconds after switching off the receiver before you move the receiver or disconnect any equipment It is a...

Страница 8: ...ossible to use already NTFS formatted disks SKYWORTH cannot guarantee compatibility with all types of USB storage devices If you are going to use external USB HDDs Hard Disk Drives please consider tha...

Страница 9: ...les between TV or RADIO mode 5 No function 6 FAV Opens the favourite group selection 7 9 One step back in menu or back to previous channel 8 AUDIO Opens the audio language selection 9 INFO Opens the c...

Страница 10: ...e receiver and the remote control Direct sunlight or very bright light can reduce or disturb the reception of the remote control signals 3 0 Connection 3 1 Connecting to a terrestrial antenna Fig 6 To...

Страница 11: ...g your receiver to the latest digital amplifiers or Home Cinema systems you will enjoy the best possible sound quality and multi channel audio depending on broadcast Connect the HDMI output of the rec...

Страница 12: ...n the scan is finished the receiver switches to viewing mode Now you can enjoy watching your favourite TV channels If you get the message No channels found then check again the antenna coaxial cable c...

Страница 13: ...channel Within the program information use pq or P P to scroll If you press t u you can change between Now and Next Event information is displayed when available Availability depends on the broadcast...

Страница 14: ...channels that are Free to Air or scrambled will be searched and stored Use pq to select ChannelNo and select the channel number of the frequency you d like to search Press OK to open a list to make se...

Страница 15: ...pressing the RED DeleteALL button 7 2 Channels Use t u to select Channels in the main menu Use pq to highlight the submenu of choice and press OK to select 7 2 1 TV Manager This menu allows you to cr...

Страница 16: ...ate is set to On it is not possible to delete channels This function can be found in the menu Settings GeneralSettings as described in chapter 7 3 3 4 7 2 2 Radio Manager Create favourite lists move c...

Страница 17: ...V via HDMI or to a home cinema set SPDIFAudioOutput Toggles between PCM and Bitstream output When PCM is selected all digital audio will be converted to stereo audio Bitstream enables you to listen or...

Страница 18: ...chosen age will be protected with a PIN code if available in your local broadcast PINCodeChange Press OK to enter the menu OldPINCode Enter your current PIN code 4 digits NewPINCode Enter your new PIN...

Страница 19: ...menu select Movies and press OK to enter this menu to play all kind of video formats Select Music to playback files as MP3 OGG and FLAC formats Select Pictures to playback your favourite pictures in J...

Страница 20: ...ress to leave this menu Note After performing the SafelyRemove function the USB device is no longer accessible by your receiver To gain access to you re the storage device again re insert it or switch...

Страница 21: ...message box will show up and you can start using it If not successful then check your cable or router Alternatively set DHCP to Off Then manually enter your IP Gateway and DNS values by using the 0 9...

Страница 22: ...on TV or amplifier HDMI or SCART is not selected on your TV or amplifier or the unit is set to higher resolution as the TV supports TV amplifier is not switched on Switch to correct TV amplifier input...

Страница 23: ...Bm Antenna power 5 V DC max 100 mA shortcut protected Video Decoder Profile level MPEG 2 MP ML MP HL MPEG 4 H 264 AVC MPEG 4 H 265 HEVC Video resolutions 576i 576p 720p 1080i 1080p Decoding Video out...

Страница 24: ...wer supply AC100 240 V 50 60 Hz Input voltage DC12 V 1 5 A Power consumption 7 W typ 18 W max Power consumption in standby max 1 0 W Operating temperature 0 C 40 C Storage temperature 10 C 50 C Operat...

Отзывы: