


10
8
C
onnecting the cables
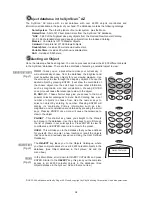
Power supply cable
: The Dobsonian SynScan requires
12-Volts DC Nominal power. The power cable from the
battery pack or other power supply goes into the jack labeled
Power on the altitude motor box. (Fig.a).
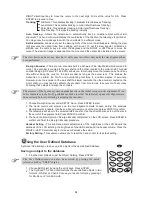
AZ motor cable
: This is the flat cable with 8-pin RJ-45 plug on
both end. Insert one end into the jack labeled "Az Motor" on
the altitude motor box and the other end into the azimuth
motor box on the round base.
Hand control cable
: This is the coil cable with a 8-pin RJ-45
plug on one end and a 6-pin RJ-12 plug on the other. Plug the
RJ-45 end into the hand control (Fig.e) and the other end into
the outlet on the altitude motor box (Fig.a).
Fig.b
Fig.c
A
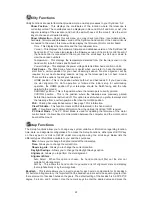
ligning the Finderscope
These fixed magnification scopes mounted on the optical tube are very useful
accessories. When they are correctly aligned with the telescope, objects can
be quickly located and brought to the centre of the field. Alignment is best
done outdoors in day light when it's easier to locate objects. If it is necessary
to refocus your finderscope, sight on an object that is at least 500 yards
(metres) away. Loosen the locking ring by unscrewing it back towards the
bracket. The front lens holder can now be turned in and out to focus. When
focus is reached, lock it in position with the locking ring (Fig.b).
Choose a distant object that is at least 500 yards away and
point the main telescope at it. Adjust the telescope so that
the object is in the centre of the view in your eyepiece.
Check the finderscope to see if the object centred in the
main telescope view is centred on the crosshairs.
Use the two small alignment screws to centre the
finderscope crosshairs on the object. The screws work in
opposition to a spring-loaded knob (Fig.c).
1.
2.
3.
(Straight through finderscope
shown here)
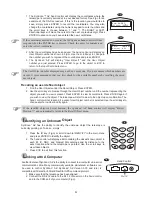
F
ocusing
Slowly turn the focus knobs (Fig.c), one way or the other, until the
image in the eyepiece is sharp. The image usually has to be
finely refocused over time, due to small variations caused by
temperature changes, flexures, etc. This often happens with short
focal ratio telescopes, particularly when they haven't yet reached
outside temperature. Refocusing is almost always necessary
when you change an eyepiece or add or remove a Barlow lens.
Fig.c
To avoid tangling of the power cable, the battery pack or
power tank can be placed on the round base, behind the
front panel. Pass the cable through the first hole on the
left side panel to plug into the power jack.
Fig.a
Hand control
cable goes here
Hand control
holder
Power switch
AZ motor cable
goes here
Power cable
goes here
Altitude motor box
Содержание DOBSONIAN SYNSCAN
Страница 28: ...28 III...


