- 36 -
4. Place the signal tone switch
5
auf "I".
5. Regularly stir the liquid so that the heat is evenly
distributed.
6. A signal tone sounds when the selected tempera-
ture has been reached. The control lamp
7
goes
out. The control lamp glows during operation
when the temperature falls below the set level
and the fruit preserver needs to heat itself back
up.
6. You can pour liquids that have no solid consti-
tuents through the pouring tap
4
.
For this, hold a suitable receptacle under the
pouring tap
4
and press the pouring lever
3
down.
When there is sufficient liquid in the receptacle,
release the pouring lever
3
.
Note:
Should you wish to pour off a large volume of liquid,
pull the pouring lever
3
upwards until it stays in
position. Then you do not have to hold the pouring
lever
3
.
Attention:
Do not pour off liquids with solid constituents, for
example, soups. The solids will block the pouring
tap
4
!
Note:
You can also keep stews warm in the fruit preserver.
They need to be stirred regularly to prevent them
sticking to the bottom of the appliance.
Cleaning and care
Attention:
Always remove the power plug before cleaning the
appliance! Danger of electrical shock!
NEVER submerse the appliance in water or
other liquids!
Clean the appliance with a lightly moist cloth. For
stubborn soiling use a mild detergent on the cloth.
Attention:
Do not use abrasive or aggressive cleaning materials.
These could attack the upper surfaces and irreparably
damage the appliance.
Clean the preserving grill
8
in a mild soapy
solution and rinse it with clear water.
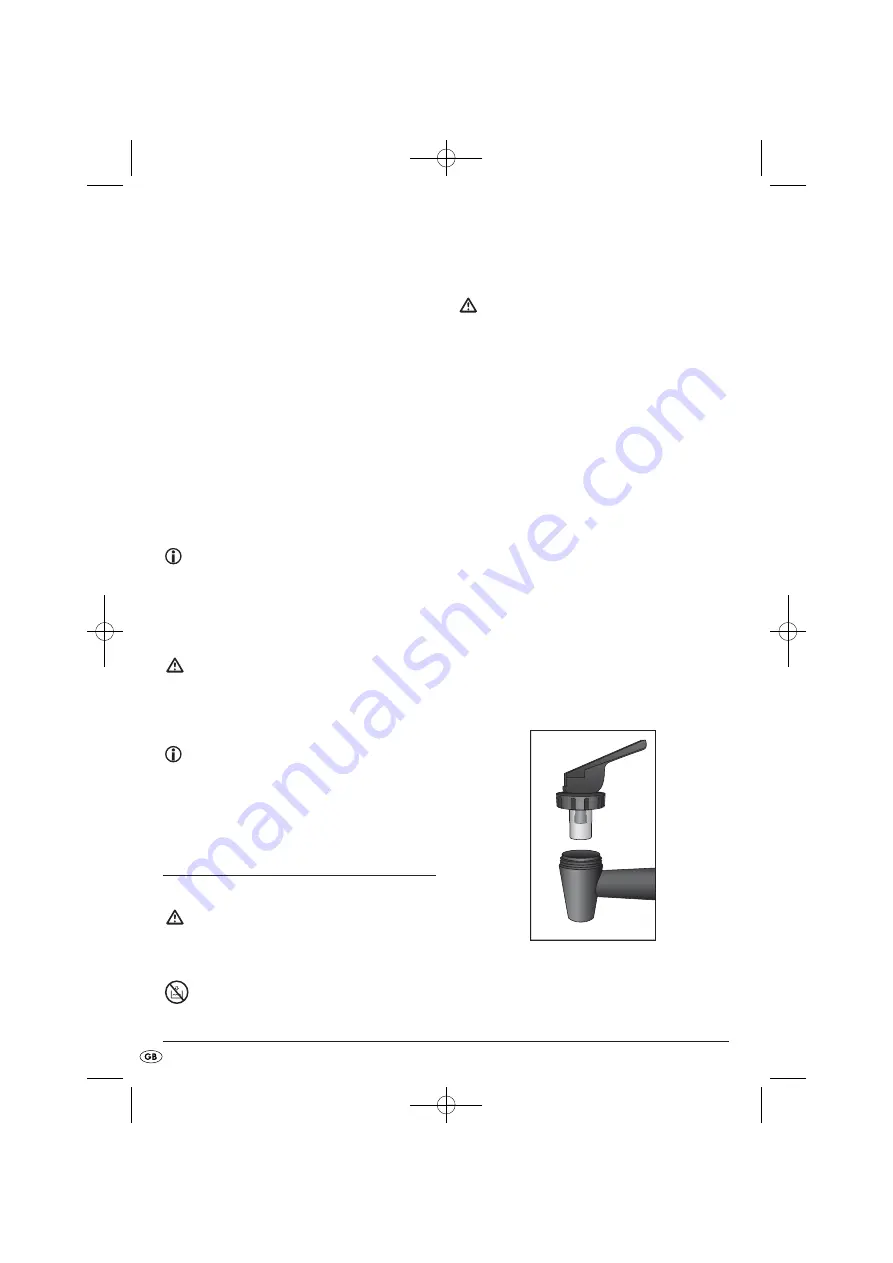
Cleaning the pouring tap
To clean the pouring tap
4
thoroughly, you can
unscrew the pouring lever
3
.
• Dismantle the pouring lever
3
.
• Place the pouring lever
3
in a mild soapy solution
and swirl it back and forth.
• Rinse it off with clear water.
• To clean the pouring tap
4
, allow a mild soapy
solution to flow through it. Should there be stubborn
soiling on the inside of the pouring tap
4
use a
pipe cleaner or similar to remove it.
• Afterwards, rinse the pouring tap
4
through
with clear water.
• Re-assemble the pouring lever
3
back on to the
pouring tap.
IB_KH1135_46612_LB5new 25.01.2010 10:07 Uhr Seite 36
Содержание KH 1135
Страница 2: ...KH 1135 q e w y u r w i o t CV_KH1135_46612_LB5new qxd 22 01 2010 12 05 Uhr Seite 4 ...
Страница 12: ... 10 IB_KH1135_46612_LB5new 25 01 2010 10 07 Uhr Seite 10 ...
Страница 22: ... 20 IB_KH1135_46612_LB5new 25 01 2010 10 07 Uhr Seite 20 ...
Страница 32: ... 30 IB_KH1135_46612_LB5new 25 01 2010 10 07 Uhr Seite 30 ...
Страница 42: ... 40 IB_KH1135_46612_LB5new 25 01 2010 10 07 Uhr Seite 40 ...


