background image

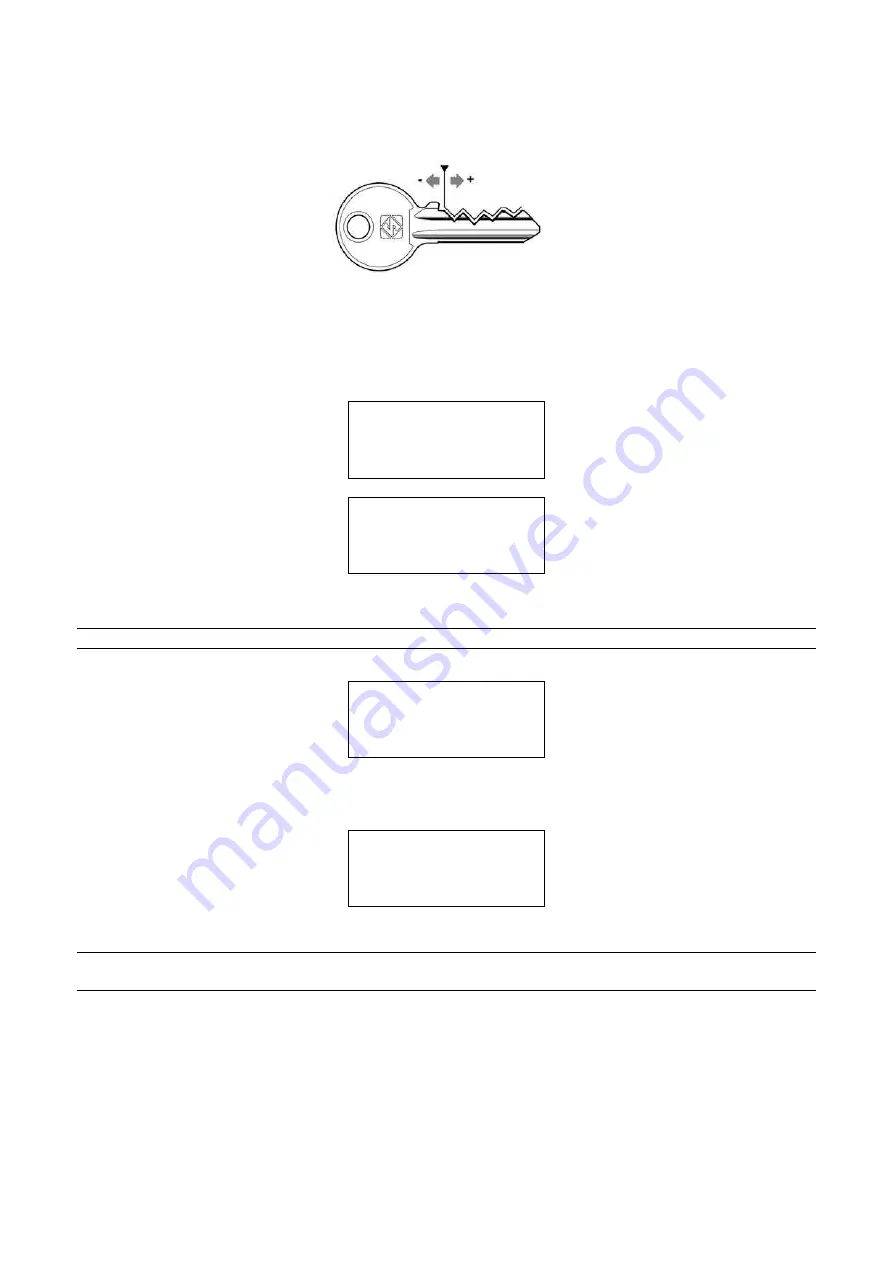
Spaces: (from -20 to +20 centesimi di mm)

Enter the value (positive or negative) to move all the cuts closer to or farther from the key stop.

Fig. 47 - SPACES ADJUSTMENTS

5)  Set the number of keys to be cut.

Operational keys: press the keys [< >] to enter the quantity of keys to be cut.

Press START to see on the display, at first:

CUTTING IN PROGRESS

Copy: 1 of: 1

And then:

Copy: 1 of: 1

Finished.

More copies ?

NO=STOP    Yes=ENTER

Press STOP to return to the main menu.

NOTE:  if a machining cycle is interrupted (intentionally or accidentally), the display will show:

ATTENTION

Remove key from

clamp!

                            [START]

IT IS COMPULSORY to remove the key:
press START, raise the safety shield and remove the key from the Automatic Clamp.
the display will show the message:

Zero the axes !

                            [START]

Lower the safety shield and press START to continue.

NOTE:  in ‘exceptional’ cases (e.g. machine breakdown) the key can be removed from the automatic 
clamp ‘manually’:

1)  raise the safety shield.

2)  use a 5 mm hex wrench on the automatic clamp screw (D5) in order to open the jaws.

3)  remove the key (blank or cut) and close the jaws with the 5 mm hex wrench.

4)  remove the 5 mm hex wrench and lower the safety shield.

Operating Manual

UC199

Copyright Silca 2012

36

Содержание UC 199

Страница 1: ...Operating Manual Original Instructions D441737XA vers 1 0 EN UC199 UC199 UC199 Japan UC199 Japan...

Страница 2: ...ety This document or any of its parts cannot be copied altered or reproduced without written authorization from the Manufacturer Keep the manual and look after it for the entire life cycle of the mach...

Страница 3: ...keys with 3 fins 19 4 4 Use of the automatic clamp OPTIONAL 20 4 5 Use of loader OPTIONAL 22 4 6 Fitting the standard clamp to the machine 23 4 7 Application Removing of loader Unit automatic clamp l...

Страница 4: ...matic optional clamp OPTIONAL 75 7 8 Checking and replacing fuses 76 7 9 Electronic circuit board replacement 78 7 10 Keyboard display replacement 79 7 11 Sensors replacement 80 7 12 Replacing the con...

Страница 5: ...quired by those who will use it Manufacturer s ID UC199 has an ID plate located on the back of the machine showing the serial number Fig 1 see chap 8 DISPOSING OF MACHINE How to apply for after sales...

Страница 6: ...frequently used terms Fig 2 1 Head 2 Neck 3 Stop 4 Stem 5 Tip 6 Back 7 Cuts 8 Diameter GRAPHICS IN THE USER S MANUAL Pay attention Obligation to read the manual GRAPHICS ON THE UC199 KEY CUTTING MACH...

Страница 7: ...ne and must be installed and used according to the rules and specifications established by the manufacturer Any other use different from that indicated in this manual will cause the forfeiture of all...

Страница 8: ...ree of cutting precision to operating speed and ease of use UC199 can operate by Reading a key with a laser reader and duplicating it Connecting to a PC and using Silca software Fig 3 UC199 is used to...

Страница 9: ...ing make it highly practical in use Laser reader Designed to read cuts on keys to be reproduced LOADER UNIT OPTIONAL Automatic Clamp Only for keys as in Fig 6 Loader Only for keys as in Fig 6 TECHNICA...

Страница 10: ...re start the work cycle place the shield in its original position and press START on the machine s keyboard Emergency stops The red emergency button A Fig 8 located on the left of the keyboard is use...

Страница 11: ...ndard E optical reader clamp knob E2 clamp knob cutter side F key gauge optical reader side F2 key gauge cutter side H cutter I cutter shield L optical reader P power input Q serial port S X axis carr...

Страница 12: ...tomatic E optical reader clamp knob F key gauge optical reader side H cutter Fig 8 I cutter shield Fig 8 L optical reader P power input Fig 8 Q serial port Fig 8 S X axis carriage T Y axis front panel...

Страница 13: ...cruciform keys UC199 Japan clamp 4 sided clamp to grip flat car cruciform keys and MIWA keys Automatic clamp with optional Loader Unit Automatic to grip flat keys see Fig 2 Runs X axis 74 mm Y axis 4...

Страница 14: ...allen key Z19 template for Zero machine Cutter release rod 6 3 Amp fuse delayed Z20 template 10 mm spanner 4 Amp fuse delayed 1 7 mm steel pin 13 mm spanner 2 Amp fuse delayed 1 2 mm steel pin 14 mm...

Страница 15: ...The machine is fixed to the base of the pallet with screwed down brackets that hold it firm into place This prevents the machine and its protective shield from any damage The closed packing is held in...

Страница 16: ...should comprise with the following 1 UC199 key cutting machine 1 set of documents including an operating manual a spare parts list and a guarantee 1 power supply cable 1 serial cable 1 pouch tool kit...

Страница 17: ...use is made of the key cutting machine it is important to place it in a well aired area which is not too damp The ideal conditions for the machine are temperature between 10 C and 40 C relative humidi...

Страница 18: ...t left hand side of the keyboard key positioning clamp keyboard display 3 5 Graphics The front panel carries an adhesive warning label Fig 14 This label must never be removed Two laser warning labels...

Страница 19: ...program Ch 5 2 SHIFT STOP Combine the SHIFT STOP keys to re position the carriages accurately operation from the main menu only or if the cutting process is interrupted Regulating the display it is p...

Страница 20: ...ensures excellent grip on the keys placed on their back or profile sides Fig 17 To copy keys which may be secured to any of the clamp sides A B C or D the user will choose the most suitable side of th...

Страница 21: ...t keys with tip stops into the clamps use the bar provided inserted into the special grooves Fig 20 or up against the right hand side of the clamp ATTENTION when closing the clamp do not apply excessi...

Страница 22: ...the key has a narrow stem and is also very thin 2 pins must be used Fig 22 Fig 22 If the original key is broken place a suitable sized pin in the groove of the keys stem so that it is properly held i...

Страница 23: ...nner part of the clamp Fig 25 Key stop DOWN and Fig 26 Key stop UP Butt the key stop up against the bar 3 Tighten the knob F to secure the key 4 Remove the bar 5 Repeat the same procedure on the other...

Страница 24: ...tip stop Keys cut on this clamp must be of the types described below TECHNICAL DATA FOR KEYS TO BE CUT Fig 27 Key thickness min 1 8 mm max 2 6 mm with jaws A or B min 2 0 mm max 2 8 mm with jaws A 2 0...

Страница 25: ...NO type Upper jaw A Lower jaw B YES type Upper jaw A Lower jaw A type Upper jaw B Lower jaw A type Upper jaw B Lower jaw B type Upper jaw 2 0 2 8 Lower jaw B type Upper jaw 2 0 2 8 Lower jaw A NOTE i...

Страница 26: ...o Orientation of the key Stem dimension regulation Head dimension regulation 1 The keys must be placed into the loader with the head to the left and the back to the operator 2 Adjust the screw G place...

Страница 27: ...25 and slide the clamp unit out of the dovetail guide To install the standard calmp unit cutting side on the machine slide the clamp into the dovetail guide pushing it all the way in then secure it b...

Страница 28: ...utomatic clamp loosen the screw D2 and pull out the clamp to the left NOTE If the machine is to be used without the Loader Unit loosen the screw D3 with the long hex wrench provided remove the loader...

Страница 29: ...ushing it all the way in then tighten the screw D3 with the long hex wrench provided 3 Fit the Automatic Clamp fit the automatic clamp into the special dovetail runner pushing to the right until it st...

Страница 30: ...ew cutter is being fitted to replace a worn one or in order to sharpen the cutting edge Fig 37 6 Use the 14 mm wrench X1 to loosen the cutter locking nut ATTENTION the thread is left handed 7 Replace...

Страница 31: ...facilitate describing the operations we have summarised the two possible machine configurations as follows UC199 with Standard configuration Cutting side standard clamp L100 Standard optic reader clam...

Страница 32: ...t language 2 1 Italiano 2 English 3 Deutsch 4 Francais 5 Espanol Operational keys arrow keys to choose the option ENTER to confirm Save the modification No STOP Yes ENTER The message will appear Zero...

Страница 33: ...d clamp remember to remove the stop bar if applicable The gauge need not be lowered because it will automatically release itself when the carriage moves ATTENTION keys with cuts that begin before Stop...

Страница 34: ...o use Side A or B of the standard clamp and whether the automatic clamp should have jaws A B or A 2 0 2 8 Operational keys use the arrow keys Up Down to move the cursor to the option required and pres...

Страница 35: ...inue until the programmed operation is finished The display will show Copy 10 of 10 Finished More copies No STOP Yes ENTER Press ENTER to repeat the cycle and copy more keys Press STOP Original on rig...

Страница 36: ...x wrench 8 remove the 5 mm hex wrench and lower the safety shield Fig 42 NOTE if the absence of key blanks in the loader is detected during the cycle the display will show FEEDER EMPTY Pieces maked x...

Страница 37: ...ENTION keys with cuts that begin before Stop 0 cannot be cut Fig 43 2 Insert the original key in the right hand clamp remember to lower the gauge or remove the stop bar if applicable Press START to se...

Страница 38: ...DEPTH ADJUSTMENTS Spaces from 30 to 30 hundredths of a mm Enter the value positive or negative to move all the cuts closer to or farther from the key stop Fig 45 SPACES ADJUSTMENTS 5 Set the number of...

Страница 39: ...ember to lower the gauge 3 place the key blank or blanks into the loader with their backs towards the operator Press START to see on the display at first Reading in progress ATTENTION The key depth is...

Страница 40: ...lly or accidentally the display will show ATTENTION Remove key from clamp START IT IS COMPULSORY to remove the key press START raise the safety shield and remove the key from the Automatic Clamp the d...

Страница 41: ...d x y Continue No STOP Yes START Open the guard and insert one or more key BLANKS according to needs At the cutting stage it can be used to know how many keys should be added to finish the job NOTE pr...

Страница 42: ...of pieces to be cut e sign indicates that the key set up has been cut f sign indicates that none of the keys set up has been cut Fig 49 By using the arrow keys up down the user may select the job to...

Страница 43: ...TOMATIC CYCLE The automatic cycle can be enabled if there are a number of jobs in the PC queue start the first one when the job is finished the machine does not wait for new orders but starts the seco...

Страница 44: ...Cutting card Manufacturer Once in the selected cutting card click on Decode top right hand corner Fig 50 The UC199 key cutting machine receives the information for starting the decoding operation fro...

Страница 45: ...Silca Key Programs Fig 51 Set the number of keys to be cut in the Quantity field Click on Transmit to send the job to the key cutting machine and create a faithful copy of the original key Operating M...

Страница 46: ...y be necessary to re set one or all calibration This operation is semi automatic and requires close attention to the instructions listed below EVENT MACHINE ZEROES CALIBRATIONS STANDARD CLAMPS AUTMATI...

Страница 47: ...TION carefully clean the Z20 template test key Z3 and clamps before gauging Select L100 STANDARD and press ENTER the display will show L100 STANDARD S A Manual adjustment X 000 Y 000 To calibrate STAR...

Страница 48: ...stements X 005 Y 002 Save data No STOP Yes ENTER The display will show the adjustments relating to the X and Y axes the correction values are viewed automatically they are the difference between the v...

Страница 49: ...ould be the same as the theoretical one value 400 expressed in brackets If not proceed as follows For X values of less than 400 loosen the grub screw P1 and use the hex wrench to loosen the screw P2 A...

Страница 50: ...t the operation until the X and Y values are correct When the values read for X and Y are the same as the theoretical ones expressed in brackets press STOP The display will show Confirm you want to qu...

Страница 51: ...ors of the optional feeder unit and only after having calibrated the standard clamp 1st calibration cutter side CLAMP Before starting the calmp calibration check that there are no keys or other fitted...

Страница 52: ...ments X 003 Y 006 Save data No STOP Yes ENTER The adjustment values are automatically shown Press ENTER to confirm the display will show L1 AUTOMATIC S A Manual adjustment X 000 Y 000 To calibrate STA...

Страница 53: ...it is not necessary to repeat clamp calibration 1 Cutting clamps 2 Cutter 3 Adaptors Select Cutter and press ENTER Cutter 00 U01 U01W 01 01 02 02 29 30 P41 Operating keys arrow keys to set the adjust...

Страница 54: ...eplacement No gauging operations to carry out Optic reader replacement Do 2 gauging operation only with the optional feeder unit Cutting side clamp replacement Do 1st gauging operation if within toler...

Страница 55: ...ll show 1 Optic reader 2 X axis motor 3 Y axis motor 4 B axis motor 5 Cutter motor 6 X axis sensor 7 Y axis sensor 8 B axis sensor 9 Shield micro 10 Automatic clamp 11 Key sensor 12 Magnet 13 Keyboard...

Страница 56: ...function all end of run controls are disactivated avoid moving the carriage up against its mechanical stops NOTE if the motor does not start contact Silca s Technical Assistance Dept Test 4 B AXIS MO...

Страница 57: ...amp optional is installed on the machine 8 SENSOR B Press arrows keys to move axis Status OFF Use the arrow keys Up Down NOTE if the ON OFF transition is not made contact Silca s Technical Assistance...

Страница 58: ...FF Press START to make the magnet on the key loader trigger as if it were pushing a key and check on the display that the indication goes from OFF to ON instantly NOTE if the ON OFF transition is not...

Страница 59: ...t the machine s display indicates OFF to ON NOTE if the ON OFF transition is not made contact Silca s Technical Assistance Dept Test 16 BATTERY STATE 16 BATTERY STATUS CHARGED Check that the display s...

Страница 60: ...llows see Ch 5 8 3 1 Remove the Automatic Clamp loosen the screw D2 and pull out the clamp to the left 2 Remove the Loader possible only after having removed the automatic clamp loosen the screw D3 an...

Страница 61: ...ghtening the screw S2 Ch 7 11 4 Secure the bottom plate with the 8 screws V1 then re position the machine on the work bench Ch 7 4 Fig 63 Regulation of the X axis sensor 1 Without disconnecting the po...

Страница 62: ...machine before fitting the Loader Unit or part of it Proceed as follows 1 Remove the Standard cutting Clamp Loosen the screw D2 and pull out the clamp to the left 2 Fit the Loader remove the cover pro...

Страница 63: ...ving the Loader Unit or part of it Proceed as follows 1 Turn off the machine with push button A 2 Remove the Automatic Clamp loosen the screw D2 and pull out the clamp to the left 3 Remove the Loader...

Страница 64: ...to the serial No that is stamped on the back of the machine if absent enter the 13 numbers in the serial number using the arrow keys Press ENTER to confirm the number Model type of UC199 Keys cut num...

Страница 65: ...roach speed 4000 1000 5000 This is the speed at which the carriages move towards the cutting area before starting the cutting cycle We recommend to operate the machine with the speed that is set 4000...

Страница 66: ...4 Copy with adjust Keep the adjustement 0 1 Enabled Operational keys arrow keys to choose the option ENTER to confirm 6 Language This menu is used to choose the required language Select language 2 1 I...

Страница 67: ...tings that are too high may renderprecise cuts impossible with the following messageon the display MIN parameter of DISTANCE FROM STOP is incompatible with selected card 9 CUTTING CHECK Enable check o...

Страница 68: ...with a straight line This aspect admissible with certain car keys is morecommonly known as the ideal cutting line ATTENTION in this example it can be seen that the angle is less than 45 This could ca...

Страница 69: ...his point 5 10 2 ATTENTION messages ATTENTION Depth limit exceeded During the cutting cycle one or more depth exceeded the maximum limit These depths are automatically aligned to the maximum permitted...

Страница 70: ...continue even if the key has not been read e g head punch too big Press SHIFT START to exclude the sensor control The exclusion is valid until the machine is turned off for the first time ATTENTION Be...

Страница 71: ...EST a fault on the motor that moves the axis do the motor TEST break down of motor control on the electronic board do the motor TEST ALARM 3 HIGH TEMPERATURE Turn the machine off The electronic contro...

Страница 72: ...board ALARM 8 Data format not compatible See operating manual The PC program version that transmits data to the machine is not compatible with the SW version of the machine program Solution Upgrade t...

Страница 73: ...accumulate during cutting operations Under no circumstances must compressed air be used to clear the work zone of chippings as this will blow them onto the moving parts Never use oily products or thin...

Страница 74: ...ower socket are faulty Working a fuse F3 on electronic control board is faulty b connection wire between display and electronic circuit board loose c defective display cutter motor not working a the c...

Страница 75: ...hat the fan on the back of the key cutting machine is working Not working a fan fault b electronic control board faulty Working electronic control board fau The display shows the message I O POWER ALA...

Страница 76: ...or replacement Motor replacement Lamp replacement Condenser motor and or feeder lamp replacement Master emergency switch replacement Clock battery replacement Win Transfer program for loading updating...

Страница 77: ...tting machine from the power supply 3 Raise the safety shield 4 Loosen the screw D2 and pull out the clamp to the left Ch 4 6 if it is an automatic clamp see Ch 4 7 5 Fit the cutter release rod X prov...

Страница 78: ...tightening screws H3 and the 4 screws H4 on the motor support plate to replace 4 pull the worn belt off the pulleys 5 fit the new belt onto the pulleys to adjust tension 6 Adjust belt tension by tight...

Страница 79: ...place the upper one 6 Fit the new set of jaws ensuring that they are buttino against the lower seat Fig 79 and centred on the rear seat 7 Tighten teh 2 screws V2 to secure the jaws NOTE jaws B can be...

Страница 80: ...and F4 F1 10 Amps delayed protects the cutter motor and its electronic controls 230V a c F2 6 3 Amps delayed protects the step motors and their electronic controls 32V d c F3 4 Amps delayed protects t...

Страница 81: ...Fig 82 Fig 83 Operating Manual UC199 Copyright Silca 2012 77...

Страница 82: ...the electronic circuit board off by unscrewing the 6 nuts Y1 Fig 85 5 mount the new electronic circuit board and re connect all cables all cable connections are polarised therefore cannot be connected...

Страница 83: ...the connector C1 and loosen the nut C2 in order to remove the earthing wire from the keyboard Fig 86 4 loosen the keyboard fixing nuts C5 and remove the keyboard from its support 5 disconnect the con...

Страница 84: ...he sensor and its support Fig 89 6 remove the faulty sensor from its support and screw in the new one then secure the support with the new sensor by tightening the 2 screws W1 7 place the new sensor i...

Страница 85: ...d remove together with the sensor and its support S3 Remove the worn sensor and replace with a new one Fit the support with the new sensor regulating it until it almost touches the upper bracket Fig 9...

Страница 86: ...Fig 93 Operating Manual UC199 Copyright Silca 2012 82...

Страница 87: ...e old condenser to connect them to the new one paying attention to their positions 7 Replace the cap N2 on the new condenser 8 Replace the bottom safety plate fix with the 8 screws U3 Ch 7 4 Fig 94 FE...

Страница 88: ...clip 11 loosen the 2 motor pulley grub screws Remove the pulley and fit to the new motor Secure by tightening the 2 grub screws 12 fit the new motor onto its plate and secure with the 4 screws M3 13...

Страница 89: ...strip in order to detach it from the switch Fig 99 4 loosen the ring nut C3 in order to remove the faulty push button switch 5 fit the new push button switch and secure by tightening the ring nut C3...

Страница 90: ...sulated long nosed pliers to remove the flat battery Fig 102 or push out from the back 5 use insulated long nosed pliers to insert the new battery into its seat paying attention to the poles Fig 103 6...

Страница 91: ...new one if necessary 2 install on your personal computer the latest version received of the WinTransfer program and follow the instructions given on the instruction sheet provided with the program 3 r...

Страница 92: ...tances which transform metal residue from solid urban waste into contaminated or toxic noxious waste are listed in the appendices to the current European Union regulations regarding disposal of such w...

Страница 93: ...Centres On the back cover of this manual is a list of the manufacturer s addresses listed below are the addresses of specialized service centres 9 1 How to request service The guarantee attached to t...

Страница 94: ...Operating Manual UC199 Copyright Silca 2012 90...

Страница 95: ...Appendix 1 ELECTRICAL DIAGRAMS The following pages contain the electrical diagrams for the UC199 key cutting machine described in this manual Operating Manual UC199 Copyright Silca 2012 91...

Страница 96: ...ELECTRICAL DIAGRAMS Operating Manual UC199 Copyright Silca 2012 92...

Страница 97: ...Operating Manual UC199 Copyright Silca 2012 93...

Страница 98: ...Operating Manual UC199 Copyright Silca 2012 94...

Страница 99: ...Operating Manual UC199 Copyright Silca 2012 95...

Страница 100: ...Operating Manual UC199 Copyright Silca 2012 96...

Страница 101: ...Terminal board connection Operating Manual UC199 Copyright Silca 2012 97...

Страница 102: ...UC199 KEY CUTTING MACHINE OPTIONAL LOADER UNIT Operating Manual UC199 Copyright Silca 2012 98...

Страница 103: ...Operating Manual UC199 Copyright Silca 2012 99...

Страница 104: ...ectives European Union DIRECTIVE 2006 42 CE Machines and with the EN 292 1 EN 292 2 Standards European Union DIRECTIVE 2004 108 CE Electromagnetic Compatibility and with the EN 55022 1998 A1 2000 EN 5...

Страница 105: ...22404705 gam intouch com Finland Hardware Group Finland Oy Hgf Ltd Luostarinportti 5 Kirkkonummi 02400 358 9 2219490 358 9 2962186 asiakaspalvelu hgf fi France SILCA S A S 12 Rue de Rouen B P 37 Z I L...

Страница 106: ...kiy Moscow 119021 7 495 7083440 7 495 7083292 Russia O O O Peter Key Mihaylovsky Pereulok 7b Saint Petersburg 198095 7 812 2520241 7 812 2523885 peterkey peterkey ru Saudi Arabia Fahd Omar Bamashmous...

Страница 107: ...SILCA S p A Via Podgora 20 Z I 31029 VITTORIO VENETO TV Tel 0438 9136 Fax 0438 913800 E mail silca silca it www silca biz Members of the Kaba Group...

Отзывы: