11
Order code: 50705
ColorCue 3
Clear the Programmer
Before exiting programming mode, you need to clear the programmer. Make sure color selection mode
is enabled. See Color Selection Mode vs. Parameter Selection Mode on page 10.
Press the CLEAR button (44) to clear any value, set with the controls (E)–(J). The LED on the button will
light up.
Manual Operating Mode
In this mode you can manually create scenes and transitions between scenes.
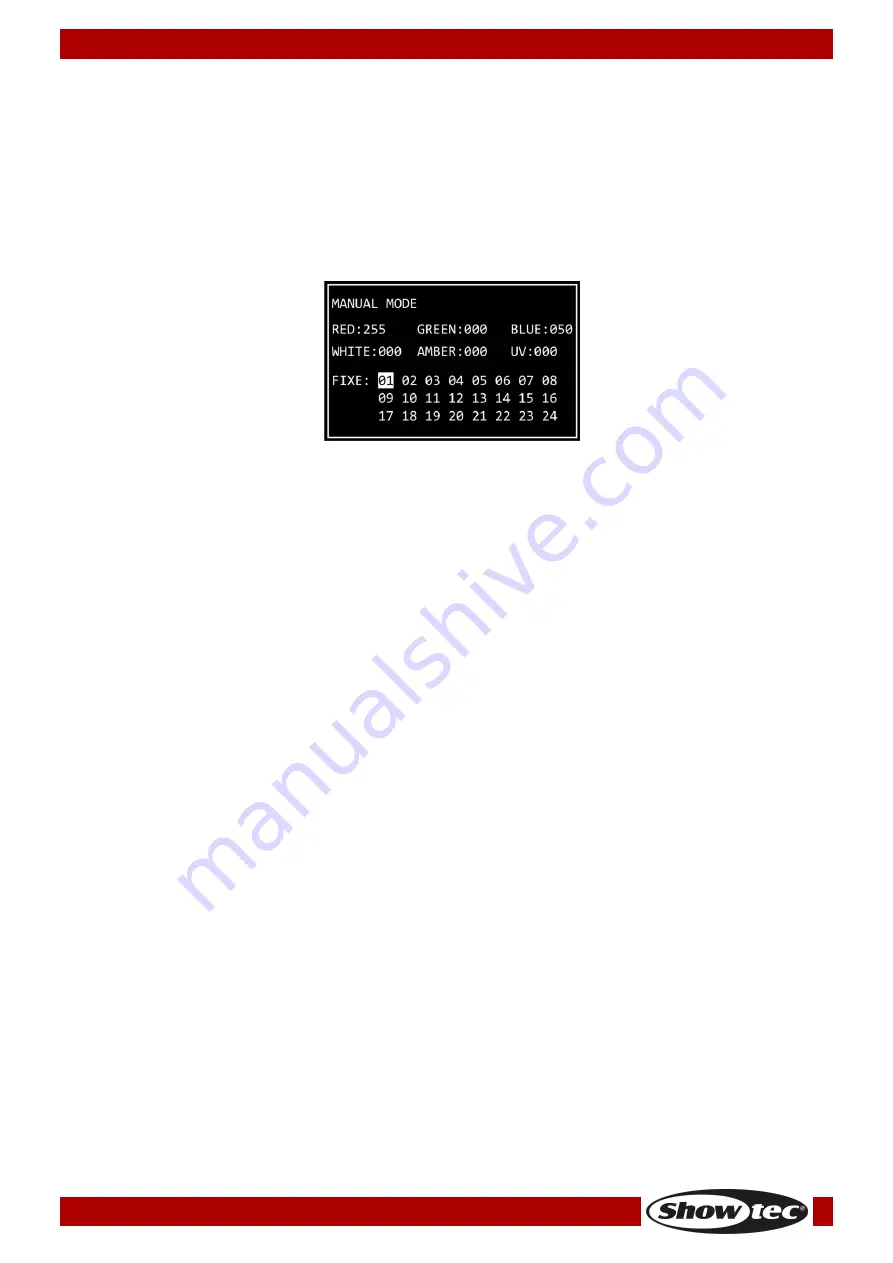
The manual mode screen provides information about the color values and the selected fixtures.
Press the MODE button (32) repeatedly until the LED on the button lights up in red to select manual
mode.
Create a Scene in Bank A (Double Control Mode)
Make sure the device is in double (12-fixture) control mode, see Control Modes on pages 9–10 for more
information.
01)
Set the BANK A master fader (K) to 0, if you do not want to output the scene live while you are
creating it. If you set the BANK A master fader (K) to any other value, any changes you make will be
output live.
02)
Press one or more FIXTURES buttons (01)–(12) to select the fixture(s) you want to control. The LED(s) on
the button(s) will light up. If you want to have the same color for all connected fixtures, press all
FIXTURES buttons (01)–(12). If you want to have different colors for each of the connected fixtures,
select only one fixture at this step. You can also select multiple fixtures, if you want to have one color
on more than one fixture. The selected fixtures will be highlighted on the display.
03)
Slide the BANK A fixtures faders (01)–(12) to adjust the light intensity of the connected fixtures
selected in step 2. The LEDs above the fixtures faders will light up.
04)
Make sure the color selection mode is enabled. Turn the controls (E)–(J) to select the desired color.
The available colors are red, green, blue, white, amber and UV. Turning the control clockwise will
increase the color intensity. The display will show the color value in the range 0–255. If you want to
clear a selection, press the CLEAR button (44).
05)
If you want to select different colors for different fixtures, press the FIXTURES button(s) (01)–(12) once
again to cancel the selection of the fixture(s) you have made in step 2. The LED(s) on the button(s)
will turn off. Skip steps 5 and 6, if you have selected the same color for all connected fixtures.
06)
Repeat steps 2–5 to select colors for the remaining fixtures.
Create a Scene in Bank B (Double Control Mode)
Make sure the device is in double (12-fixture) control mode, see Control Modes on pages 9–10 for more
information.
01)
Set the BANK B master fader (L) to 0, if you do not want to output the scene live while you are
creating it. If you set the BANK B master fader (L) to any other value, any changes you make will be
output live.
02)
Press one or more FIXTURES buttons (13)–(24) to select the fixture(s) you want to control. The LED(s) on
the button(s) will light up. If you want to have the same color for all connected fixtures, press all
FIXTURES buttons (13)–(24). If you want to have different colors for each of the connected fixtures,
select only one fixture at this step. You can also select multiple fixtures, if you want to have one color
on more than one fixture. The selected fixtures will be highlighted on the display.
03)
Slide the BANK B fixtures faders (13)–(24) to adjust the light intensity of the connected fixtures
selected in step 2. The LEDs above the fixtures faders will light up.
Содержание 50705
Страница 21: ...20 Order code 50705 ColorCue 3 Dimensions...
Страница 23: ...22 Order code 50705 ColorCue 3...
Страница 24: ...2020 Showtec...


