Quickstart for use with a PC and no NVR
1.
Camera power up
When not used with the Sharx Security NVR, the camera can be powered by PoE or 12 V DC. Any 802.3af
compatible PoE injector or switch would work. One example is the $20 PSW4824-POE from L-Com.com
a)
In recent production lots the cameras may be shipped with the weatherproof cover piece already
installed over the ethernet connector. This is done as a reminder to use it in the final installation.
For initial testing you would just take it off by rotating it a quarter turn counter clockwise.
b)
Connect a Cat5e or Cat6 cable from the camera’s network jack to one of the first 4 NVR LAN ports
Then download the latest “SmartManager” from the support section on
PC software will automatically find the IP address for all HTNC series cameras on your network. If you’re
not already familiar with SmartManager, it is explained towards the end of this Quickstart guide.
2.
Login to the camera’s full user interface using Internet Explorer
Note: All browsers allow access to the camera’s commonly used setup options. Many browsers can also
show video with a very low level of clarity. For the full image quality as well as much more detailed control
including zoom & focus you would use Internet Explorer or the free Sharx Titanium V2 software.
On Windows 10 you can start IE by right clicking on the Windows start icon at the bottom left, then
selecting the “Run” option and then typing the following into the search box: iexplore
Then type http:// followed by the camera’s IP address into the address bar. Be sure to use an administrator
account on your PC to allow the installation of the camera’s ActiveX when you click on “Live View”. The
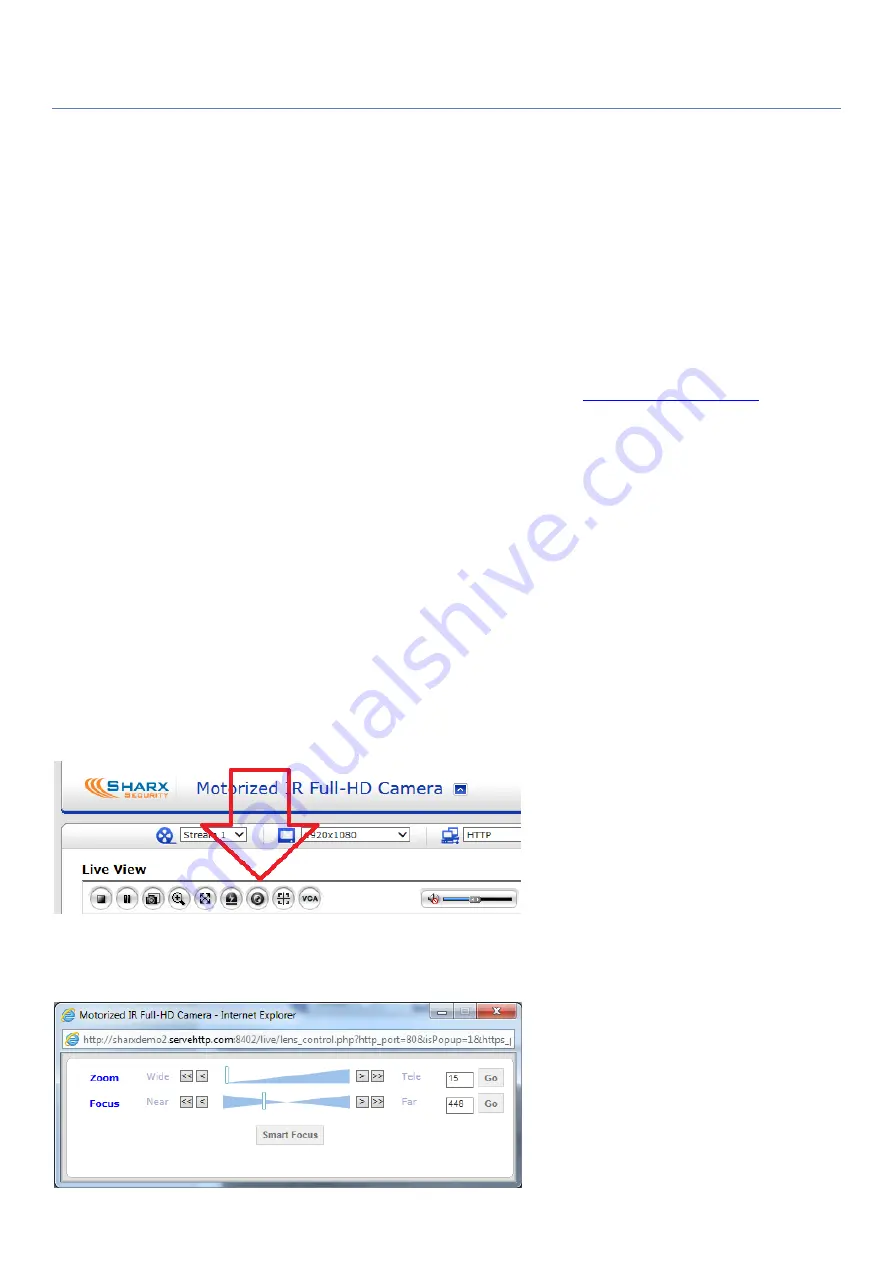
initial username and password are both admin. To adjust zoom, click on the icon highlighted below:
This pops up the Lens control menu shown below that allows you to adjust the zoom ration with a slider.
The focus is adjusted automatically, and you can force the camera to re-adjust it by clicking “Smart Focus”


