IP Address Assignment with SmartManager
The Sharx Security HTNC4503M can be used with a router, or completely standalone, or with a Sharx
Security or other brand of ONVIF compatible NVR (network video recorder).
When used with a Sharx Security NVR there is no need for any IP configuration
. Simply plug it in one of
the NVR’s available network jacks, and if the camera is in default settings, the NVR will recognize and
automatically display and record it. If you already changed the password it will need manual setup.
Similarly, when used completely standalone without being connected to anything else, the default IP of
192.168.30.220 could be used directly.
When used with a router, the HTNC4503M will need to be configured
either for a static IP that is within
the acceptable range for your router, or for DHCP which means to ask your router for an automatically
assigned IP. In this case, you would then follow up to reserve the automatically assigned IP in your router
so that it doesn’t change after a power failure or router restart.
The camera is shipped configured for the unusual IP address 192.168.30.220 that is purposely set to be
outside the scope of most routers. That way it doesn’t conflict with anything you might already have.
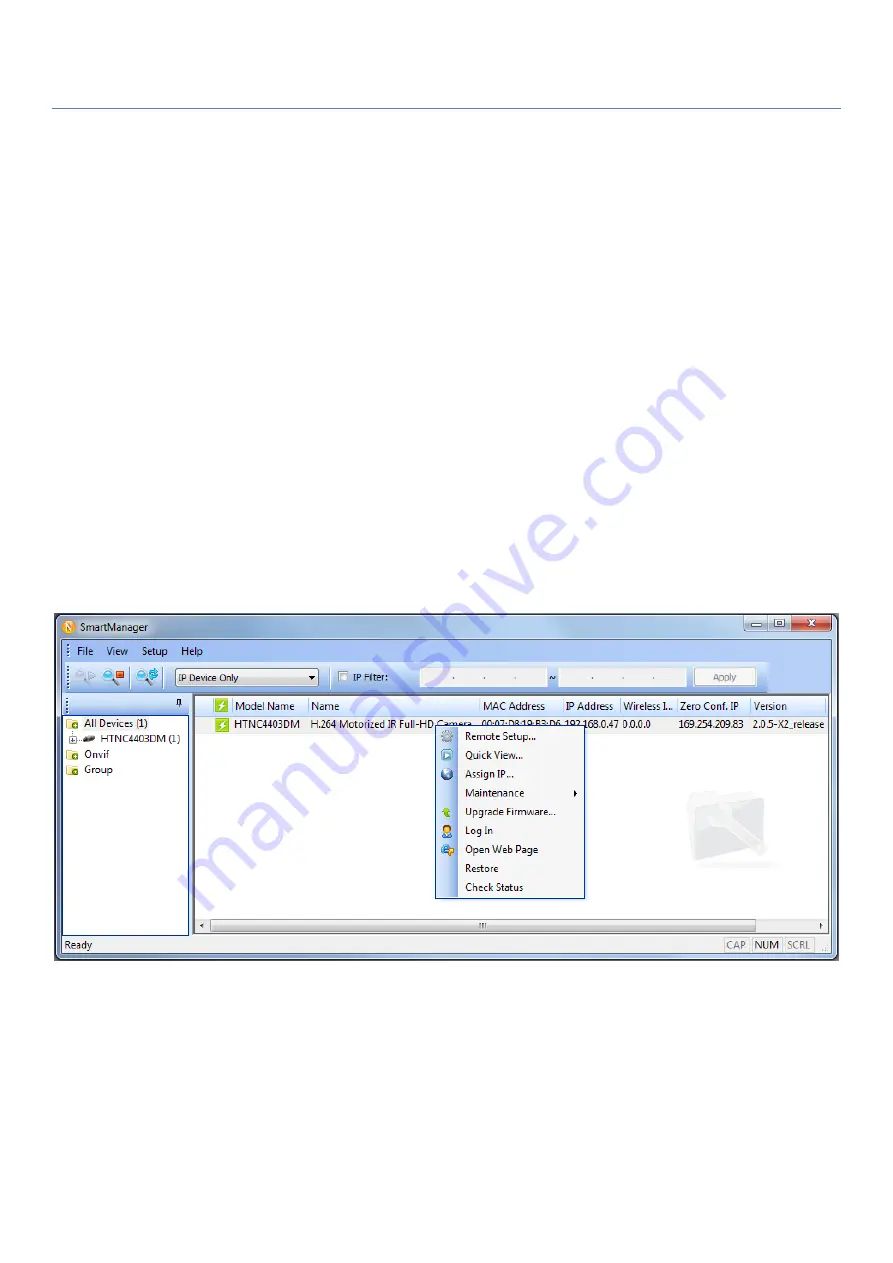
Unlike a browser, SmartManager will be able find it even if your network uses a different subnet.
You can then right click on the camera and SmartManager will open a menu with a number of choices as
shown below.
Select Assign IP Address. The Assign IP window will display. Enter the required IP address.
In the example on the next page, the camera is being set up for an IP address of 192.168.0.201, with a
common subnet mask of 255.255.255.0 and a gateway (router address) of 192.168.0.1
Typically the first 3 sets of digits in the camera’s IP address and the router’s IP address will need to be the
same, and the subnet mask is almost always 255.255.255.0, while your router’s IP is entered into the
“gateway” field.


