background image


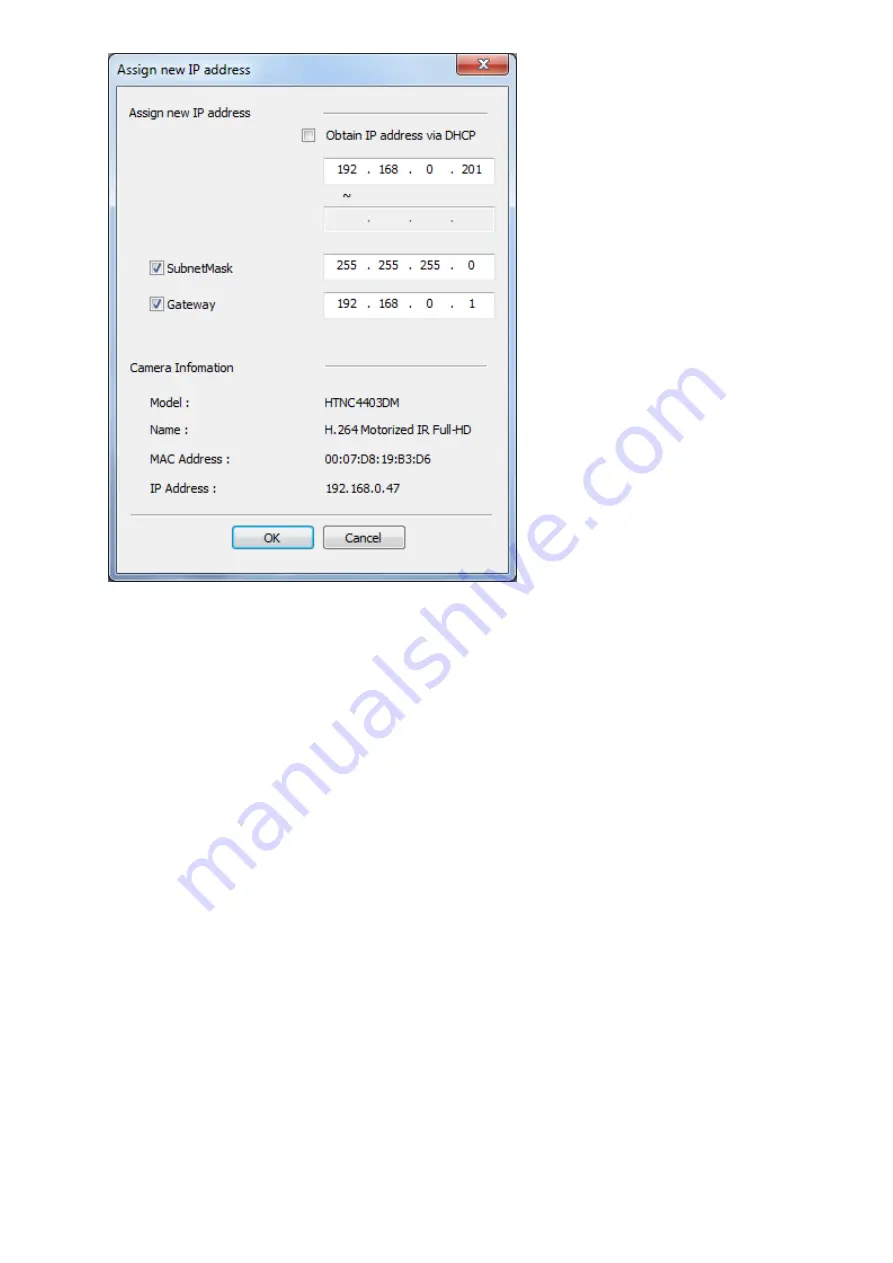
Note: if you wish to set the camera to DHCP to get an automatically assigned IP address, then you would 
proceed in 2 steps: 
 

1)


Set the camera to a fixed IP within your router’s subnet (i.e. sharing the first 3 sets of digits) and 
click OK, and wait a few seconds for SmartManager to recognize the camera’s new IP 
 

2)


Open this menu again, this time check the checkbox for “obtain IP address via DHCP” and click OK 
 

For example, the camera’s default IP is 192.168.30.220. If your router uses 192.168.0.xxx for its subnet, 
you would first set the camera to 192.168.0.220, then enable DHCP as a second step, and the camera 
would then be able to obtain an automatically assigned IP that starts with 192.168.0 from your router. 
 
Once you have a valid IP, you can proceed to use the camera with Internet Explorer or with the software of 
your choice. 
 
Please note that browsers other than Internet Explorer cannot show the full clarity of this camera. So if you 
are using a Mac or do not wish to use Internet Explorer, you could use the free 32 bit or 64 bit Titanium V2 
software for PC or the 64 bit Mac OS version of the Titanium V2 which are all available for free download 
with no licensing hassles from the Sharx Security web site. 
 
Should you prefer other software, the camera is fully ONVIF S compatible and typically does not need a 
dedicated driver.   
 
In the following chapters we have setup guides for Titanium V2 and some of the most popular third party 
software packages including Milestone VMS and Blueiris for PC, and SecuritySpy for Mac. 


Содержание HTNC4503M

Страница 1: ...tyle outdoor IP camera with motorized 3 X zoom and IR night vision Full setup support is included with your purchase We would be glad to call you to walk you through these steps if you like Just email customerservice sharxsecurity com for an appointment or use our online chat ...

Страница 2: ...er asking about Java and you would need to click through to allow Chrome to use the Java plugin If you prefer not to use Java you can also use Sharx Security Titanium V2 software instead Please contact us for details 2 Camera power up a The cameras are generally shipped with a weatherproof cover piece already installed over the ethernet connector This is done as a reminder to use it in the final i...

Страница 3: ...ailable if you log in to the NVR with the attached monitor or with a browser and the NVR s local IP You can find the DVRNS ID if you go to setup then network then the DVRNS menu The initial DVRNS ID usually has 6 letters or numbers but you can choose your own ID if you like Then click on Register In the Titanium Mobile app you would go to the Device menu then click on the icon at the top right cor...

Страница 4: ...ain menu Once the device is added in the app you can click on Live then select your device and click on Connect at the bottom and you will see your first 4 cameras For live viewing you can select 2 4 8 or 16 If you double tap on a camera you will see that one by itself You can zoom in or better yet use the phone sideways If you hold your finger on the display all menus disappear for an edge to edg...

Страница 5: ... for zoom focus iris and other options including smart focus which is the camera s autofocus option The playback menu can show 1 2 4 cameras at a time The green slider at the bottom can be moved to the desired playback time This is very useful to skip back for a few minutes or hours In playback mode you can also keep the finger on the image and then the extra menus disappear ...

Страница 6: ...peed can be selected from 1 to 64 times if you tap on either the forward button or backward button and then tap on the tiny plus or minus icons that appear above and below the selected speed In the example below a 16 x forward speed is selected Or hold your finger on the image to remove the bottom row of menus for a much closer look at the video This covers the most common features of the NVR and ...

Страница 7: ... towards the end of this Quickstart guide 2 Login to the camera s full user interface using Internet Explorer Note All browsers allow access to the camera s commonly used setup options Many browsers can also show video with a very low level of clarity For the full image quality as well as much more detailed control including zoom focus you would use Internet Explorer or the free Sharx Titanium V2 ...

Страница 8: ... you can also connect cables for integration with a burglar alarm or specialized sensors such as flood or freeze sensors or an amplified microphone or speaker Dimensions Note Dimensions shown in mm Camera cable details NO Item Description 1 RJ 45 Ethernet port standard 10 100Mbps PoE RJ45 modular jack 2 DC Jack Main Power DC jack standard 12V DC connector 3 AI Alarm In Alarm input and output 3 pin...

Страница 9: ...urface Some customers prefer not to show very obviously in which direction a camera is pointing For that reason we now also have the matching mini dome model HTNC4503DM Note the MicroSD slot and reset button are behind a cover at the bottom of the camera towards the back For very high volume installations Sharx Security can offer an optional cable that plugs into a port next to the MicroSD card an...

Страница 10: ...In this case you would then follow up to reserve the automatically assigned IP in your router so that it doesn t change after a power failure or router restart The camera is shipped configured for the unusual IP address 192 168 30 220 that is purposely set to be outside the scope of most routers That way it doesn t conflict with anything you might already have Unlike a browser SmartManager will be...

Страница 11: ... IP that starts with 192 168 0 from your router Once you have a valid IP you can proceed to use the camera with Internet Explorer or with the software of your choice Please note that browsers other than Internet Explorer cannot show the full clarity of this camera So if you are using a Mac or do not wish to use Internet Explorer you could use the free 32 bit or 64 bit Titanium V2 software for PC o...

Отзывы: