background image

34

Useful Features
Previewing

Useful Features

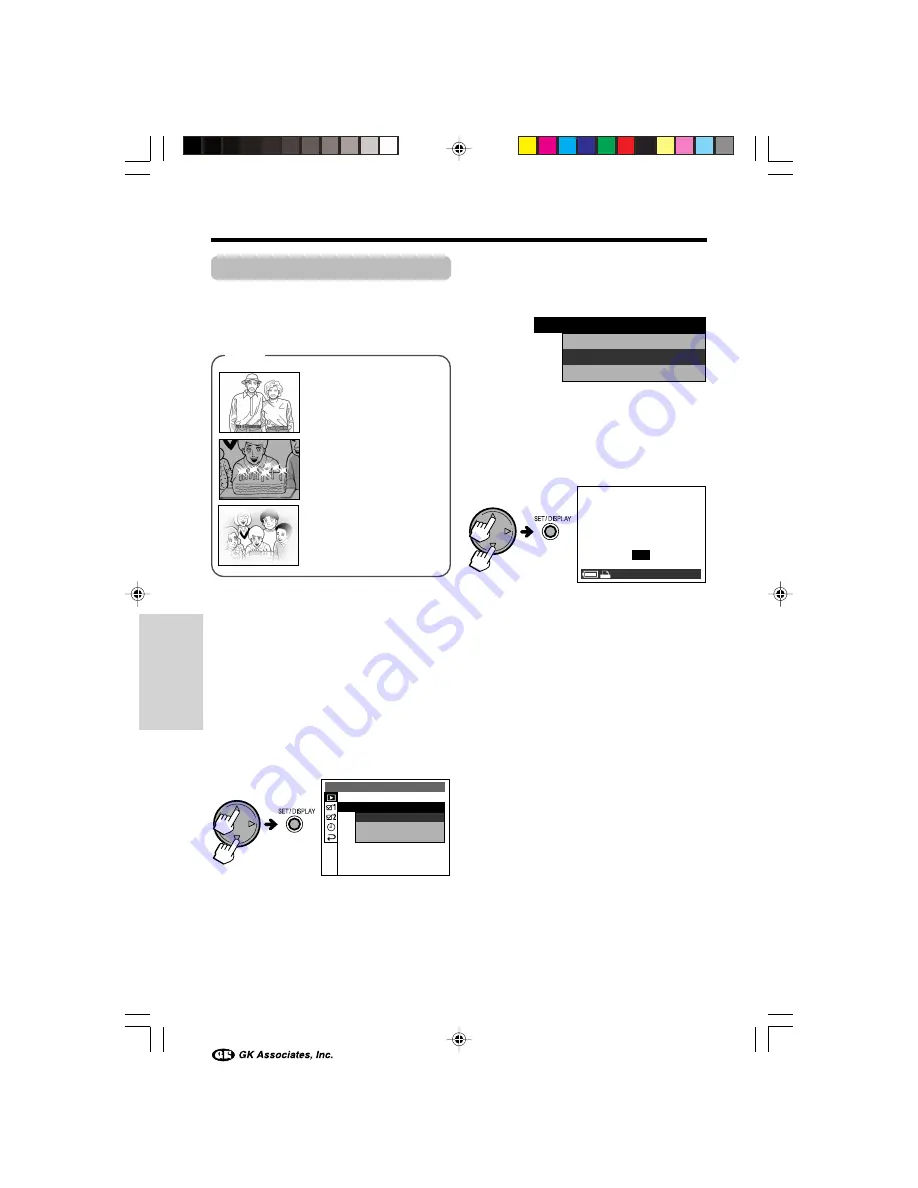
Using Image Effects

Available in 

w

 mode

These filters allow you to alter a still image for
more dramatic effect.

Types

SEPIA:

 Filling with sepia

color similar to that of an
old photograph

CROSS:

 Enhancing light

spots with crosses

SOFT SPOT:

 Shading off to

get a soft border around an
image

1

Set the Mode Dial to “

w

”, then power

on camera.

2

Press 

j

 or 

k

 to select the image to

which you want to add an effect.

3

Press the MENU button until the menu
screen appears.

4

Press 

l

 or 

m

 to select “

w

”, then press

the SET button.

5

Press 

l

 or 

m

 to select “IMAGE

EFFECT”, then press the SET button.

S L I D E S H OW
P R I N T OR D E R
D E L E T E A L L
DU B B I N G
R E T U R N

P R O T E C T

P R E V I EW

S E P I A

C RO S S
S O F T S P O T

I MA G E   E F F E C T

S E P I A

C RO S S

S O F T S P O T

I MA G E   E F F E C T

6

Press 

l

 or 

m

 to select the desired

setting, then press the SET button.

• After processing, the image displays

with the selected effect.

7

Press the SET button.

8

Press 

l

 or 

m

 to select “YES” to save

the image, then press the SET button.

• When you select “YES” to save the still

image, the edited image is saved as an
additional image file.

• Select “NO” to cancel the effect.
• To add the image effect to another

image, perform steps 2 to 8 again.

S A V E T H I S

?

I MA G E

N O

Y E S

0 1 0

0

-

1 0

0 0

0

VE-CG40U-033-040

02.8.27, 7:32 PM

34

Содержание VE-CG40U

Страница 1: ...anted to OF MERCHANTABILITY URCHASE SET FORTH ty lasts so the above ke any warranties other eyond the time period ted by Sharp and shall cts in the manner and nt of all liabilities and d shall constitute full otherwise In no event he Product which were uthorized servicer Nor l economic or property damages so the above HAVE OTHER RIGHTS when you need service abor from date of pur rranted for replac...

Страница 2: ...ARNING It is the intent of SHARP that this unit be used in full compliance with the copyright laws of the United States and that prior per mission be obtained from copyright owners whenever necessary Trademarks Microsoft and Windows are either registered trademarks or trademarks of Microsoft Corporation in the United States and or other countries DPOF is a trademark of CANON INC Eastman Kodak Comp...

Страница 3: ...es cause harmful interference to radio or television reception which can be determined by turning the equipment off and on the user is encouraged to try to correct the interference by one or more of the following measures CReorient or relocate the receiving antenna CIncrease the separation between the equipment and receiver CConnect the equipment into an outlet on a circuit different from that to ...

Страница 4: ...l prevent damage to the product due to lightning and power line surges 1 Read InstructionsCAll the safety and operating instructions should be read before the product is operated 2 Retain InstructionsCThe safety and operating instructions should be retained for future reference 3 Heed WarningsCAll warnings on the product and in the operating instruc tions should be adhered to 4 Follow Instructions...

Страница 5: ... been spilled or objects have fallen into the product c If the product has been exposed to rain or water d If the product does not operate normally by following the operating instructions Adjust only those controls that are covered by the operating instructions as an im proper adjustment of other controls may result in damage and will often require extensive work by a qualified technician to resto...

Страница 6: ...e in Auto Mode 13 Capturing a Motion Image 14 Zooming 15 Auto Focus 15 Using the Flash 16 Using Macro Shot 16 Previewing Previewing Images 17 Deleting One Stored Image 19 Zooming a Preview Image 19 Previewing on a TV screen 20 Using the Controls 21 Using the Menu Screen 22 Capturing Selecting Image Size and Quality 23 Selecting the Shooting Mode 24 Using the Self Timer 25 Using Automatic Exposure ...

Страница 7: ...the Light Sensitivity 49 Gamma Correction 50 Displaying the Date and Time 51 Selecting the Display Style of Date and Time 51 Setting to Factory Presettings 52 Formatting the Card 52 Setting the Time for Automatic Power Off 53 Setting the File Numbering Method 53 Restoring the Latest Image Deleted 54 Turning off the Speaker 54 Turning off the Confirmation Sound 55 Changing the Language for the On S...

Страница 8: ... the U S and Latin America If this digital still camera was purchased outside of these areas the part number may be different Please refer to the part number printed on the label of the supplied AC adapter Lens cap GCOVAA115WJSA SD Memory Card 16 MB USB cable QCNWGA018WJPZ Wrist Strap UBNDTA003WJZZ AA Alkaline Battery G4 CD ROM CDSKAA008WJ01 VE CG40U ii x 02 8 27 7 15 PM 8 ...

Страница 9: ... close proximity to lighting equipment The heat from incan descent lights may de form the digital still camera or cause it to malfunction Always respect prohibitions or restrictions on the use of electronic equipment on commercial flights or in other sensitive ar eas Be aware of the temperature and humidity You can use your digital still camera at 32 F to 104 F 0 C to L40 C and at 30 to 80 relativ...

Страница 10: ...nserting the AA batteries p 7 Inserting the supplied SD Memory Card p 9 Capturing Still Image p 13 Movie p 14 Previewing Still Image p 17 Movie p 18 Write protect switch Clipped corner VE CG40U ii x 02 8 27 7 15 PM 10 ...

Страница 11: ... to the page number indicated in parentheses Front view Bottom view Zoom lens Microphone Self timer indicator p 25 Shutter button pp 13 14 Flash sensor Flash Wrist strap loop p 12 Power button p 21 Mode Dial p 21 Battery compartment door release p 7 Tripod socket VE CG40U 001 006 02 8 27 7 16 PM 1 ...

Страница 12: ...ide angle T telephoto p 15 Speaker Card slot cover p 9 Macro p 16 Thumbnail p 18 button LCD screen Flash q p 16 Delete p 19 button Operation button p 21 Data transfer button p 57 A V OUT jack p 20 USB terminal p 57 DC IN jack p 8 Jack cover pp 8 20 57 Diopter control p 11 Status indicator p 13 VE CG40U 001 006 02 8 27 7 16 PM 2 ...

Страница 13: ...C E FRAME GU I D E R E TURN MOV I E I MAG E S I Z E CAP T URE 1 QU I CK V I EW CAP T URE 2 DE F AUL T S E T T I NG 1 P C CONN E C T S E T T I NG 2 S E T T I NG DA T E T I ME D I SP L AY S T YL E 1 2 H 2 4 H R E TURN On screen Display Index For details on the use of each function refer to the page number indicated In w mode Thumbnail p 52 p 52 p 53 p 53 p 48 p 29 p 33 p 34 p 35 p 36 p 38 p 39 p 51 ...

Страница 14: ...LOT COVER OPEN LENS ERROR OFF ON AGA I N TURN POWER NO MAX IMAGE I S SET CARD TO READ ONLY PROCESS I NG WAS STOPPED CANNOT READ THE DATA IMAGE BAT TERY I S TOO LOW TO TRANSFER THE DATA The card slot cover is open Close the cover The camera failed to process the data Make sure the operation procedure is correct Replace the batteries with new AA alkaline batteries or fully charged Ni MH rechargeable...

Страница 15: ... MEMORY CARD FUL L The images in the card are corrupted or recorded in a format which is not compatible with this camera Format the card for use with this camera see page 52 The memory card has not been formatted for use with this camera If the card contains important data transfer it to another storage device before formatting see page 52 ACCESS ERROR CARD FORMAT THE CARD Formatting a card erases...

Страница 16: ...e remaining battery power indicator only as an approximate value The indicator may change to a higher or lower level if the power is turned off and then on again In cold environments the red indicator may appear sooner Use of the zoom functions when the warning indicator is displayed may cause the camera to suddenly lose power When the battery power becomes very low some menu items may not be sele...

Страница 17: ... it is not the batteries may fall out or camera operation may fail because of poor contact pressure Do not use old and new batteries together or batteries of different brand together When the batteries are depleted replace them with new AA R6 or UM SUM 3 alkaline batteries or fully charged Ni MH rechargeable batteries commercially available Battery performance The table below shows the approximate...

Страница 18: ...g into the DC IN jack 1 then plug the AC adapter into a power outlet 2 4 Press the Power button until the camera turns on Notes BEFORE REMOVING THE DC PLUG ALWAYS STOP OPERATIONS AND TURN THE POWER OFF Removing the DC plug during operation may destroy the card rendering it unreadable and unwritable Remove the DC plug from the camera if you will not use the camera for a long period of time The AC a...

Страница 19: ...traight out 2 as shown below Notes The supplied card is preformatted for immediate use See page 60 for more information on the cards intended for use with this camera Do not remove the card from the camera while recording data on the card S indicator blinks during recording This may delete the recorded image or damage the card About the write protect switch SD Memory Cards have a write protect swi...

Страница 20: ...s m or l to select 2003 year then press the SET button 7 Press m or l to select 1 hour then press the SET button 8 Press m or l to select 30 minute then press the SET button The internal clock starts up once the second hand begins to blink Note If you capture an image without setting the date and time under bars will display in the preview screen instead of the date and time values D I SP L AY S T...

Страница 21: ...en set the CAPTURE 1 screen O appears in step 2 Select SETTING in the DATE TIME screen using the Operation button and the SET button 1 2 H 1 2 H 2 4 H 2 4H D I SP L AY S T YL E R E TURN S E T T I NG DA T E T I ME 4 2 H 2 1 H 1 2 H 2 4H Adjusting the Diopter Adjust the diopter according to your eyesight when the picture in the viewfinder is not clear 1 Press the Power button until the camera turns ...

Страница 22: ... the strap Using the Lens Cap Attach the strap of the lens cap to the wrist strap as shown below Always attach the lens cap when not using the camera Note Remove the lens cap before you power on the camera The camera may freeze if the lens cap remains attached In such case press the Power button to power off remove the lens cap and press the Power button again to power on VE CG40U 007 012 02 8 27 ...

Страница 23: ...ill see the status indicator blinks green and v blinks white in the display When the camera locks into focus they stop blinking and light up 6 Press the Shutter button fully to capture the image The status indicator blinks while data is being recorded on the card and stops blinking when recording completes When the QUICK VIEW menu item is set to ON the captured image displays on the LCD screen for...

Страница 24: ...on fully to begin capturing To pause capturing Press the Shutter button fully again Notes You cannot use the zoom digital zoom and the flash for capturing motion images If the card becomes full during motion image capture the camera automatically stops recording The camera captures the motion image in 320K240 pixels See page 18 for how to playback a motion image The following settings are not avai...

Страница 25: ...ect nearest the center will be focused on If there is no subject to focus on the camera will automatically zoom out until a focusable subject comes into the frame Auto Focus may not work in the situations described below If v lights up red the camera cannot auto focus Try focusing again in a different angle or composition Subject is too dark Lack of contrast e g snow scene Fast moving subject Back...

Страница 26: ...o Shot is not available when Quick Shot is on Using the Flash Available in or mode You can use the flash to record good quality still images even in dark locations Types s Automatic flash mode based on light condition N Automatic flash mode with red eye reduction q Flash on mode L Flash on mode with red eye reduction M Flash off mode 1 Turn on the camera in the desired mode 2 Press the q button un...

Страница 27: ...ded that you use the on screen indicators Notes Depending on the amount of data for the recorded image the picture quality icon displayed during playback may not match the picture quality setting used during recording Images bigger than 2448K1632 pixels e g images recorded on other equipment display as thumbnails not full screen Images and capture details recorded with a different camera may not d...

Страница 28: ... button until the camera turns on 3 Press j or k to select the motion image The movie icon appears when the selection frame is over the motion image file 4 Press m to start previewing The movie previews in full screen Preview Options You can use the options below when you preview a motion image To pause the preview press m Press m again to return to normal preview To search the scene in the previe...

Страница 29: ... while deleting an image Protected images cannot be deleted Cancel the protection setting to delete the image see page 33 You can restore the most recent image deleted see page 54 Zooming a Preview Image Available in w mode This function allows you to magnify the preview image up to 4 times its original size 1 Preview the image see page 17 or 18 2 Press the Power Zoom T button to magnify the image...

Страница 30: ...y do to view the signal from the VCR See the operation manuals of your TV and VCR Previewing 1 Set the Mode Dial to w then power on the camera 2 Press the MENU button until the menu screen appears 3 Press l or m to select then press the SET button 4 Press l or m to select VIDEO OUT then press the SET button 5 Press l or m to select the TV system in your location then press the SET button 6 Press t...

Страница 31: ...on and the status indicator blinks green Set the dial so it securely snaps in to the desired position Power button To turn the power on press the Power button until the camera turns on To turn the power off press the Power button Note Do not turn the power off when the status indicator blinks Operation button Use the Operation button to select menu items and adjust menu settings MENU button Use th...

Страница 32: ...lect the desired menu screen P then press the SET button You can press k instead of the SET button 5 Press l or m to select the desired menu item SENSITIVITY then press the SET button You can press k instead of the SET button 6 Press l or m to select the desired setting then press the SET button You can press k instead of the SET button To adjust another menu item press l or m to select RETURN and...

Страница 33: ...then press the SET button I MAG E SHOOT I QU I CK FRAME D I G I T AL ZOOM R E TURN I MAG E S I Z E 2 1 1 4 8 2 4 2 0 8 4 0 7 2 0 1 1 6 2 8 4 3 1 0 8 2 6 0 0 G G G G CAP T URE 1 7 Press l or m to select the desired setting then press the SET button 8 Press the MENU button to turn off the menu screen Note The image size and quality are not selectable while capturing a motion image Approximate number...

Страница 34: ...reen Notes Depending on your selection in step 5 perform the steps in the sections indicated below SINGLE p 13 CONTINUOUS See the following section SELF TIMER p 25 BRACKET p 26 z BRACKET p 27 When the card capacity becomes nearly full in step 5 the settings CONTINUOUS BRACKET and z BRACKET may not be selectable In CONTINUOUS mode 1 Press the Shutter button half way down to focus on the subject QU ...

Страница 35: ...rs when the on screen indicators are turned on S I NGL E CON T I NUOUS B RAC K E T S E L F T I MER B RACK E T SHOOT I NG MODE 2 Press the Shutter button half way down to focus on the subject 3 Press the Shutter button fully to activate the ten second count down to image capture The self timer indicators on the body and LCD screen blink Ten seconds after pressing the Shutter button the camera autom...

Страница 36: ...L E CON T I NUOUS B RAC K E T S E L F T I MER B RACK E T SHOOT I NG MODE 2 0 E V 1 5 E V 1 0 E V 0 5 E V BRA CK E T 3 Press the Shutter button half way down to focus on the subject 4 Press the Shutter button fully to capture the image The camera shoots three successive images at three different exposure values Below is an example of the effect you can excpect Notes This function cancels after one ...

Страница 37: ...wn to focus on the subject SHO T GU I D E ZOOM S I NGL E CON T I NUOUS B RAC K E T S E L F T I MER B RACK E T SHOOT I NG MODE 3 Press the Shutter button fully to capture the image The camera automatically captures three still images with different gamma settings Notes This function cancels after one capture se quence To use Automatic Gamma Bracketing again perform the above steps again This functi...

Страница 38: ... 3 Press l or m to select O then press the SET button 4 Press l or m to select QUICK SHOT then press the SET button 5 Press l or m to select ON then press the SET button 6 Press the MENU button to turn off the menu screen The camera automatically sets to pan focus settings 7 Press the Shutter button fully The camera captures the image without first pressing halfway to lock the focus Note Zooming i...

Страница 39: ...n press the SET button 6 Press the MENU button to turn off the menu screen Types Cross A cross mark at the center of the screen for placing the subject at the center Portrait Frame fitting an upper body view Focus Focus brackets for guiding you to the focus area Landscape Grid lines dividing the screen into 9 areas to help you with the horizontal and vertical composition Off No frame guide Snapsho...

Страница 40: ...T button 5 Press l or m to select ON then press the SET button 6 Press the MENU button to turn off the menu screen I MAG E QUA L I T Y SHOOT I NG MODE QU I CK SHO T R E TURN I MAG E S I Z E CAP T URE 1 FRAME GU I D E OFF ON D I G I T AL ZOOM OFF ON D I G I T AL ZOOM When using the digital zoom range a D appears in the zoom range indicator To use optical zoom only Select OFF in step 5 Note When usi...

Страница 41: ...3 Press l or m to select P then press the SET button 4 Press l or m to select QUICK VIEW then press the SET button 5 Press l or m to select OFF then press the SET button 6 Press the MENU button to turn off the menu screen Note If the LCD screen is turned off Quick View will turn it on and show the preview image for a few seconds then turn it off again WH I T E BA L ANC E S E NS I T I V I T Y GAMMA...

Страница 42: ...en press the SET button WH I T E BA L ANC E BA L ANC E S E NS I T I V I T Y GAMMA ME T E R I NG R E TURN QU I CK V I EW CAP T URE 2 OFF ON VO I C E RE C BA L ANC E OFF ON VO I C E RE C 6 Press the MENU button to turn off the menu screen 7 Capture the still image see page 13 The camera captures a still image with 10 seconds of sound To quit the sound recording manually Press the Shutter button Note...

Страница 43: ...HOW PR I N T ORD ER D E L E T E A L L DUB B I NG R E TURN P ROT E C T PR E V I EW ONE I MAGE A L L I MAGE S 8 Press the MENU button to turn off the menu screen To cancel the protection setting When you select a protected image in step 7 the following screen appears Press the SET button to cancel protection Selecting all images 1 Select ALL IMAGES in step 6 of Selecting one image 2 Press l or m to ...

Страница 44: ... Press l or m to select IMAGE EFFECT then press the SET button S L I DE SHOW PR I N T ORD ER D E L E T E A L L DUB B I NG R E TURN P ROT E C T PR E V I EW S E P I A CROSS SOF T SP O T I MAGE E F F E C T S E P I A CROSS SOF T SP O T I MAGE E F F E C T 6 Press l or m to select the desired setting then press the SET button After processing the image displays with the selected effect 7 Press the SET b...

Страница 45: ...tton 5 Press l or m to select SLIDE SHOW then press the SET button 6 Press l or m to select the display interval then press the SET button Beginning from the image selected in step 2 the images display in full screen view consecutively in order of capture The Slide Show ends one image before the image that started the sequence I MAGE E F F E C T D E L E T E R E TURN DUB B I NGA L L PR I N T ORD ER...

Страница 46: ...ess l or m to select w then press the SET button 5 Press l or m to select PRINT ORDER then press the SET button 6 Press l or m to select ONE IMAGE then press the SET button I MAGE E F F E C T S L I DE SHOW D E L E T E A L L R E TURN DUB B I NG P ROT E C T PR E V I EW PR I N T ORD ER ONE I MAGE A L L I MAGE S PR I N T ORD ER ONE I MAGE A L L I MAGE S 7 Press l or m to select the number of prints Yo...

Страница 47: ...s in step 7 above Selecting all images 1 Select ALL IMAGES in step 6 of Selecting one image then press the SET button 2 Press l or m to select the number of prints then press the SET button To cancel the setting for all images Select 0 for the number of prints in step 2 of Selecting all images VE CG40U 033 040 02 8 27 7 32 PM 37 ...

Страница 48: ...en press the SET button Notes Protected images are not deleted in this procedure To delete a protected image first cancel its protection setting see page 33 DELETE ALL also erases the DPOF print order information for all images including protected ones see page 36 It may take several seconds to delete all images from the card Do not turn the power off during the deletion process I MAGE E F F E C T...

Страница 49: ...ess the SET button 7 Press the Shutter button fully to begin dubbing I MAGE E F F E C T S L I DE SHOW PR I N T ORD ER D E L E T E A L L R E TURN P ROT E C T PR E V I EW DUB B I NG OFF ON DUB B I NG OFF ON 8 Press the Shutter button fully to stop dubbing The maximum dubbing time is 10 seconds After 10 seconds elapse the dubbing stops automatically even if you do not press the Shutter button Notes I...

Страница 50: ...recorded with a still image 1 Set the Mode Dial to w then power on the camera 2 Press j or k to select the image with sound A sound icon appears on the image with sound 3 Press the Shutter button fully to begin sound playback To pause the sound playback Press the Shutter button fully again VE CG40U 033 040 02 8 27 7 32 PM 40 ...

Страница 51: ...usts the shutter speed and aperture 5 Press the Shutter button fully to capture the image Note AE is an abbreviation for Auto Exposure E V 5 0 About Exposure Value Automatic exposure works by selecting an average value of all the different tones in the shot If two different objects have an equal amount of dark and light parts they will have the same exposure value However when the scene is dominat...

Страница 52: ...0 6 5 F 5 Press the Shutter button half way down to focus on the subject The camera automatically adjusts the shutter speed 6 Press the Shutter button fully to capture the image About aperture setting The larger the aperture smaller f number the more blurred the background and foreground will become On the other hand the smaller the aperture bigger f number the clearer the background and foregroun...

Страница 53: ...n set the functions indicated with in that description 3 Press l or m to set the desired shutter speed You can select 17 steps from 0 5 sec to 1 500 sec 4 Press j or k to set the exposure value EV You can select 9 steps from D2 0EV to H2 0EV E V 5 0 0 0 5 1 E V 5 0 0 0 5 1 5 Press the Shutter button half way down to focus on the subject The camera automatically adjusts the aperture 6 Press the Shu...

Страница 54: ... but with blurry legs Recording with a shutter speed faster than 1 60 sec tends to darken the picture Record in bright locations when you use a fast shutter speed Use of a tripod is recommended when using a slow shutter speed to avoid camera shaking unless you have a special reason to hold the camera by hand Using a fast shutter speed under fluorescent lighting will cause flickering in the picture...

Страница 55: ...with in that description 3 Press j or k to select the desired shutter speed setting 1 and press l or m to select the desired F stop 2 If the photograph would be under or over exposed the shutter speed and aperture values in the status bar will display red In such case select other combinations to obtain an appropriate setting which will display the values in white If you set a slow shutter speed t...

Страница 56: ...ite 1 Set the Mode Dial to then power on the camera SCENE MENU screen appears 2 Press l or m to select the desired setting then press the SET button The subject displays in the selected mode and a frame guide matching the scene menu selection appears on screen PORTR A I T L ANDS CAP E B L A CK WH I T E N I GHT V I EW SNAP SHOT SC E NE MENU 3 Set any desired menu items Note The available mode is de...

Страница 57: ...ter than the background 1 Turn on the camera in the desired mode 2 Press the MENU button until the menu screen appears 3 Press l or m to select P then press the SET button 4 Press l or m to select METERING then press the SET button WH I T E BA L ANC E VO I C E RE C R E TURN QU I CK V I EW S E NS I T I V I T Y CAP T URE 2 GAMMA S PO T C ENT E R ME T E R I NG S PO T C ENT E R ME T E R I NG 5 Press l...

Страница 58: ... T Suitable for capturing under a tungsten lamp 1 Turn on the camera in the desired mode 2 Press the MENU button until the menu screen appears 3 Press l or m to select P then press the SET button 4 Press l or m to select WHITE BALANCE then press the SET button 5 Press l or m to select the desired setting then press the SET button S E NS I T I V I T Y GAMMA ME T E R I NG VO I C E RE C R E TURN QU I...

Страница 59: ... screen appears 3 Press l or m to select P then press the SET button 4 Press l or m to select SENSITIVITY then press the SET button 5 Press l or m to select the desired setting then press the SET button 6 Press the MENU button to turn off the menu screen Notes In Auto mode the SENSITIVITY menu item is set to AUTO In Manual mode the default SENSITIVITY setting in the menu is ISO 100 and AUTO is not...

Страница 60: ...e camera in the desired mode 2 Press the MENU button until the menu screen appears 3 Press l or m to select P then press the SET button 4 Press l or m to select GAMMA then press the SET button WH I T E BA L ANC E ME T E R I NG VO I C E RE C R E TURN QU I CK V I EW S E NS I T I V I T Y CAP T URE 2 GAMMA H I GHL I GH T S T ANDARD DARKN E SS CON TRAS T 1 2 3 GAMMA H I GHL I GH T S T ANDARD DARKN E SS...

Страница 61: ...y Style of Date and Time Available in w or mode Follow the procedure below to select among three different display styles of date and time Types MMM DD YYYY First 3 letters of month with day and year as numbers DD MM YYYY Day month and year as numbers YYYY MM DD Year month and day as numbers 1 Turn on the camera in the desired mode 2 Press the MENU button until the menu screen appears 3 Press l or...

Страница 62: ... to backup important data on your computer or other media before formatting the card Do not remove the power source during formatting as this may cause damage to the card It is recommended that you use the AC outlet for the power supply when formatting 1 Turn on the camera in the desired mode 2 Press the MENU button until the menu screen appears 3 Press l or m to select Z then press the SET button...

Страница 63: ...ed images You can select two different methods of file numbering Types SERIAL Defines file numbers by incrementing up from the last image captured when inserting a new card RESET Defines a new set of file numbers when inserting a new card 1 Turn on the camera in the desired mode 2 Press the MENU button until the menu screen appears 3 Press l or m to select Z then press the SET button 4 Press l or ...

Страница 64: ...ng the protection or print order Formatting the card Saving the image with effect L ANGUAG E V I D EO OU T R E TURN B E E P SP E AK ER P C CONN E C T S E T T I NG 2 UNDO L AS T IMAG E Turning off the Speaker Available in w mode You can turn off the sound while viewing motion images or still images with sound data attached 1 Set the Mode Dial to w then power the camera 2 Press the MENU button until...

Страница 65: ...in the desired mode 2 Press the MENU button to display the menu screen 3 Press l or m to select then press the SET button 4 Press l or m to select BEEP then press the SET button 5 Press l or m to select OFF then press the SET button 6 Press the MENU button to turn off the menu screen L ANGUAG E V I D EO OU T UNDO SP E AK ER L AS T IMAG E R E TURN P C CONN E C T S E T T I NG 2 OFF ON B E E P B E E ...

Страница 66: ...ress l or m to select LANGUAGE then press the SET button LANGUAGE menu is SPRACHE in German LANGUE in French IDIOMA in Spanish or in Japanese 5 Press l or m to select the desired language then press the SET button The menu screen displays in the language selected 6 Press the MENU button to turn off the menu screen Note The operation procedures in this manual are based on using the English on scree...

Страница 67: ...SB cable Note When you connect the USB cable for the first time you need to install the USB driver Before installing the USB driver you must read and agree to the LIMITED USE SOFTWARE LICENSE on the first page of the supplied Installation Guide The installation procedure varies depending on your PC operating system Find your operating system and follow the steps in Installing the USB driver Discon...

Страница 68: ...he CD ROM containing the USB driver into the CD ROM drive then click Next 4 Specify R USBDRV WIN2KXP then click OK 5 Check the message then click Next to begin installation 6 Click Finish to complete the installation Windows Me 1 Add New Hardware Wizard appears after performing Preparation 2 Select Specify the location of the driver 3 Insert the CD ROM containing the USB driver into the CD ROM dri...

Страница 69: ... E C T S E T T I NG 2 OFF ON B E E P OU T P C CONN E C T OFF ON Installing the software Before you start transferring data install the Quick File Transfer Software included in the supplied CD ROM Refer to the Installation Guide for details Transferring the data To transfer all the data to your PC at one time simply press the button after making the necessary preparations 1 Press the MENU button to...

Страница 70: ...se in a place exposed to strong electromagnetism Protecting your images Select the write protect switch on the exterior card casing to protect your images Do not power off any devices while transferring data as this may destroy the data Back up your image data often to a hard disk or other permanent storage media Be aware that formatting will erase all image data stored on the card Note Sharp Corp...

Страница 71: ...evision Signal Standards In any country you can always preview the image by using the LCD monitor However if you want to preview the image on a TV screen the TV must be either NTSC M or PAL system compatible NTSC M is used in the following areas The Bahamas Barbados Bermuda Myanmar formerly Burma Canada Chile Colombia Costa Rica Cuba the Dominican Republic Ecuador El Salvador Greenland Guam Guatem...

Страница 72: ...etting does not match the lighting condition You set the flash to off mode You set the flash to Auto mode in a bright condition The flash has malfunctioned The camera cannot automatically focus on a subject closer than 1 ft 30 cm The focus is not properly locked The DIGITAL ZOOM menu item is set to OFF Suggested solution Replace them with new ones p 7 Press and hold down the Power button for appro...

Страница 73: ...n In mode In w mode Suggested solution Cancel the protection p 33 Cannot display an image larger than 2448K1632 on this camera Check the operation manual for your VCR or TV and select the proper chan nel p 20 Check the cable connection p 20 Check the TV system that applies to where you live p 61 and set it to cor rect item p 20 Check the installation procedure and try again p 58 Check the cable co...

Страница 74: ...rmat WAV monaural Dimensions W K H K D 4 5 K 2 9 K 2 4 113 5 K 74 5 K 60 mm Weight 0 64 lbs 290 g without batteries card wrist strap and lens cap Operating Temperature 32 F to 104 F 0 C to L40 C Storage Temperature D4 F to 140 F D20 C to L60 C Operating Humidity 30 to 80 AC adapter Power Requirement AC 100 120V 50 60Hz DC Output 6 V Operating Temperature 32 F to 104 F 0 C to L40 C Dimensions W K H...

Страница 75: ...a videocámara es un producto de alta tecnología con más de 134 000 transistores de película fina lo que le proporciona una imagen perfectamente detallada De vez en cuando tal vez aparezca un pixel en la pantalla en forma de punto fijo de color azul verde rojo o negro Tenga en cuenta que esto no tiene ninguna influencia en las prestaciones de la videocámara Marcas comerciales Microsoft y Windows so...

Страница 76: ...sistema de cable Esto impedirá que el producto se estropee debido a las tormentas eléctrica o a la sobretensión en la línea de alimentación 1 Lectura de las instrucciones Antes de utilizar este producto deberán leerse todas las instrucciones de seguridad y manejo 2 Conservación de las instrucciones Las instrucciones de seguridad y manejo deberán guardarse para poder consultarlas en futuro en caso ...

Страница 77: ... b Si se ha derramado líquido o han entrado objetos en el interior del producto c Si el producto ha estado expuesto a la lluvia o al agua d Si el producto no funciona normalmente siguiendo las instrucciones de manejo Ajuste solamente los controles indicados en las instrucciones de manejo ya que el ajuste incorrecto de otros controles puede causar daños y tal vez se requiera un trabajo de reparació...

Страница 78: ...por las luces incandescentes puede deformar la cámara digital o hacer que ésta funcione mal Respete siempre las prohibiciones o restricciones relacionadas con la utilización de equipos electrónicos en vuelos comerciales o en otras áreas susceptibles Tenga cuidado con la temperatura y la humedad Podrá utilizar su cámara digital a temperaturas de entre 32 F y 104 F 0 C y L40 C con una humedad relati...

Страница 79: ... protección contra escritura Esquina recortada Guía de operación rápida Inserción y extracción de las pilas AA 1 Asegúrese de que la alimentación esté desconectada 2 Deslice el mando de abertura de la puerta del compartimiento de las pilas a la posición UNLOCK 3 Deslice la puerta y luego ábrala en el sentido de la flecha 4 Inserte las pilas AA como se muestra abajo 5 Cierre la puerta y luego deslí...

Страница 80: ...cender la cámara Dial de modos Disparador Botón de la alimentación Captura de una imagen en movimiento 1 Inserte una tarjeta en la cámara 2 Quite la tapa del objetivo 3 Ponga el dial de modos en 4 Pulse el botón de la alimentación hasta que se encienda la cámara 5 Pulse a fondo el disparador para empezar a capturar imágenes Para hacer una pausa en la captura Pulse otra vez a fondo el disparador Em...

Страница 81: ... a la presentación preliminar normal Para buscar una escena en el archivo de presentación preliminar pulse j o k Pulse m para volver a la presentación preliminar normal Para detener la presentación preliminar pulse l 0 0 5 0 1 0 0 Cambio a la presentación preliminar de imagen miniatura 1 Pulse el botón 2 Pulse j k l o m para seleccionar la imagen deseada Pulse de nuevo el botón para volver a la pr...

Страница 82: ...asta que aparezca la pantalla de menú 4 Pulse l o m para seleccionar w y luego pulse el botón SET 5 Pulse l o m para seleccionar PRO TECT y luego pulse el botón SET 6 Pulse l o m para seleccionar ONE IMAGE y luego pulse el botón SET 7 Pulse el botón SET para proteger la imagen 8 Pulse el botón MENU para volver a la pantalla de menú Nota Seleccione ALL IMAGES en el paso 6 de Selección de una imagen...

Страница 83: ...El menú LANGUAGE es SPRACHE en alemán LANGUE en francés IDIOMA en español o en japonés 5 Pulse l o m para seleccionar el idioma deseado y luego pulse el botón SET 6 Pulse el botón MENU para apagar la pantalla de menú V I D EO OU T UNDO L AS T IMAG E R E TURN B E E P SP E AK ER P C CONN E C T S E T T I NG 2 L ANGUAG E ENGL I SH D EU T SCH F RANÇ A I S E SP AÑ OL L ANGUAG E ENGL I SH D EU T SCH F RA...

Страница 84: ...ction of defects in the manner and for the period of time described herein shall constitute complete fulfillment of all liabilities and responsibilities of Sharp to the purchaser with respect to the Product and shall constitute full satisfaction of all claims whether based on contract negligence strict liability or otherwise In no event shall Sharp be liable or in any way responsible for any damag...

Отзывы: