Cordless Handset Setup
18
Cordless Handset Setup
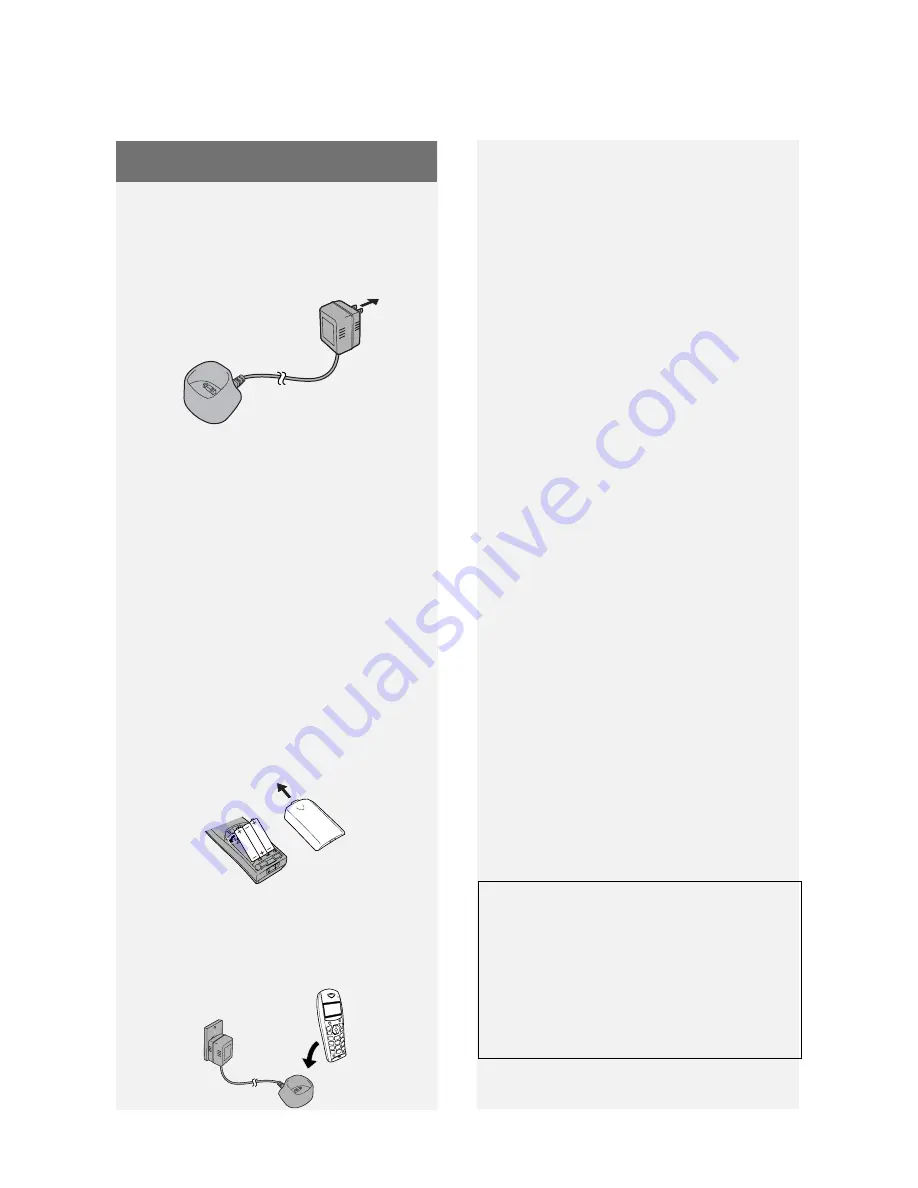
Cordless handset charger
Plug the AC adapter into a standard
120 V AC outlet.
Important:
Never cover the charger
and AC adapter with a blanket, cloth, or
other material. Excessive heating may
result and cause fire.
Installing the batteries and
charging the cordless handset
♦
Be sure to read the battery
precautions on page 6.
1
Insert the batteries into the cordless
handset, making sure that the "+"
and "-" sides are placed correctly.
Place the battery cover on the
cordless handset.
2
Remove the protective film from the
display, and place the cordless
handset in the charger.
•
Important!
The dial pad must face
forward, or the batteries will not
charge.
•
Let the batteries charge at least 12
hours the first time.
•
The cordless handset and charger
may feel warm while charging. This
is normal.
•
The batteries charge automatically
while the cordless handset is in the
charger. The battery icon shows the
charging status. When charging is
finished, the battery icon appears
full.
•
The batteries cannot be
overcharged. When not using the
cordless handset, keep it in the
charger to ensure that it is always
charged.
•
When the batteries need charging,
the battery indicator will blink in the
display and you will hear beeps
during a phone conversation.
Talking range
Large metal objects, metal structures,
thick walls, and other conditions
reduce the talking range. If you hear
noise or interference while talking on
the cordless handset, move closer to
the machine.


