PN-K321/K322B SERVICE MENU/VARIOUS SETTING TOOL OPERATING PROCEDURES 4
- 26
14.
OPERATING MANUAL OF THE LOG TOOL
14-1. PREPARE
■
[CAUTION]
1) Turn On the power of the display and set the monitor not to shift
to input signal waiting mode, before updating.
* Set [Other]>[Power management] to [not carrying out] or input
the video signal.
2) Be sure to update the firmware under turning on the monitor or
returning from the signal waiting mode because it is not possible
to update under the standby mode or the signal waiting mode.
3) Be sure to update the firmware under the condition that the
menu can be operated.
* The monitor sometimes fails to update the firmware right after
turning on the AC power
■
When connecting to the information display with an RS-232C
cable
・
PC which is installed Windows XP, Windows Vista, Windows 7
OS and has COM port (or USB serial cable).
・
RS-232C cable (Female-Female, Straight)
・
Information Display which has the Logging function.
Connect PC’s COM port and Information Display’s RS-232C
input connector with RS-232C cable.
■
When connecting to the information display with a LAN cable
・
PC with Windows XP/Vista/7 OS and LAN configuration
・
LAN cable (Cross cable when connecting directly to the
information display, or straight cable when connecting via a
hub)
・
Information display provided with the LAN function and the log
output function Connect the PC and the information display
with the LAN cable. If they are directly connected, setting
must be made both in the PC and in the information display.
When connecting a PC to the network in order to obtain log
information from the information display which is already
connected to the network, consult the network administrator on
the PC setting.
14-2. BOOTING
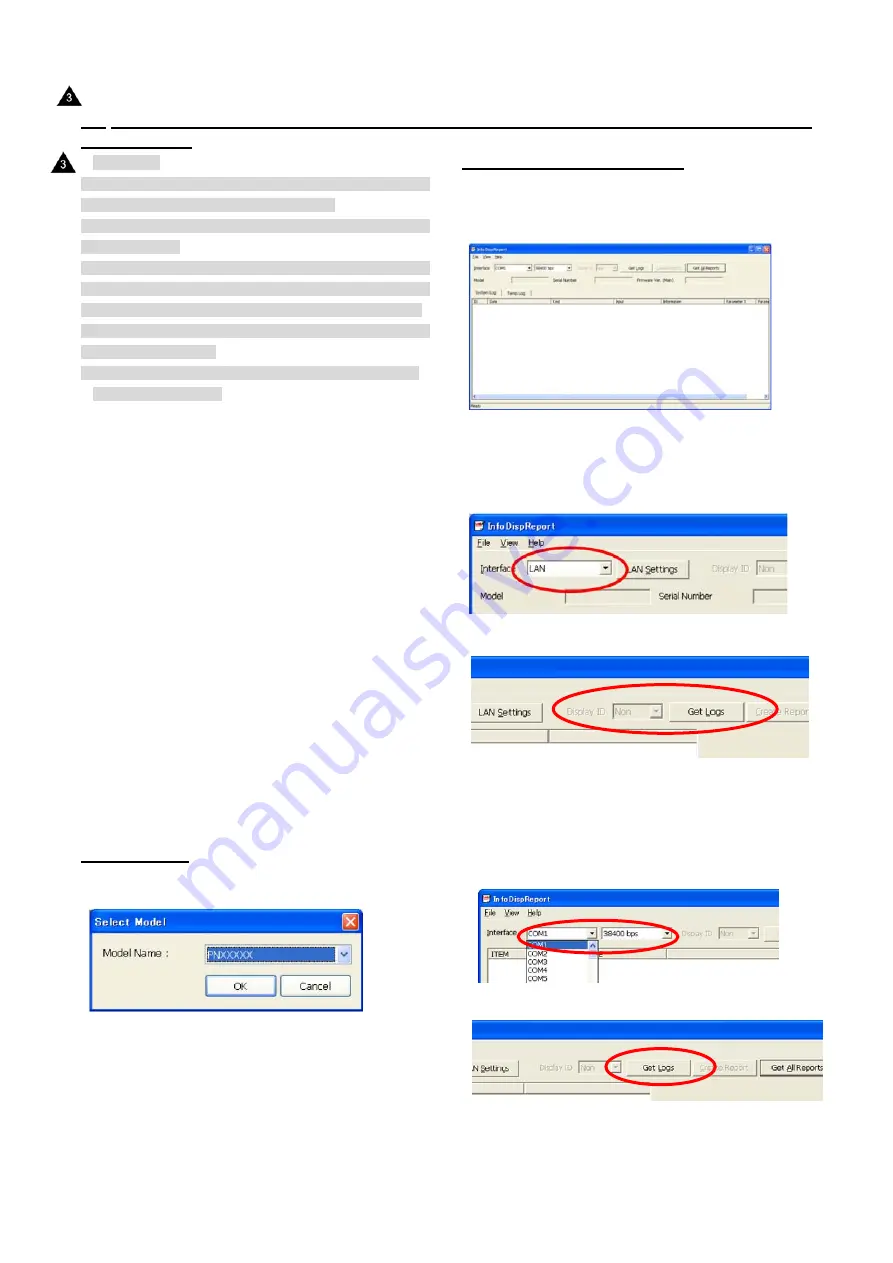
Press [InfoDisp Report] button of the Service Tool Launcher.
Select the model for obtaining the log, and press [OK].
14-3. GET AND DISPLAY LOGS
1 ) When a model is selected, the following window is displayed.
The actual display slightly differs depending on the selected
model.
For the models which do not support the LAN function, [LAN
setting] button is not displayed and “LAN” is not displayed in the
option list of the interface.
Depending on the models which are not supported are lightly
displayed.
When connecting to this display via a RS-232C cable, select the
RS-232C port that is connected to the interface (e.g.COM1), and
set the communication speed to the same as the display.
Set the baud rate to the display’s setting. (In some models, the
setting item is not displayed.)
2 ) After completion of the setting of “1)” press [Get Logs] button.
: ’13/Dec
Содержание PN-K321
Страница 106: ...PN K321 K322B HARDWARE DESCRIPTIONS 8 4 PN K322B ...
Страница 141: ...PN K321 K322B HARDWARE DESCRIPTIONS 8 39 ...
Страница 142: ...PN K321 K322B HARDWARE DESCRIPTIONS 8 40 ...
Страница 144: ...PN K321 K322B HARDWARE DESCRIPTIONS 8 42 ...
Страница 145: ...PN K321 K322B HARDWARE DESCRIPTIONS 8 43 ...
Страница 146: ...PN K321 K322B HARDWARE DESCRIPTIONS 8 44 ...
Страница 147: ...PN K321 K322B HARDWARE DESCRIPTIONS 8 45 ...
Страница 148: ...PN K321 K322B HARDWARE DESCRIPTIONS 8 46 ...
Страница 149: ...PN K321 K322B HARDWARE DESCRIPTIONS 8 47 ...
Страница 150: ...PN K321 K322B HARDWARE DESCRIPTIONS 8 48 ...
Страница 151: ...PN K321 K322B HARDWARE DESCRIPTIONS 8 49 ...
Страница 152: ...PN K321 K322B HARDWARE DESCRIPTIONS 8 50 ...
Страница 153: ...PN K321 K322B HARDWARE DESCRIPTIONS 8 51 ...
Страница 154: ...PN K321 K322B HARDWARE DESCRIPTIONS 8 52 ...
Страница 155: ...PN K321 K322B HARDWARE DESCRIPTIONS 8 53 ...
Страница 156: ...PN K321 K322B HARDWARE DESCRIPTIONS 8 54 ...
Страница 157: ...PN K321 K322B HARDWARE DESCRIPTIONS 8 55 ...
Страница 158: ...PN K321 K322B HARDWARE DESCRIPTIONS 8 56 ...
Страница 159: ...PN K321 K322B HARDWARE DESCRIPTIONS 8 57 ...
Страница 160: ...PN K321 K322B HARDWARE DESCRIPTIONS 8 58 ...
Страница 161: ...PN K321 K322B HARDWARE DESCRIPTIONS 8 59 ...
Страница 162: ...PN K321 K322B HARDWARE DESCRIPTIONS 8 60 ...
Страница 163: ...PN K321 K322B HARDWARE DESCRIPTIONS 8 61 ...
Страница 164: ...PN K321 K322B HARDWARE DESCRIPTIONS 8 62 ...
Страница 168: ...PN K321 K322B HARDWARE DESCRIPTIONS 8 66 BOTTOM 13 Dec ...
Страница 169: ...PN K321 K322B HARDWARE DESCRIPTIONS 8 67 DC DC PWB CN1 13 Dec ...


