21
E
Touch Panel / Touch Pen Preparations
n
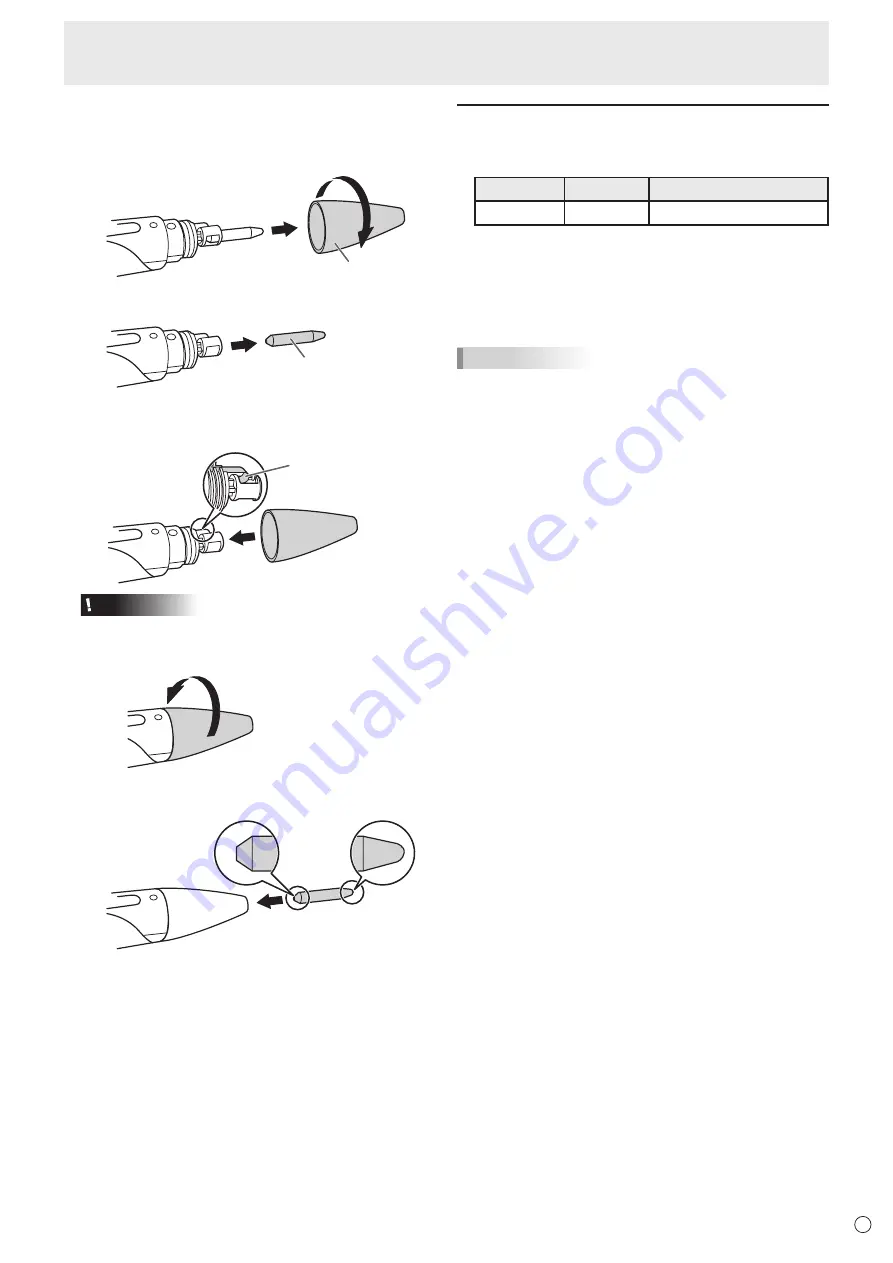
Replacing the pen tip
If the pen tip becomes worn or damaged, replace it.
1. Remove the pen tip cover.
Pen tip cover
2. Remove the pen tip.
Pen tip
* Do not touch any part other than the pen tip.
3. Attach the pen tip cover.
1
*
Caution
Be carefull that the pen tip cover does not catch on the
metal tab (*).
2
4. Insert the pen tip.
* Note which end of the pen tip you are inserting.
* Carefully insert the flat end of the pen tip.
* Firmly insert the pen tip all the way in.
Adding touch pens (pairing)
• Up to 4 touch pens can be used simultaneously. (Up to 8
touch pens can be registered.)
Item
Model
Remarks
Touch pen
PN-ZL06
For capacitive touch panel
• To use an optional touch pen with the monitor, the touch
pen must be registered in the touch pen adapter. (pairing)
• Use the Touch pen Management Tool to perform touch pen
pairing. For details, see the Touch pen Management Tool
Operation Manual.
• Perform touch pen pairing for one pen at a time.
TIPS
• When multiple touch pens are used, touch positions and
touch pen information (color, thickness, etc.) may become
interchanged, and lines may break.
- When touched simultaneously.
- When touch pens are moved near each other.
- When batteries are low.
- When other wireless equipment is operating nearby.
• Do not press the pen tip on other than the screen.
This may cause malfunctioning.
• One touch pen cannot be registered in multiple touch pen
adapters.


