


LARGE CAPACITY TRAY
5-11
5
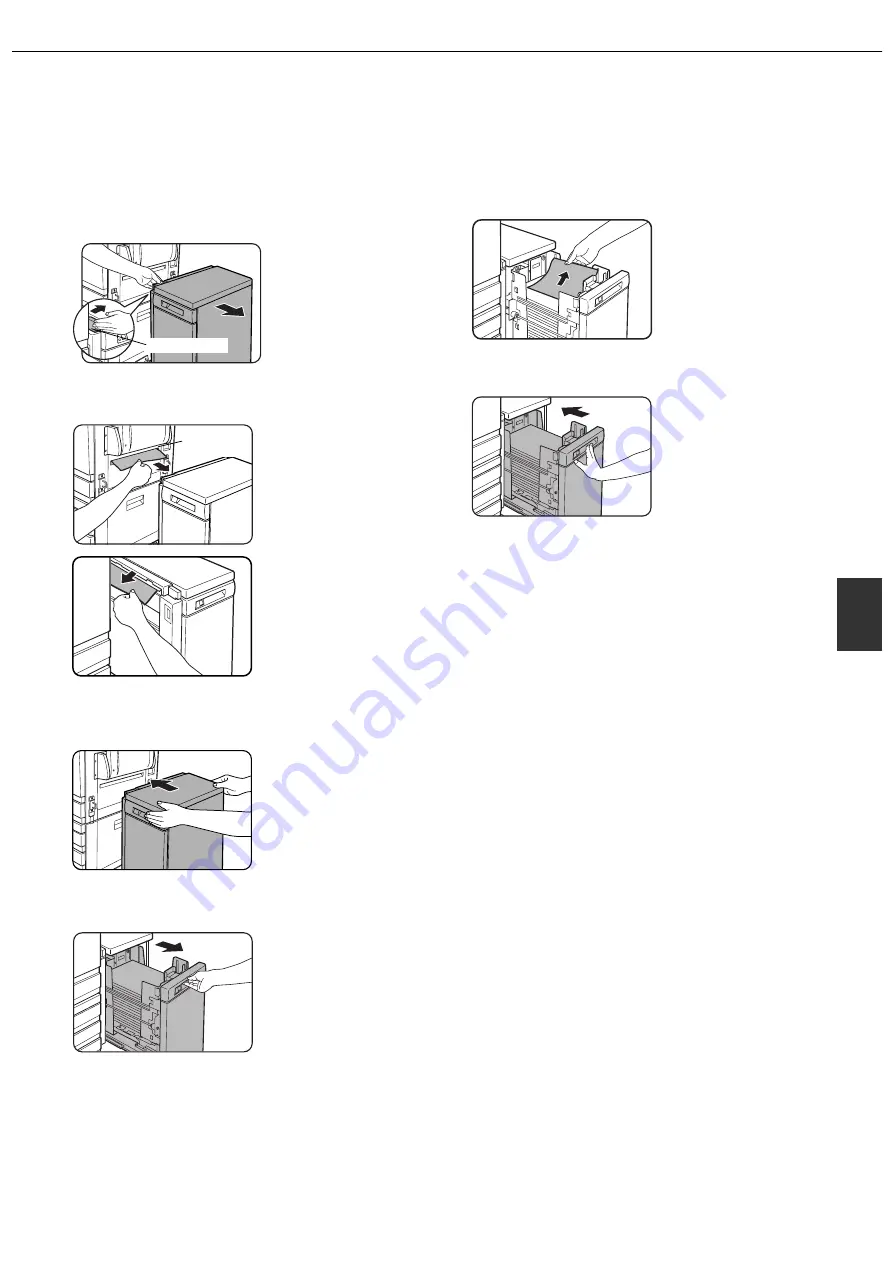
Misfeed removal
When a misfeed occurs in the large capacity tray, follow these steps to remove the misfed paper.
1
While holding the tray release lever,
carefully slide the large capacity tray away
from the main unit until it stops.
2
Remove any misfed paper from the main
unit and the large capacity tray.
Be sure not to tear the
misfed paper during
removal.
Open and close the
upper right side cover of
the printer after
removing the misfed
paper from the printer.
If the misfed paper
cannot be removed
easily, open the upper
right side cover to
remove the paper.
3
Push the large capacity tray toward the
main unit and latch it into place.
4
If misfed paper is not found in step 2, pull
the tray out.
When pulling the large
capacity tray out, be
sure to pull it out after
the paper tray control
button lamp goes out.
5
Remove the misfed paper.
6
Gently push the tray back into place.
Confirm that the misfeed
display is cleared.
Release lever
Upper right
side cover
Содержание AR-C260P
Страница 8: ......
Страница 58: ......
Страница 70: ......
Страница 78: ...AR C260P OPERATION MANUAL for general information PRINTED IN JAPAN 2003K KS1 TINSE2196FCZZ ...


