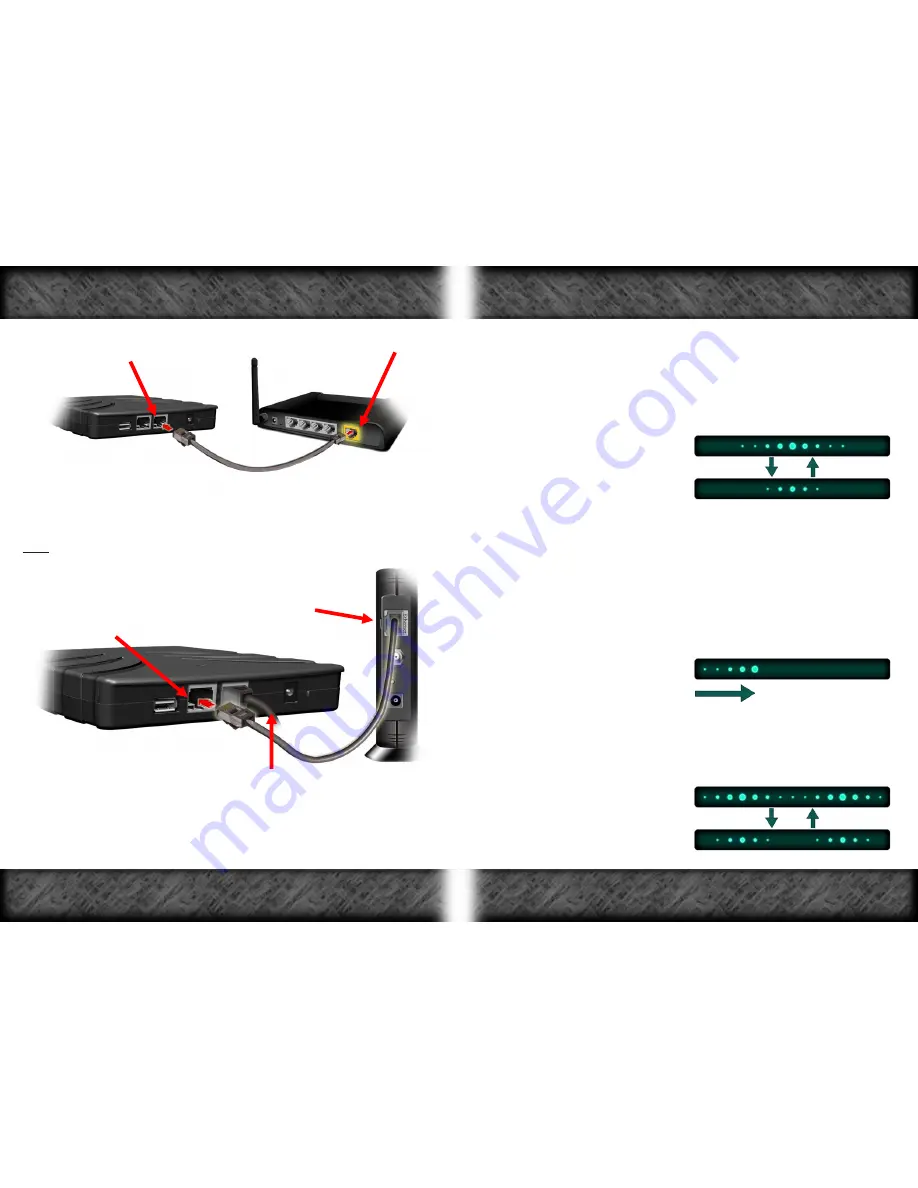
Connect Ethernet Cable
Connect Ethernet Cable to
WAN Port
to LagBuster
Router
Figure 5
4-
Connect an Ethernet cable to the
WAN Port
on your router and
connect the other end of the cable into either Ethernet port on the
back of the LagBuster
(See Figure 5)
.
Note: If the Ethernet cable is not connected to the WAN Port on the
router, the LagBuster will not function.
Connect Ethernet
Ethernet Cable
Cable to LagBuster
is connected
Connected to Router
Figure 6
Modem
5-
Connect an Ethernet cable to the Ethernet port on the
modem
.
Connect the other end of the cable into the empty Ethernet port on
the back of the LagBuster
(See Figure 6)
.
6-
Power on
your network components in the following sequence:
1- Power on
LagBuster
by plugging the
factory supplied power
adapter
into an electrical outlet with the correct AC voltage.
2- Wait for the LagBuster to display the
Direct Connect
light
pattern.
Direct Connect
light pattern -
3- Power on the
Modem
.
4- Wait 15 seconds.
5- Power on the
Router
.
6- Power on your
PC
.
7-
Wait for the LagBuster to initialize. You will see each LED on the
Intelligent LED Bar light up one by one. After all of the LEDs are lit,
you will see the
Initialization
light pattern while the LagBuster is
initializing.
Initialization
light pattern -
8-
When the Intelligent LED Bar displays the
Unactivated
light pattern,
initialization is complete and you can begin the activation process
as outlined on the next page.
Unactivated
light pattern
-
- Direction of Light Movement
Connecting Your LagBuster
Connecting Your LagBuster
Page 6
Page 7


