With a Direct LagBuster to Computer Connection (No Internet)
(If you have an Active Internet Connection, skip to Step #1 on the next page)
:
Note: The PC that you are connecting to must have DHCP enabled, and the
web browser must have JavaScript enabled.
1-
Power off
your LagBuster by disconnecting the power supply.
2-
Unplug both Ethernet cables
from the back of the LagBuster.
3-
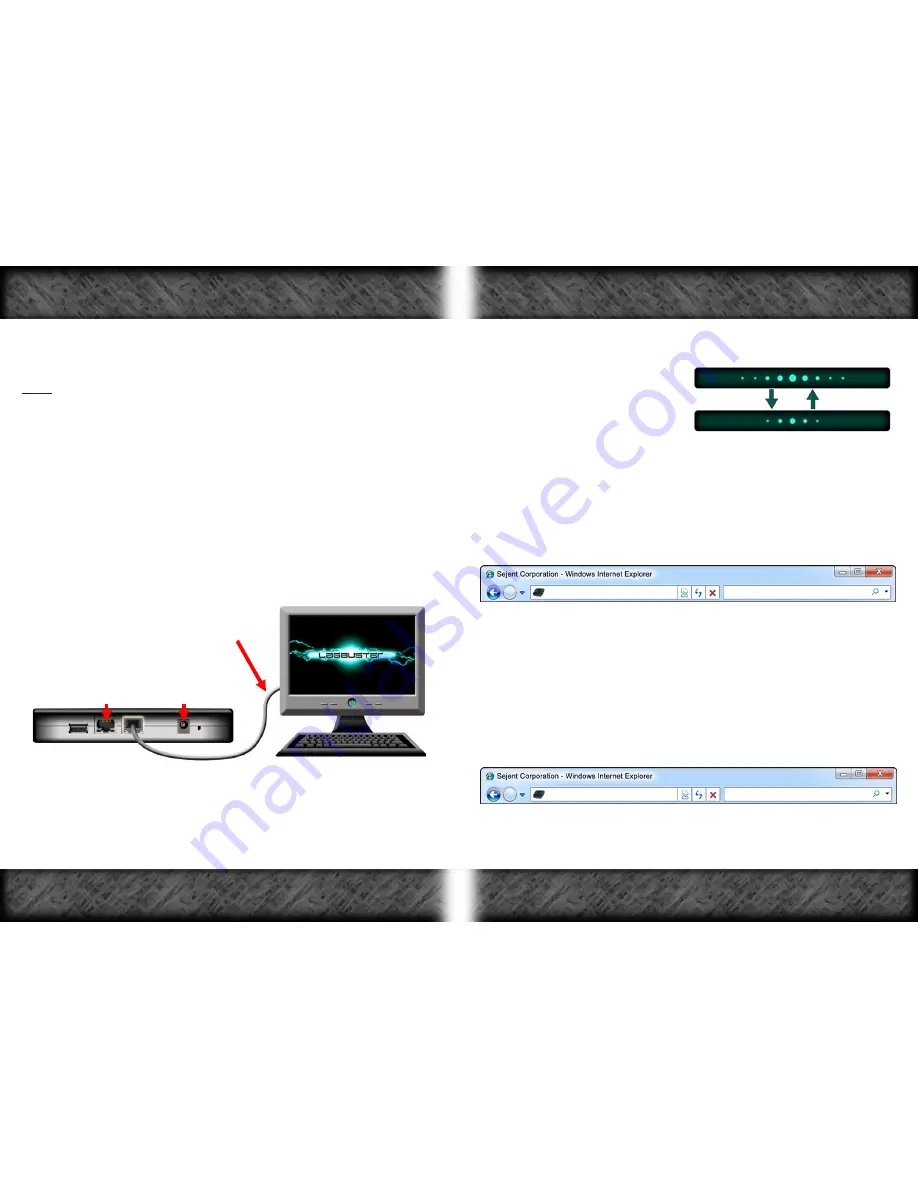
Plug an Ethernet cable into the Ethernet port on your computer.
4-
Plug the other end of the Ethernet cable into either Ethernet port
on the back of your LagBuster.
5-
Make sure that there is
no
cable connected
to the other
Ethernet port on the LagBuster
(See Figure 7)
.
Ethernet Cable connected to
LagBuster and Computer
2nd Ethernet port & power supply are disconnected
Figure 7
6-
Power on the LagBuster by inserting the Power Supply i nto the
Power Supply Input; the Intelligent LED Bar will display the
Initialization
light pattern while the LagBuster initializes.
7-
When the LagBuster has finished initialization, the Intelligent LED
Bar will display the
Direct Connect
light pattern.
Direct Connect
light pattern -
8-
Using the computer that is directly connected to the LagBuster
with an Ethernet cable
9-
Open your preferred Internet browser
(Microsoft Internet Explorer or
Mozilla Firefox are recommended).
10-
In the address bar of the browser type:
http:// 10.1.1.1
and
continue to Step #4 below.
With the LagBuster Installed in the Network (Active Internet Connection)
:
1-
Ensure that the LagBuster is
Ready
(See
LagBuster Light Patterns
on Pg.
14).
2-
Open your preferred Internet browser.
3-
In the address bar of the browser type:
http://cp.lagbuster.com
4-
Press the
Enter
or
Return
key on your keyboard and the LagBuster
Control Panel
Login
Page will load.
http://cp.lagbuster.com
10.1.1.1
Accessing the Control Panel
Accessing the Control Panel
Page 18
Page 19


