11. The
More
drop-down will allow you to send the currently selected item to another device, or
to the print Library.
12. Items currently in your Queue.
13. The
Add
button will allow you to add objects or G-code files to the print queue.
14. The
Create
button displays a list of available plug-ins that are used to create printable
objects right inside of MatterControl.
15. The
Buy Materials
button will open your web browser and point it to the SeeMeCNC store.
16. The
Queue
button opens a menu list that will allow you to export the current file and perform
other operations on the print queue.
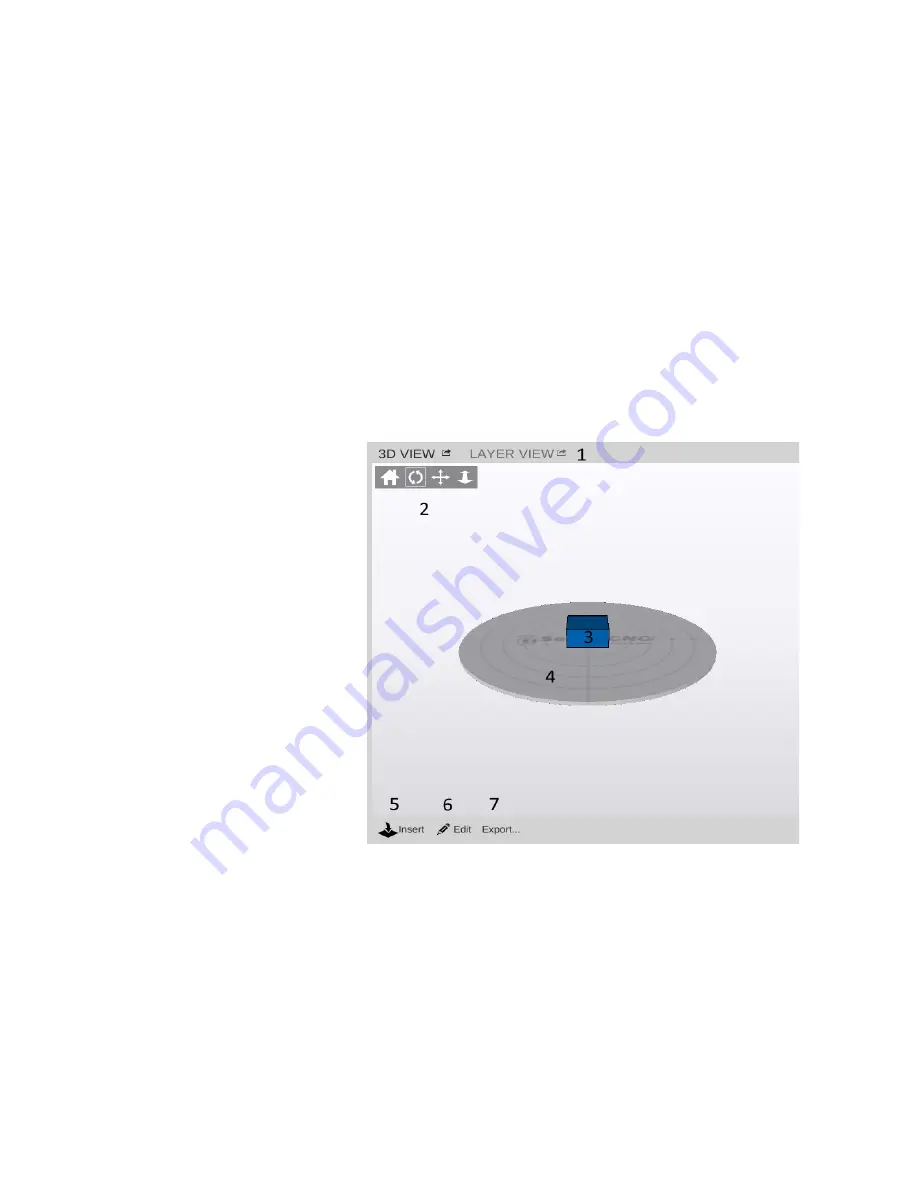
The right half of the MatterControl interface is taken up by a 3D view of your build
platform and what objects are currently loaded and ready to print.
1. The 3D and Layer view controls allow you to switch between the 3D view (shown) and the
Layer view. The layer view shows
you the path the print head will
take as your part is printed. The
layer view won't display anything
until the part you want to print has
been “sliced”.
2. View manipulation controls –
Rotate, Pan, and Zoom. By
default, the 3D view will show a
rotating display of the part. You
can stop the rotation by clicking
anywhere in the 3D view window.
3. The object currently ready to
print.
4. This is a representation of the
print bed on your Eris®. As long
as your object fits within the
circle, you can print it!
5 & 6 The
Insert
and
Edit
buttons allow you to add and manipulate multiple objects to the
current print job. We'll cover this in depth later as well.
7. The
Export
button allows you to save the current state of the build plate in a few different file
formats.
9


