


The configuration process automatically loads a test object that you can print. Let's take
a few minutes to go over the various features of the MatterControl interface.
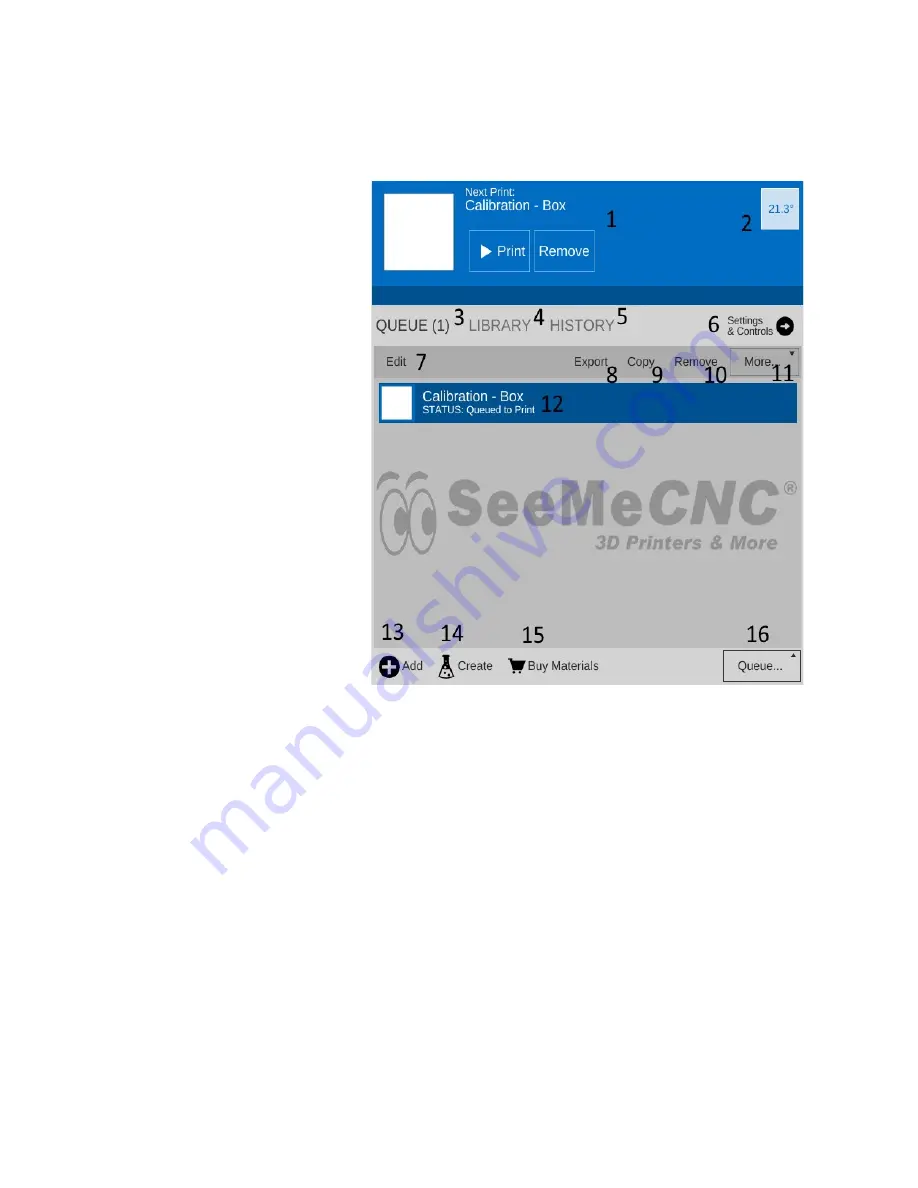
The MatterControl interface
is split into two halves. The left
half is where you can load objects
or G-code to print, start prints, and
manually control the printer.
1. This is the print queue display.
If nothing is queued up, you'll see
the message, “No items in the print
queue”. To add an item, click the
“Add” button (#13). We'll cover
this in detail later. Note that you
can only select STL or GCODE
files.
2. This is the temperature display.
The figure displayed shows the
current nozzle temperature. If you
ever install a heated bed on your
Eris®, a second box will appear
that will show the bed
temperature. Both values are
shown in degrees Celsius.
3. Queue Count. This shows the
number of objects currently in the
print queue.
4. Library – This is a list of items that you've stored in your object “library”. We'll cover this one
in detail later.
5. Print History. This will show you what you've printed in the past along with statistics about
each print.
6. Settings & Controls – this is where you can edit your slicer & printer settings as well as
manually control your Eris®
7. The
Edit
button will allow you to choose which items in the print queue will be available for
printing.
8. The
Export
button will allow you to export the currently select item as an STL, AMF, or
GCODE file. You can use this to save GCODE if you want to share your sliced object with
another Eris® user.
9. The
Copy
button will make copies of the currently selected item in the print queue.
10. The
Remove
button will remove the currently selected item in the print queue.
8


