Installation (144” Radome)
9711-44 Ku-Band TXRX
3-18
7.
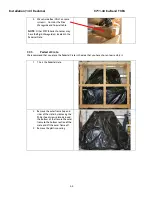
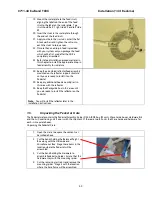
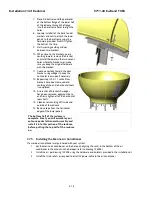
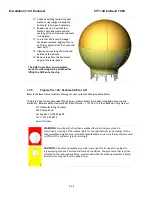
Place 4-8 bolts around the perimeter
of the bottom flange of the lower half
of the radome, through the flange
into the base frame holes to align the
holes.
8.
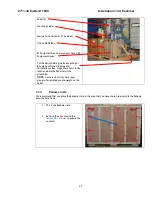
Loosely install all of the bolts, fender
washers and nuts to attach the lower
panels to the base frame using the
hardware provided. Do NOT tighten
the bolts at this time.
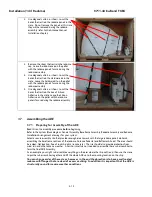
9.
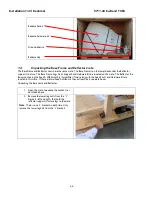
Start injecting caulking midway
between two brackets.
10.
When close to the bracket you are
caulking toward, remove the bracket
and install hardware in the two vacant
holes where the bracket was (make
sure you keep the original hardware
with the bracket).
11.
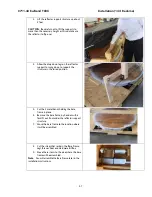
Continue caulking toward the next
bracket, using wedges to keep the
horizontal seam open if necessary.
12.
Repeat steps 10 & 11 until all four
brackets have been removed and
caulking of the entire horizontal seam
is completed.
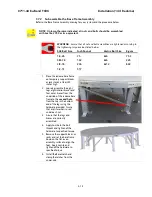
13.
Assure that all brackets & wedges
have been removed, apply Loctite to
and firmly tighten all of the horizontal
seam bolts.
14.
Clean excess caulking off inside and
outside of the radome.
15.
Remove tape from the horizontal
edges of the lower panels.
The bottom half of the radome is
complete. Next you will assemble your
antenna pedestal General Assembly and
install it into this portion of the radome,
before putting the top half of the radome
on.
3.7.5.
Installing the Marine Air Conditioner
If a marine air conditioner was purchased with your system:
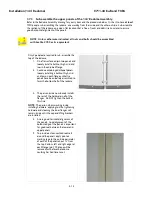
1.
Set the marine air conditioner on the base pan aligning the vents in the bottom of the air
conditioner to the cutouts in the basepan (refer to drawing 123496).
2.
Install the air, per drawing 122508, using the hardware and isolators provided in the installation kit.
3.
Install the strain reliefs as required to install AC power cable to the air conditioner.
Содержание 9711-44 KU-BAND TX/RX
Страница 3: ......
Страница 12: ...Table of Contents xii This Page Intentionally Left Blank ...
Страница 24: ...Site Survey 9711 44 Ku Band TXRX 2 8 This Page Intentionally Left Blank ...
Страница 64: ...Installation 144 Radome 9711 44 Ku Band TXRX 3 40 This Page Intentionally Left Blank ...
Страница 112: ...Basic Setup of the ACU 9711 44 Ku Band TXRX 5 4 This Page Intentionally Left Blank ...
Страница 114: ...Setup Ships Gyro Compass 9711 44 Ku Band TXRX 6 2 This Page Intentionally Left Blank ...
Страница 116: ...Setup Band Select 9711 44 Ku Band TXRX 7 2 This Page Intentionally Left Blank ...
Страница 122: ...Setup Home Flag Offset 9711 44 Ku Band TXRX 9 4 This Page Intentionally Left Blank ...
Страница 130: ...Setup Searching 9711 44 Ku Band TXRX 11 6 This Page Intentionally Left Blank ...
Страница 142: ...Setup Modem Connections Setup and Test 9711 44 Ku Band TXRX 13 8 This Page Intentionally Left Blank ...
Страница 150: ...Antenna Specific Operation 9711 44 Ku Band TXRX 16 4 This Page Intentionally Left Blank ...
Страница 154: ...Functional Testing 9711 44 Ku Band TXRX 17 4 This Page Intentionally Left Blank ...
Страница 158: ...Installation Troubleshooting 9711 44 Ku Band TXRX 18 4 This Page Intentionally Left Blank ...
Страница 180: ...Maintenance 9711 44 Ku Band TXRX 19 22 This Page Intentionally Left Blank ...
Страница 198: ...Drawings 9711 44 Ku Band TXRX 23 2 This Page Intentionally Left Blank ...
Страница 205: ......
Страница 208: ...D C B A A B C D 1 2 3 4 5 6 7 8 8 7 6 5 4 3 2 1 SIZE SCALE SHEET NUMBER DRAWING NUMBER REV B 1 15 140165 B 2 OF 3 ...
Страница 209: ...D C B A A B C D 1 2 3 4 5 6 7 8 8 7 6 5 4 3 2 1 SIZE SCALE SHEET NUMBER DRAWING NUMBER REV B 1 15 140165 B 3 OF 3 ...
Страница 210: ......
Страница 218: ......
Страница 230: ......
Страница 231: ......
Страница 242: ......
Страница 243: ......
Страница 252: ......
Страница 254: ......
Страница 256: ......

