8VHU6HWXSPHQX
Setting up your Business Satellite Receiver for normal operation requires that user-
related options be set from the User Setup menu. These settings are used for opti-
mizing receiver performance (see also “Receiver Setup menu” and “Search Setup
menu”).
To display the User Setup menu
Step 1.
Display the
Main Menu
(Figure 7).
Step 2.
Move to
Receiver Status
and press SELECT.
Step 3.
Move to
User Setup
and press SELECT.
You can view or change the current setup. Your dealer/reseller or local service
provider can advise you about what receiver settings you may need to change (see
also “Search Setup menu”). Move to Exit and press SELECT (or press 1 and then
SELECT) to return to the previous menu.
}
$ERXW/RFN/HYHOV
Five (5) unique Lock Levels are available for protecting your Business Satellite Re-
ceiver and the current receiver settings against unauthorized use or modification
(see Table 5). A Lock Level 0 setting lets you make any changes to the current re-
ceiver setup. Lock Levels 1 and 2 limit access to settings that cannot compromise
the video signal. When the receiver setup is protected via Lock Levels 3 or 4, access
to menus is blocked to preserve the current receiver setup, and only the current (or
Last) channel is available for viewing (see IMPORTANT). At Lock Level 3, only
POWER, MUTE, VOL
Ï
and VOL
Ð
functions are available. Lock Level 4 is identi-
cal to Lock Level 3, except it can only be changed via remote terminal or PCC
uplink signal. Note that after setting the Lock Level to 3, you are automatically
returned to video after exiting the User Setup menu (i.e., moving to Exit and
pressing SELECT).
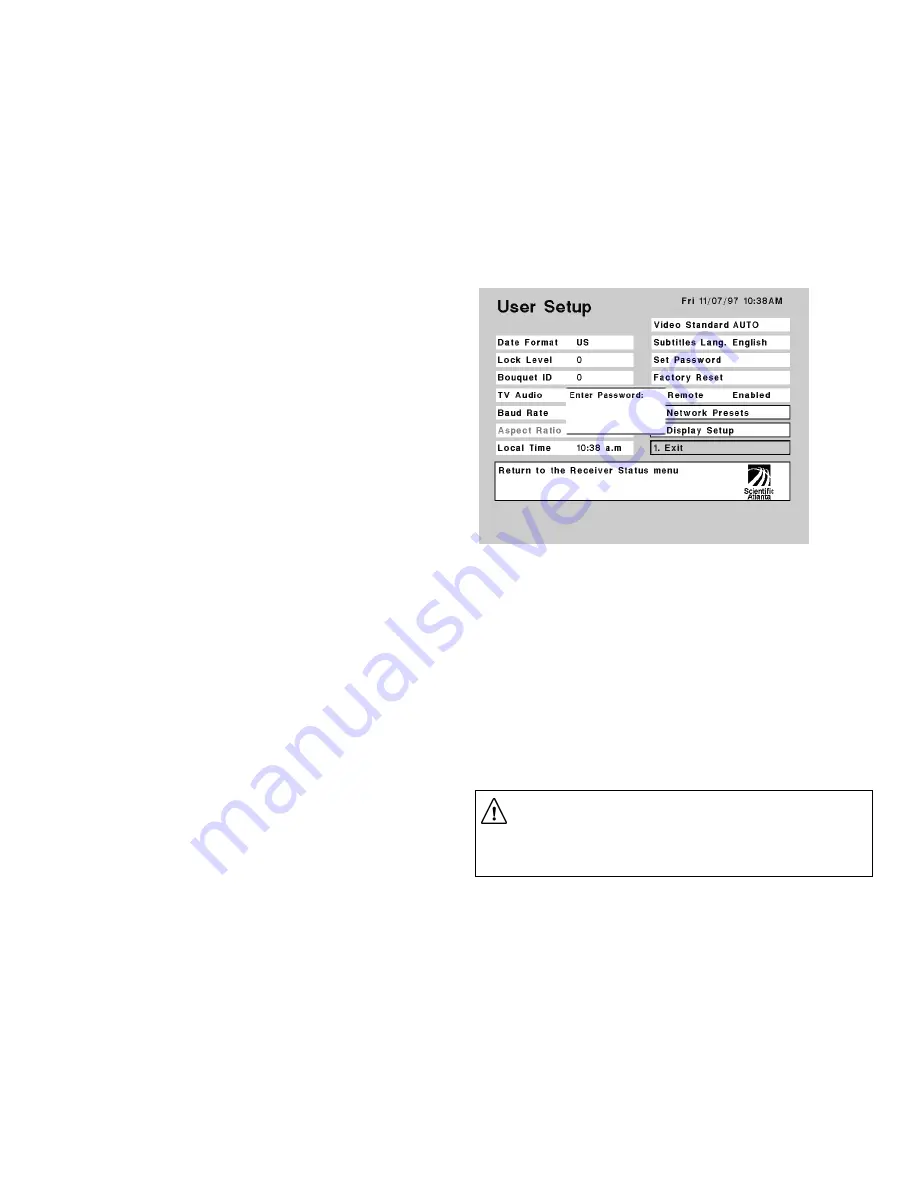
Receiver Lock Levels are Password-protected. When an attempt is made to change
the Lock Level setting (Lock Level 2 or lower), a Password prompt displays (see
Figure 11). After the correct Password is entered, you can change the Lock Level
setting. If Lock Level 3 is currently set and MENU button is pressed, a banner dis-
plays with a password prompt. After the correct Password is entered, the Main
Menu displays, and the receiver Lock Level is automatically set to Level 0. If
no password is entered, or if no other key or button is pressed within one (1) min-
ute of the banner text message display, the current channel displays automatically.
If the incorrect Password is entered (any Lock Level setting), a message box dis-
plays to confirm the invalid Password entry, and access to the Main Menu (in the
case of Lock Level 3), or to the Lock Levels option (User Setup menu) is denied. A
Password prompt also displays when changing the Password (see Figure 10). See
also
“
}
About the Password”). The accompanying table summarizes Lock Level
settings and associated receiver options.
Figure 10. User Setup menu and Password prompt display
IMPORTANT!
A virtual channel displayed for 20 seconds or more automatically becomes the
current (Last) channel. As Lock Level 3 disables most Lock Level 0 functions
(including channel changes), perform this action before changing the current
Lock Level setting to 3 (see also
}
About saving changes).
Содержание PowerVu D9234
Страница 1: ...Model D9234 Business Satellite Receiver Installation and Operation Guide...
Страница 2: ......
Страница 23: ...0HQXV DW D JODQFH Figure7 Menus at a glance...
Страница 54: ......
Страница 68: ......
Страница 74: ......
Страница 76: ......
Страница 77: ......


