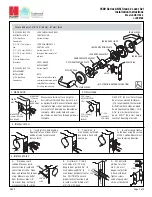
background image

Troubleshooting

Problem

Possible  

Cause

Action

No beeps or blinks when battery 

pack is connected.

• Improper plug connection.

• Pinched wires or bent pins.

• Reversed battery or dead battery.

• Check all wiring, and the three plugs.

• Check that battery voltage is 6 VDC or better 

with new batteries.

Fails power up self test. There were 

no three green LED blinks and 

beeps at the end of power up, just 

three RED LED blinks and beeps.

• Motor not connected.

• Battery voltage low.

• Check all three plug connections, inspect for cut 

or pinched through door wires. Measure battery 

voltage, must be over 6 VDC.

Unable to connect to the device with 

BLE, don’t see the expected lock 

name, or “Schlage Lock”.

• The battery cover must be installed to avoid 

Tamper Mode before BLE will work.

• The tamper switch could be broken.

• Press “+” in the app.

• Install the battery cover.

• Turn the outside lever, and check for the name 

again by pressing “+” in the app.

Latch is not retracting when access 

is granted.

• Latch tail assembly incorrect.

• Check installation step 2.

NDE is crooked in the door 

preparation.

• 

Check installation step 2, that the latch tail fits 

in the slide slot.

• Center and square the lock in the door prep.

Outside lever won’t go on.

• Key cylinder is assembled incorrectly.

• Follow lever installation pull/push instructions.

• See Cylinder and Lever installation.

• Check cam rotation and key rotation for handing.

Batteries are hot.

• A battery is reversed.

• Replace all batteries, with polarity per the 

battery pack markings. Measure the battery 

voltage as 6 VDC or more when new to confirm 

proper insertion.

Can’t do a Factory Default Reset 

(FDR)

• Motor/RTX cable is disconnected. Pins are 

bent or cut.

• Hold down the FDR button until there are two 

green blinks and beeps; then turn the inside 

lever three times. Check all connections are 

correct and no wires are cut or pins are bent.

No Wi-Fi connection

• 

Wrong Wi-Fi Configuration.

• 

Check the Wi-Fi configuration for the location.

You must have the SSID, Security type, 

Password, and in some higher security 

configurations, the user ID.

Intermittent Wi-Fi connection
Wi-Fi signal is weak

• Your phone’s Wi-Fi may be turned off.

• You may be too far from a Wi-Fi access point 

or have walls blocking the Wi-Fi signal.

• 

Use your smart phone Wi-Fi settings to confirm 

the desired SSID is present and listed under 

“Choose a Network” on your phone.  

Use the same SSID, password, and user name 

to connect your smart phone to the Wi-Fi to 

confirm the Wi-Fi is functioning at this door 

location. The NDE lock and phone can both 

connect with the proper Password and User ID.  

Make sure the SSID assigned to the lock is at 

the nearest access point with a strong signal.

After enrolling credentials and 

access files into the NDE, all valid 

cards are still denied.

• DPS (door position sensor) is not calibrated.

• Activation or Expiration date errors.

• Calibrate DPS using your mobile application.

• The DPS must be calibrated before access is 

granted. Use the ENGAGE mobile application to 

calibrate the DPS.

• The NDE clock is set automatically with the 

first communication to the Engage mobile 

application. Check the User Credential 

information in the app to make sure you have 

enrolled the “User Configuration” with the proper 

access Activation and Expiration dates.

Reader does not respond to 

credentials, (no beeps or LEDs) but 

lock passed power up self-test.

• Lock is not detecting a user in the area around 

the reader.

• Credentials should be presented by hand 

directly over the logo on the front of the reader. 

Avoid interference from lanyards, wallets, or 

purses.

Содержание NDE80

Страница 1: ...This is a printable pdf document For Smartphone friendly interactive version tap or click here...

Страница 2: ...E APPLICATIONS Search for Allegion ENGAGE in the Apple App Store or Google Play store to download the app Navigate to portal allegionengage com to access your account online A Install latch The bevel...

Страница 3: ...1C v thick doors NO ADJUSTMENT IS REQUIRED Continue to step 1 For 1B or 2 thick doors complete the following door thickness adjustment steps A Remove chassis from outside assembly Pull lever post and...

Страница 4: ...uts on assembly 1b To change handing pull lever post until it stops then rotate 180 degrees Align lever catch pin and slide hole to latch side Release lever post Assembly will click into place CAUTION...

Страница 5: ...t Install Inside Assembly 3 Install backplate first then route ribbon cable CAUTION Do not pinch ribbon cable Route cable through indicated space 4 Install spring cage Align lever catch pin to door ed...

Страница 6: ...Push Pull Lever With Interchangeable Core Cylinder Install cylinder tailpiece Rotate cam in lever post until the cam stops Insert key into cylinder and insert into lever Rotate the key clockwise 15 d...

Страница 7: ...hree green flashes of the outside LED and 3 audible beeps If the POST detects an issue the outside LED will flash red 3 times Once commissioned with the ENGAGE mobile application any issues identified...

Страница 8: ...for access The LED will blink green five times and beep if successful 2c To enroll more credentials repeat steps 2a and 2b 3 Remove user construction credentials The only way to remove credentials fro...

Страница 9: ...in the upper right corner 3 Enter the new user s first name and last name 4 Select Credentials from the menu 5 Select the icon in the upper right corner 6 Select the device you want to use to enroll t...

Страница 10: ...unt A Press and hold the FDR button for five seconds The NDE will blink green two times and beep two times B Turn the inside lever three times within 20 seconds LED will blink red and lock will beep w...

Страница 11: ...the FDR button until there are two green blinks and beeps then turn the inside lever three times Check all connections are correct and no wires are cut or pins are bent No Wi Fi connection Wrong Wi Fi...

Страница 12: ...tions this radio transmitter may only operate using an antenna of a type and maximum or lesser gain approved for the transmitter by Industry Canada To reduce potential radio interference to other user...

Страница 13: ...l ext rieur APPLICATIONS WEB ET MOBILES DE LA TECHNOLOGIE ENGAGE MC Cherchez Allegion ENGAGE sur l App Store iOS ou sur le Google Play Store Android pour t l charger l application Rendez vous portal a...

Страница 14: ...EQUIERE NING N AJUSTE Contin e con el paso 1 Para puertas de 1B o 2 de espesor siga los pasos a continuaci n para ajustar el espesor de la puerta L L Pour les portes dont l paisseur est de 44 mm 1C v...

Страница 15: ...age ext rieur 1 Prepare la unidad externa Pr parez l assemblage ext rieur 1a Corrobore que el orificio de deslizamiento en el chasis est alineado con la clavija de sujeci n de la manija V rifiez que l...

Страница 16: ...dans le canal m tallique LH Conecte el cable Branchez le c ble O OU RH Empuje e inserte el cable Introduisez le c ble en le poussant Conecte el cable Branchez le c ble Tienda el cable en el canal de...

Страница 17: ...en place avant de serrer les boulons Clavija de sujeci n de la manija Pivot d entra nement du levier Tama o real Taille r elle 5 Instale el escudo interno Installez l cusson int rieur 5a Conecte el c...

Страница 18: ...a hasta que la leva se detenga Faites pivoter la came dans le support du levier jusqu ce que la came s arr te Coloque la llave en el cilindro e inserte en la manija Gire la llave 15 grados en el senti...

Страница 19: ...as alcalinas de alta calidad en el soporte de la bater a Siga las indicaciones de las marcas de polaridad Instale solo 4 pilas alcalinas AA nuevas Introduisez quatre piles alcalines de qualit dans le...

Страница 20: ...or se activa cuando detecta la mano del usuario que sostiene la credencial por lo que la funcionalidad puede parecer diferente a la de un lector el ctrico montado en la pared Generalmente la palanca e...

Страница 21: ...n m vil ENGAGE para configurar los ajustes de la cerradura administrar el acceso de usuarios y ver auditor as y alertas AVERTISSEMENT Le mode d acc s autonome directeur N est PAS requis pour faire mar...

Страница 22: ...los ajustes de la cerradura vuelvan a la configuraci n original que haya tra do de f brica Elimina configuraciones bases de datos y requiere que se vuelva a capturar la cerradura Una FDR no eliminar l...

Страница 23: ...ontrase a debe tener al menos 10 caracteres de longitud y contener tres de los siguientes elementos letras min sculas a z letras may sculas A Z n meros 0 9 y caracteres especiales por ej amp No pueden...

Страница 24: ...trase a y en algunas configuraciones de mayor seguridad la ID de usuario La configuraci n de Wi Fi puede ajustarse en la cerradura durante el proceso de puesta en marcha o en cualquier momento mientra...

Страница 25: ...aintien et Lock Down Confinement Lock Down Bloqueo Cambia el estado de la cerradura a bloqueado y deshabilita todas las credenciales con excepci n de Pass Through Paso y Freeze Congelamiento Presente...

Страница 26: ...base de donn es du nuage ENGAGE Si la serrure n a pas t configur e pour tre connect e au r seau Wi Fi vous devez d abord vous connecter la serrure gr ce l application mobile ENGAGE et s lectionner Up...

Страница 27: ...er a Conexi n incorrecta del enchufe Cables aplastados o clavijas dobladas Bater a colocada al rev s o bater a agotada Verifique todo el cableado y los tres enchufes Compruebe que el voltaje de la bat...

Страница 28: ...is fiches V rifiez que la tension de la pile est de 6 VCC ou plus avec de nouvelles piles Le test d auto diagnostic de mise sous tension a chou Les 3 clignotements verts et les 3 bips n ont pas eu lie...

Страница 29: ...la interferencia que pudiera causar un funcionamiento no deseado Declaraci n de exposici n a la radiaci n de la FCC Para cumplir con los requisitos de exposici n a radiofrecuencia de la FCC IC para l...

Отзывы: