


SBIG ST-402 Operating Manual
Page 12
have the latest firmware periodically run the
Driver Checker,
which checks our servers for later drivers and updates your system
accordingly.
Serial Number
– If you ever need to know this, here it is. It’s on the label
on the back of the camera as well.
Readout Mode Table
– This shows the various readout modes the ST-402
supports. The
High
-resolution mode offers the full 765 x 510
resolution with 9 micron square pixels. The ST-402 also supports
binning
whereby groups of pixels are combined to form a single
larger pixel. This reduces the resolution but increases the
sensitivity as larger pixels capture more light. The
Medium
and
Low
-resolution modes utilize 2x2 and 3x3 binning as you can see
by the
Image Height/Width
and
Pixel Size
entries
.
Finally, review the information presented, then close the dialog by clicking
in it.
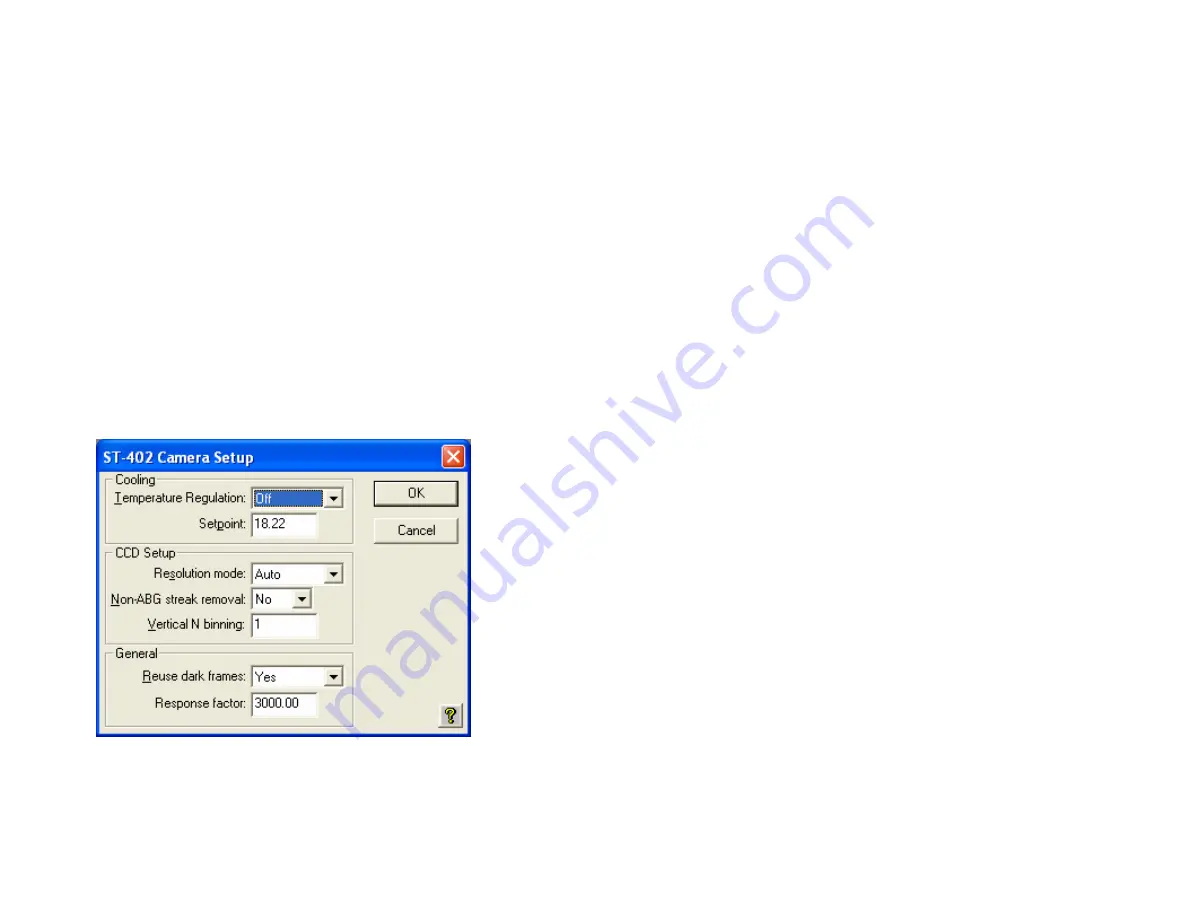
Camera Setup
Use the
Setup
command in the
Camera
menu to see the
ST-402 Camera
Setup
dialog shown below.
The key items in this dialog are described individually below.
Temperature Regulation
– This allows you to turn the TE cooling on and
off. Typically at the start of an imaging session you’ll turn the
cooling on and then back off at the end of the night. For now let’s
just leave it off.
SBIG ST-402 Operating Manual
Page 13
Setpoint –
When the
Temperature Regulation
is on, set this to the
absolute
temperature in degrees C
to which the CCD should be cooled.
We know that cooling reduces dark current but there is a limit as to
how much the CCD can be cooled by the TE cooler.
We recommend choosing a temperature that is 20 to 23 degrees
below the ambient temperature. Choosing a lower temperature
won’t hurt the camera but you’ll notice in the
Link Status
field
(bottom of screen) that the CCD never attains the temperature and
the TE stays at 100%. It can take several minutes for the
temperature to settle in, but if you see the TE stuck at 100% simply
increase the
Setpoint Temperature
so it can regulate.
Resolution mode
– This popup controls the readout mode discussed in the
Camera Information
section above. You can select the
High
,
Medium
or
Low
resolutions modes directly but we recommend
you start with the
Auto
resolution mode. In
Auto
mode the camera
uses the high-resolution mode everywhere except in the
Full
Frame Focus
mode (discussed below) where it uses the low-
resolution mode to speed up the image throughput.
Reuse dark frames
– This is a handy feature and you should set it to
Yes
.
What that means is that when you’re taking images where you
want to
subtract dark frames
the software will reuse a previously
captured
dark frame
if it’s the same exposure time and at the same
CCD temperature.
You can read about the other items in the
Help
but for now just leave them
set the way they are. Click
OK
to register your changes.
Grab Command
Let’s take a
dark frame
with your new camera. If you haven’t done so
already, screw in the nosepiece and put the rubber cap on it. While the
shutter was designed to block light from the telescope for
dark frames
, it
can’t block flooding room light from leaking around the edges of the shutter
blade. That’s why you should cover it under bright light illumination.
Now, use the
Grab
command in the
Camera
menu and set the dialog as
shown below:


