SBIG ST-402 Operating Manual
Page 2
Extremely
Important!
In the past SBIG has shipped products like the STV, ST-5C and
ST-237/A that used a 12-Volt, Center-Negative power supply.
Starting with the ST-402 we are switching to Center-Positive
12-Volt power supplies. How do you know the difference?
All 12-Volt, Center-Positive power jacks and receptacles are
locking with a threaded collar
.
Don’t ever try to mate an
unthreaded power supply to a threaded camera or vice-versa
.
USB Cable –
Included is a 15-foot, USB 2 certified, A-to-B type, USB
cable. USB has a limit of 15-foot cables but the range can be
extended with active boosters. Relatively low-cost (~$30) 15-foot
boosters that can be stringed together are available from such
sources such as <www.usbgear.com>. Long haul boosters (more
expensive) are available from <www.icron.com>. Also note that
putting a hub at 15 feet will allow you to go another 15 feet.
Tracking Cable –
This cable looks like a simple “RJ-11 telephone cable”
but in fact is a “6-pin reversed RJ-11 telephone cable”. Telescopes
require 6-pin autoguider cables and reversed means that unlike
ordinary phone cables, this one is flips the order of the wires. You
can tell a tracking cable from an ordinary cable by noting that with
tracking cables the tines that lock the RJ-11 jack into the receptacle
are both on the same flat side of the cable or when the ends are put
side by side the colored wires inside are in opposite order on the
two connectors.
Software –
We include several CD-ROMs with the ST-402 but the most
important one is labeled “
SBIG Software and Catalog
”. This
disc contains the
drivers
and
CCDOps
software you’ll need to use
the camera.
Very Important
:
Before you attach the ST-402 to your computer for the first
time you MUST install the software as described below.
SBIG ST-402 Operating Manual
Page 3
2.
Installing the Software
Installing USB drivers on a
Windows
system can be a difficult task if you
don’t follow the instructions to the letter. Please don’t plug the camera into
the computer until instructed to do so below and please follow the
instructions carefully.
1.
Disable Driver Signing
–
Windows XP
adds an extra level of security
to installing drivers that will complicate our installation. To disable it
open the
System
Control Panel in the
Start Menu
and then select the
Hardware
tab. Click the
Driver Signing
button and in the dialog that
appears select
Ignore
then click
OK
. Click
OK
one more time to close
the Control Panel.
2.
Insert the
SBIG Catalog and Software
CD-ROM in your computer
and on most systems the installer program will automatically start. If it
doesn’t, explore the CD-ROM drive and double-click on the
autorun.exe
icon. Then click on the
Setup a New Camera
button.
3.
Install CCDOps
– Click on the
Install
CCDOps
button to install it on
your computer, and then follow the on-screen instructions.
CCDOps
is
our powerful yet simple-to-use image acquisition and image processing
software and we’ll use it extensively throughout this manual.
4.
Install the Driver Checker
– Click on the
Install
Driver Checker
button to install it on your computer and then follow the on-screen
instructions. The
Driver Checker
is a utility program that installs and
maintains the drivers that are required for operating the ST-402 under
the Windows Operating System.
At the end of the install when you are given the
option
to
launch
the
Driver Checker
. Check that option.
5.
When the
Driver Checker
starts it will ask you if you have an
Internet
Connection
on this machine. If you do then answer
Yes
otherwise
answer
No
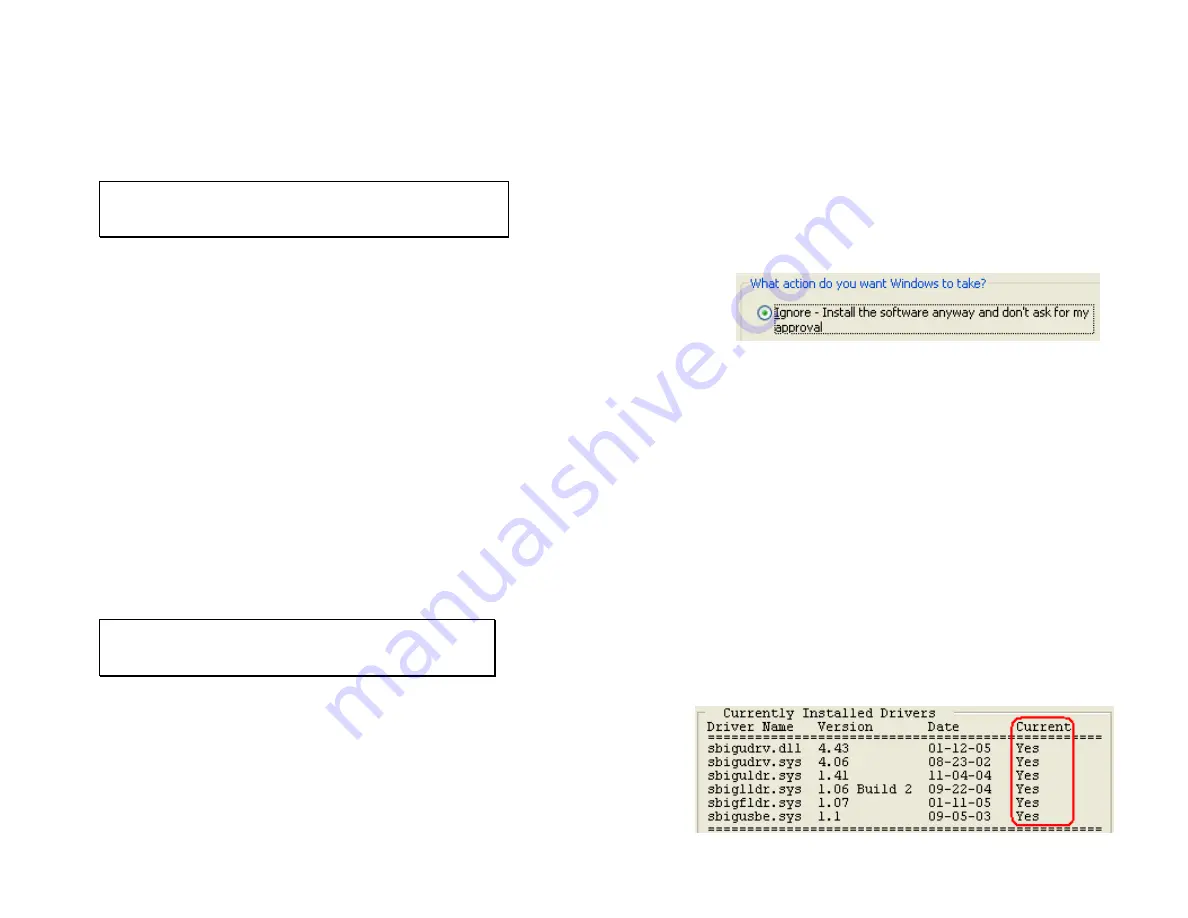
. The Driver Checker will install the camera drivers and at
this point all your drivers should all be current:


