


26
2.1.2
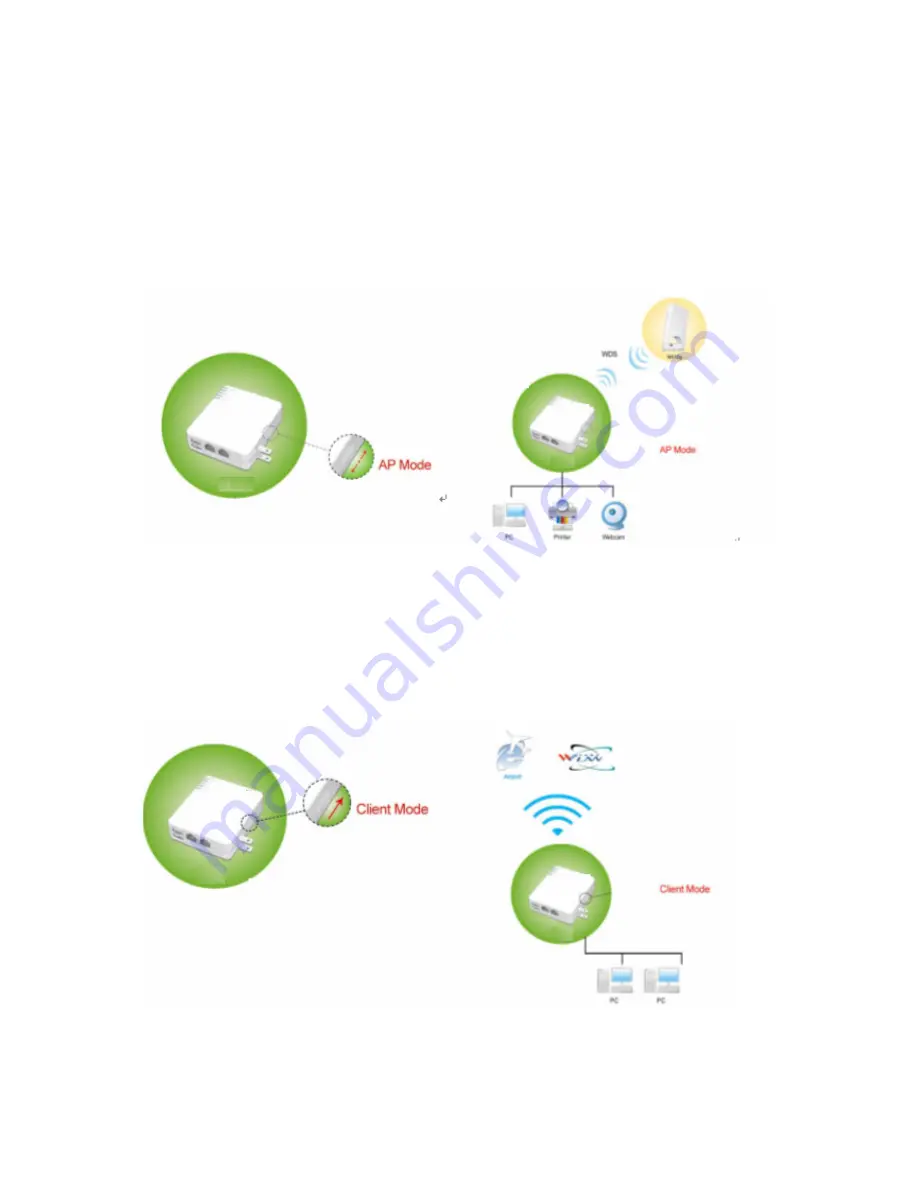
AP Mode Hardware connection and application
Under AP mode, it supports 2 LAN ports as Bridge, and user can connect to GR-1100 via
LAN port or Wireless (WDS). The administrator can do the Quick Setup including LAN Setup,
Wireless Setup, USB Disk Management Setup, User Account Management Setup, FTP
Server Setup, Web Camera Setup, Time Server Setup, Password Setup, Samba Server
Setup and Printer Server Setup.
2.1.3
Client Mode Hardware connection and application
As Client Mode, GR-1100 will be a Wireless Adapter, and users can plug cable to each 2 LAN
ports and then connect Internet via Wireless.
Содержание Gr-1100
Страница 1: ...1 ...
Страница 16: ...16 1 3 1 Product Appearance Introduction ...
Страница 19: ...19 Step2 Click on Properties button Step3 Double click on Internet Protocol TCP IP ...
Страница 24: ...24 If it can t work it will show Request timed out ...
Страница 35: ...35 ISP and then click on Next button to connect to 3 2 2 LAN Setup ...
Страница 78: ...78 5 Apply Cancel Click on Apply button to continue Click on Cancel button to clean the setting on this page ...
Страница 104: ...104 Step 3 Click Next Step 4 Click the Local printer attached to this computer and then click Next ...
Страница 105: ...105 Step 5 Click the Create a new port and select the Standard TCP IP Port and then click Next Step 6 Click Next ...
Страница 125: ...125 ...
Страница 127: ...127 3 8 Logout To logout the router via click on Logout button in Menu and system will return to Login homepage ...
Страница 134: ...134 3 10 Site Map The GR 1100 provides site map clicking for each icon and do the setting easily from the home page ...
Страница 169: ...169 Step 6 Input Username and Password of your own You will see like as below monitor screen ...
Страница 175: ...175 Step 3 Click Next Step 4 Click the Local printer attached to this computer and then click Next ...
Страница 176: ...176 Step 5 Click the Create a new port and select the Standard TCP IP Port and then click Next Step 6 Click Next ...
Страница 202: ...202 Site Map The GR 1100 provides site map clicking for each icon and do the setting easily from the home page ...
Страница 238: ...238 Step 3 Click Next Step 4 Click the Local printer attached to this computer and then click Next ...
Страница 239: ...239 Step 5 Click the Create a new port and select the Standard TCP IP Port and then click Next Step 6 Click Next ...
Страница 265: ...265 5 9 Site Map The GR 1100 provides site map clicking for each icon and do the setting easily from the home page ...
Страница 267: ...267 ...
Страница 269: ...269 Step5 1 Click on the mail 2 Click on the address https www dyndns org account confirm xxx Step6 Click on login 2 ...
Страница 270: ...270 Step7 Click on the My Services under Account Step8 And then click on Add Host Services ...


