


205
5.2
Quick Setup
Typical Configuration Manager Page consists of two frames. The left frame contains all the
means available for device configuration. Menus are indicated by file icons, and related
menus are grouped into categories, such as LAN, WAN and etc., and indicated by folder icon,
depending on whether the group of menus are expanded or not. You can click on any of
these to display a specific configuration page.
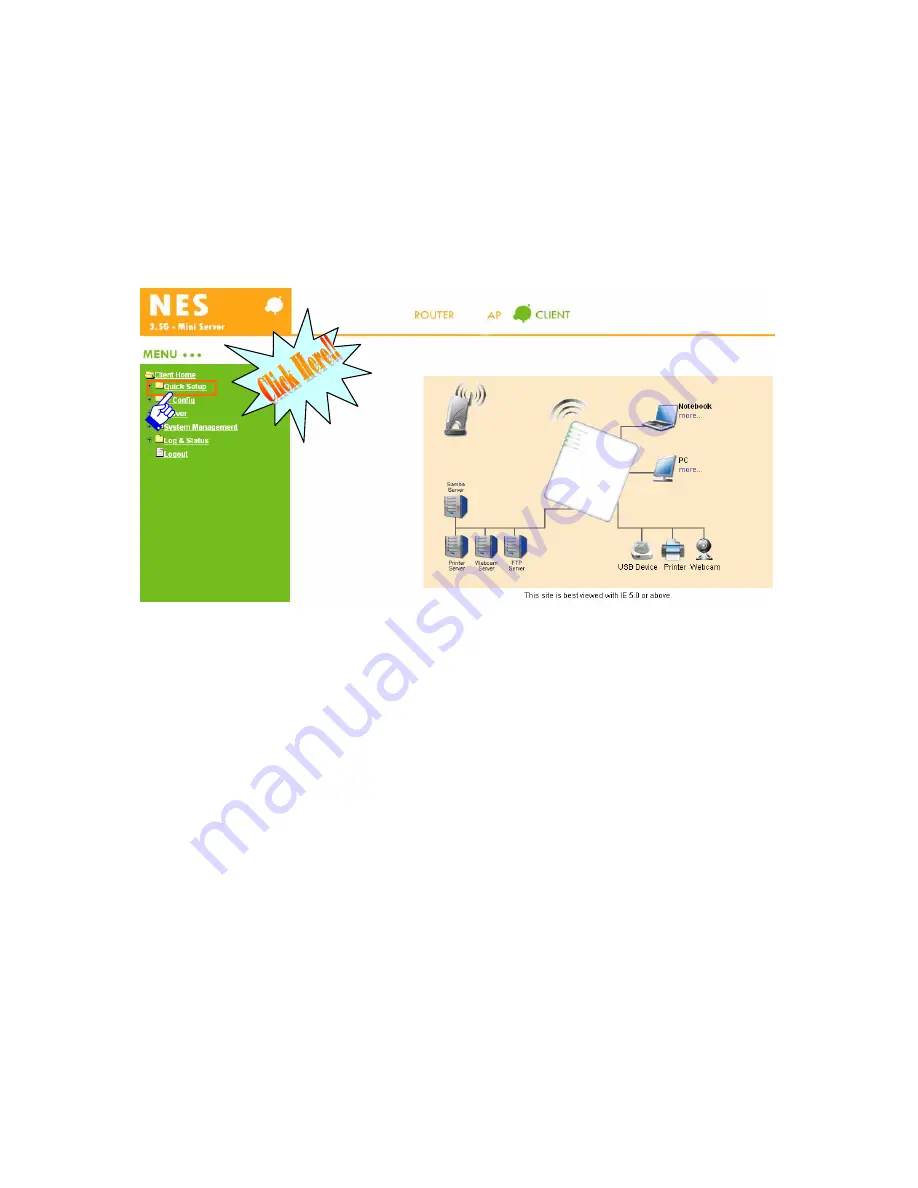
The above diagram shows all PCs and devices connected to your GR-1100 and theirstatus.
Click on “
Quick Setup
” in the left screen of the main menu. Then you’ll see the “
Basic
” and
“
Application
” selecting screen appears and do the setting for each items.
Содержание Gr-1100
Страница 1: ...1 ...
Страница 16: ...16 1 3 1 Product Appearance Introduction ...
Страница 19: ...19 Step2 Click on Properties button Step3 Double click on Internet Protocol TCP IP ...
Страница 24: ...24 If it can t work it will show Request timed out ...
Страница 35: ...35 ISP and then click on Next button to connect to 3 2 2 LAN Setup ...
Страница 78: ...78 5 Apply Cancel Click on Apply button to continue Click on Cancel button to clean the setting on this page ...
Страница 104: ...104 Step 3 Click Next Step 4 Click the Local printer attached to this computer and then click Next ...
Страница 105: ...105 Step 5 Click the Create a new port and select the Standard TCP IP Port and then click Next Step 6 Click Next ...
Страница 125: ...125 ...
Страница 127: ...127 3 8 Logout To logout the router via click on Logout button in Menu and system will return to Login homepage ...
Страница 134: ...134 3 10 Site Map The GR 1100 provides site map clicking for each icon and do the setting easily from the home page ...
Страница 169: ...169 Step 6 Input Username and Password of your own You will see like as below monitor screen ...
Страница 175: ...175 Step 3 Click Next Step 4 Click the Local printer attached to this computer and then click Next ...
Страница 176: ...176 Step 5 Click the Create a new port and select the Standard TCP IP Port and then click Next Step 6 Click Next ...
Страница 202: ...202 Site Map The GR 1100 provides site map clicking for each icon and do the setting easily from the home page ...
Страница 238: ...238 Step 3 Click Next Step 4 Click the Local printer attached to this computer and then click Next ...
Страница 239: ...239 Step 5 Click the Create a new port and select the Standard TCP IP Port and then click Next Step 6 Click Next ...
Страница 265: ...265 5 9 Site Map The GR 1100 provides site map clicking for each icon and do the setting easily from the home page ...
Страница 267: ...267 ...
Страница 269: ...269 Step5 1 Click on the mail 2 Click on the address https www dyndns org account confirm xxx Step6 Click on login 2 ...
Страница 270: ...270 Step7 Click on the My Services under Account Step8 And then click on Add Host Services ...


