5
Getting Star
ted
Accessing the Main Menu
You can configure various adjustments and preference settings on the monitor screen.
☞
In this manual, the buttons and their names on the camera are used for description.
■
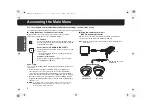
Using the buttons on the base circuit board
Open the dome cover. Place the dome cover back once you have
finished the settings. (Refer to the Installation Manual.)
Sync. lamp
You can set the “SYNC”-(INT/L-L) without displaying the Main menu on
the monitor.
1
While this lamp is turned off, the Main menu is not displayed, or
otherwise the cursor is located on the option other than “SYNC”.
In that case, press and hold the SET button to enter into the Main
menu, or press the Select button to UP or DOWN to turn on the lamp.
2
Once the lamp turns on, press the Select button to RIGHT or LEFT.
A lighted lamp indicates that “INT” is selected, while a flashing lamp
indicates “L-L”.
■
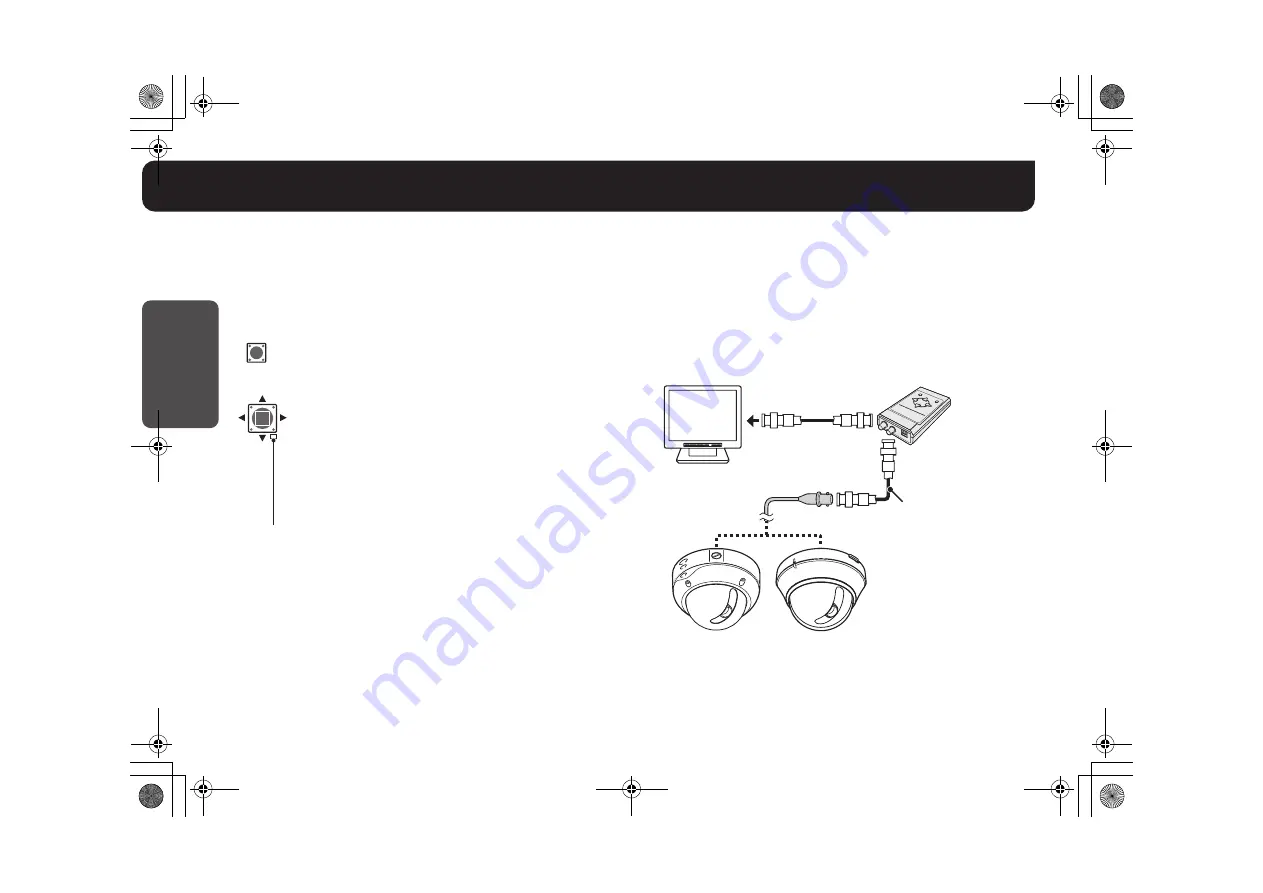
Using the Camera Control Unit
(VAC-70: Separately ordered)
Camera can be controlled remotely during setting or adjustment.
• Please refer to the instruction manual for VAC-70.
SET button
Press and hold the button to enter into the Main menu, or
perform other operations such as determining a selected
value during the settings.
Select button (UP, DOWN, RIGHT, LEFT)
Press the button up and down or side to side to select an
item or set up.
• Press and hold the button to continually change the
items that appear.
Simple zoom adjustment
While the camera captures an image, you can adjust
Zoom (
d
: Wide or
c
: Tele).
MEMO:
To check the image on the monitor near the camera unit, connect the
MONITOR OUT pin and the GND pin on the base circuit board to a
monitor using an alligator clip cable.
UP
DOWN
LEFT
RIGHT
SET
Note:
Make sure to disconnect the unit after setting or adjustment is
completed.
VAC-70
VDC-DP7584
VDC-DP7585P
VCC-P7574
VCC-P7575P
RG-6U (5C-2V) cable,
500 m max.
BNC type
L5BH2_BK2_US_XE(GB).book 5 ページ 2006年3月2日 木曜日 午後8時41分


