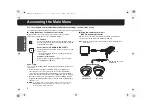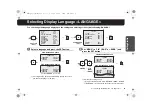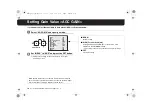
10
Getting Star
ted
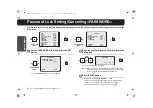
Naming Cameras <TITLE>
3
Repeat step
2
to complete the name and select
“ID”.
Example: ROOM1
• The letters “???....” do not appear on the monitoring screen, but
if you select “ON” for the “TITLE” and then enter no letter at all,
the monitor will show you “???....”.
4
Select “POSITION” – “SET” and press the SET
button.
R
On the normal monitoring screen, the name will be displayed.
5
On the monitor screen, determine the location
where the name should be displayed by pressing
the Select button up-down or side to side; and
then press the SET button.
R
Returns to the settings screen.
6
Set “MENU” to “END” and press the SET button.
R
Finishes the settings screen and display the name on the
normal monitoring screen.
• If you want to return to the previous screen, select “BACK” and
press the SET button.
■
To delete the name specified:
Set “PRESET” to “ON”, and press the SET button.
R
All the characters will be displayed with “?”.
MEMO:
If you want the name to be displayed on the monitor in two lines,
insert the line feed mark (
v
) in the “ID string” wherever you want to
start a new line. On the monitor screen, the name will be displayed
in two lines. You can enter up to 16 characters including the line
feed mark (
v
).
TITLE SETTING
ABCDEFGHIJKLM
NOPQRSTUVWXYZ
0123456789 :-v
·
ID ROOM1???????????
x
·ID
ID string
ID ROOM1???????????
x
·POSITION
PRESET
MENU
SET y
OFF
BACK
·POSITION
SET
R
MEMO:
• If an alarm signal is input, the camera name on the screen will
blink during the time that has been set in “DURATION” (See page
32). When the camera name is not specified, “???....” will blink.
• When masking setting is “ON”, the camera name will not be
displayed.
ROOM1
SET
R
L5BH2_BK2_US_XE(GB).book 10 ページ 2006年3月2日 木曜日 午後8時41分


