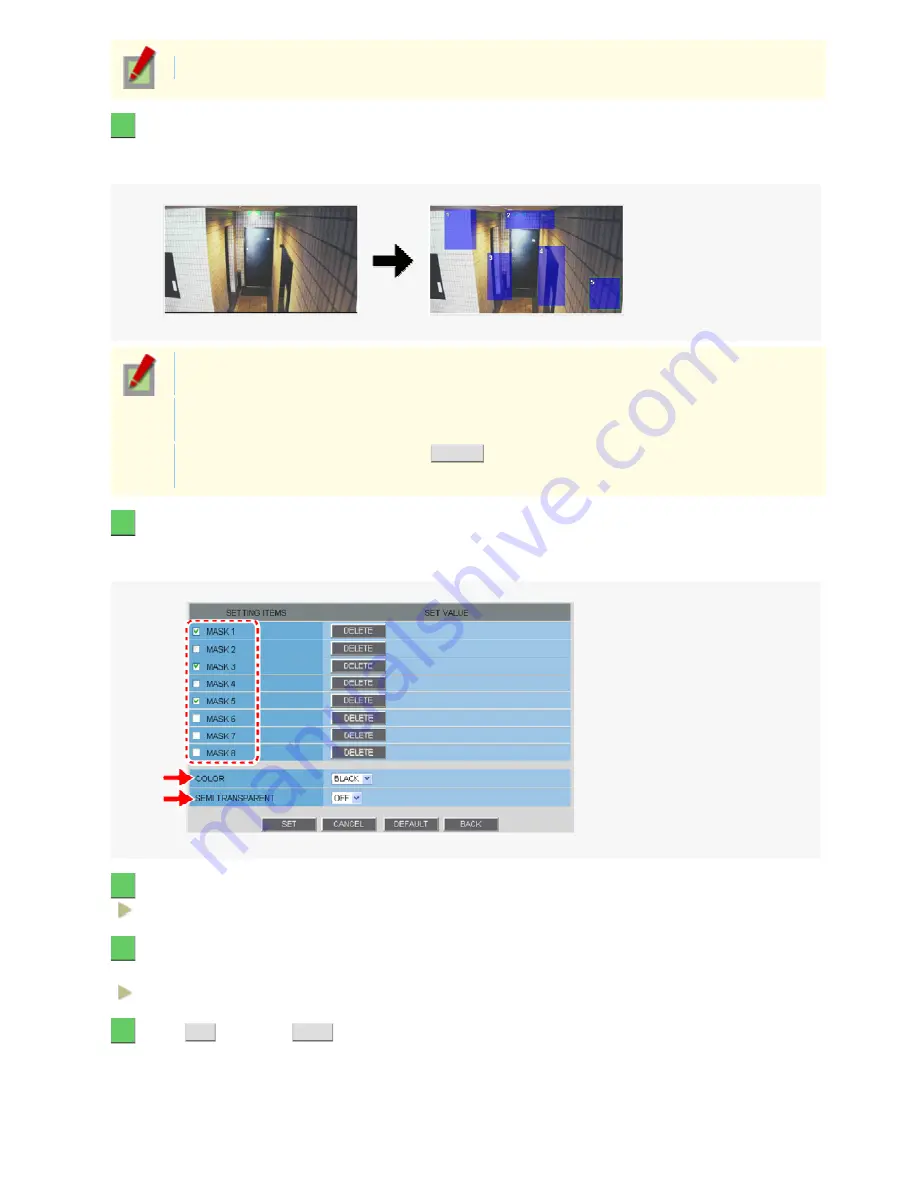
The mask setting screen shows the video at the angle of view that you see on the live screen.
2
Drag the mouse over the live video image to select the area you want to mask.
A mask pattern appears over the selected area.
You can set up to eight mask patterns on the screen.
To select a mask pattern, just click on it. The selected mask pattern is shown with a yellow green
border.
To move a mask pattern, select it and then drag the mouse. To resize a mask pattern, place the
mouse pointer over its border and then drag the mouse.
To delete a set mask pattern, click the
DELETE
button corresponding to the pattern number or drag
it out of the screen.
3
Select the [SETTING ITEMS] check box.
Each mask pattern for which you selected the check box appears on the live screen.
You may select two or more check boxes.
4
In [COLOR], select the color of the mask pattern(s).
BLACK, GREY, WHITE, RED, BLUE
5
In [SEMI TRANSPARENT], select whether to enable or disable the transparency of the
mask pattern(s).
OFF (Disables transparency), ON (Enables transparency)
6
Click
SET
and then
BACK
.
The settings are saved and you return to the sub menu.
Working with Administrator Configuration Screens 31/50


