background image

22

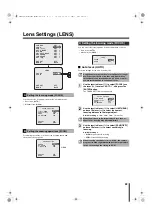
Lens Settings (LENS)

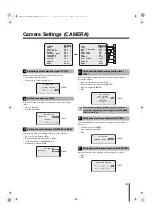
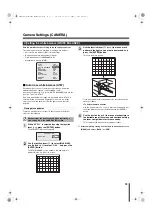
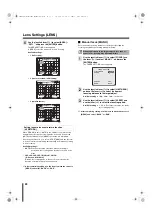
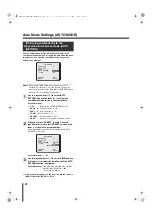
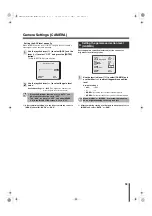
You can select the focusing mode from the following options.

• Auto focus (AUTO)

• Manual focus (MANU)

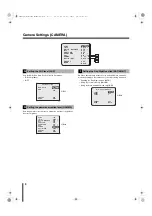
For zooming operations, you can set the zooming speed and 
electronic zooming options.

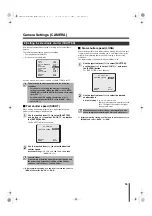
You can select the focusing mode from the following two options.

• Auto focus (AUTO)

• Manual focus (MANU)

b

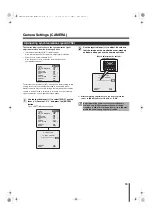
Auto focus (AUTO)

Performs settings for the auto focus function.

1

Use the joystick lever (

xy

) to select [FOCUS], use 

the lever (

vw

) to select “AUTO 

y

”, and press the 

[ENTER] button.

The FOCUS SETTING screen appears.

2

Use the joystick lever (

xy

) to select [LIMIT NEAR] 

and use the lever (

vw

) to select the nearest 

focusing distance to the target object.

Available settings: 

10cm, 30cm, 50cm, 1m, 3m, 5m

3

Use the joystick lever (

xy

) to select [SENSITIVITY] 

and use the lever (

vw

) to select sensitivity in 

focusing.

Available settings: 

• HIGH: 

High sensitivity focusing

• LOW: 

Low sensitivity focusing

A

Setting the focusing mode (FOCUS)

B

Setting the zooming operations (ZOOM)

 CAMERA

 LENS

 PAN/TILT

 AUTO MODE

 ALARM

y

 PRIVACY MASK

 PASSWORD

 LANGUAGE

 OPTION

 PRESET
 MENU

LENS

 
 FOCUS

 ZOOM

 PRESET
 MENU

A

B

SET
SET
SET
SET
SET
SET
SET
SET
SET

OFF
BACK

AUTO
SET

OFF
BACK

FOCUS SETTING

 
 LIMIT NEAR

m

 SENSITIVITY
 AREA

 AF RETURN

 PRESET
 MENU

1

m

HIGH
SET
30S

OFF
BACK

ZOOM SETTING

 
 SPEED
 EL ZOOM
 V-RESO.UP
 

 PRESET
 MENU

3
OFF
OFF

OFF
BACK

P24

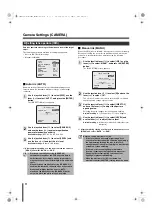
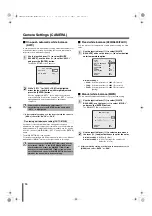
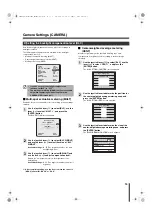
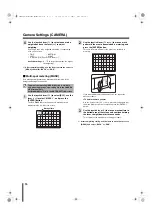
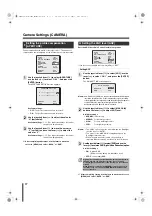
A Setting the focusing mode (FOCUS)

Using the auto focus function in surveillance for longer 
hours shortens the life of the lens unit. If performing 
surveillance for an extended period (24 hours or more), 
you are recommended to use manual focus.

When the distance to the target object is less than or 
equal to 1m, focusing may become difficult.

When focusing sensitivity is set to “HIGH”, the camera 
may react to even slight movements of the target object. 
In this case, change the setting to “LOW”.

LENS

 
 FOCUS

 ZOOM

AUTO
SET

FOCUS SETTING

 
 LIMIT NEAR
 SENSITIVITY
 AREA

 AF RETURN

1m

HIGH
SET
30S

L5BW2_XE(VCC-MC800P_MC700P)(GB).book  22 ページ  2007年1月18日 木曜日 午前10時18分

Содержание VCC-9700P

Страница 1: ...P VCC MC700P Color CCD Camera About this manual Before installing and using this unit please read this manual carefully Be sure to keep it handy for later reference L5BW2_XE VCC MC800P_MC700P GB book 1 ページ 2007年1月18日 木曜日 午前10時18分 ...
Страница 2: ...QUENCE GROUP 29 Deleting a preset position DELETE 30 Switching to a preset position PRESET GO 30 B Making the amount of movement in the screen constant PROPORTIONAL 31 C Displaying a still image while switching the surveillance location FREEZE 31 D Setting the starting point 0 degrees angle information SET NORTH 31 E Limiting the tilting angle TILT LIMIT 32 Auto Mode Settings AUTO MODE 33 A Monito...

Страница 3: ...corder and alarm buzzer Protecting privacy and ensuring security Masking patterns can be placed over defined image areas to protect privacy Password authorization can be set for camera operation Additional convenient functions Automatic image flipping AUTO FLIP function allows you to view the surveillance image in an upright position when the camera is tilted beyond the straight down position and ...

Страница 4: ...coloration or other damage Be careful when installing close to the ceiling in a kitchen or boiler room as the temperature may rise to high levels Cleaning Dirt can be removed from the cabinet by wiping it with a soft cloth To remove stains wipe with a soft cloth moistened with a soft detergent solution and wrung dry then dry by wiping with a soft cloth Do not use benzine thinner or other chemical ...

Страница 5: ...ARM PLAY STOP PLAY SPEED REC STOP SEQ ON PAN ON TOUR ON SEQ PAN TOUR OFF ONE PUSH AF FOCUS FAR FOCUS NEAR IRIS CENTER GO TO PRESET TO SUB SCREEN SYSTEM SETUP MAP ENTER PLAY SPEED IRIS IRIS ADDRESS DVR MUX ADDRESS STILL TIMER ON OFF CLOCK ADJUST C A M 1 D V R 1 C A M 1 D V R 1 MENU MENU CODE SEQUENCE AUDIO MENU RESET TO 10 KEY MAIN MONITOR MON2 LOCK UNLOCK TO MAIN SCREEN ADDRESS AWB SET AUX ON BLC ...

Страница 6: ...To exit from the menu screen Move the cursor to MENU and select the END option then press the ENTER button Memo If there is no menu operation for three minutes or more the menu screen is automatically exited To display the menu screen again Press the MENU button in the CAMERA MENU CONTROL screen To restore your selected options to initial values Move the cursor to PRESET and change its option to O...

Страница 7: ... this manual assumes the advanced menu When the password lock is enabled you have to enter your password before displaying the main menu by pressing the MENU button To enter your password perform the following procedures 1 Use the joystick lever vw to select the digit and use the lever xy to select a number The PASSWORD screen appears 2 After entering your four digit password press ENTER If the pa...

Страница 8: ...age settings for menus 9 Miscellaneous settings OPTION Performs settings for optional functions including auto flip sway correction auto pursuit and mirroring according to your preferences CAMERA y LENS y PAN TILT y AUTO MODE y ALARM y PRIVACY MASK y PASSWORD y LANGUAGE y OPTION y PRESET MENU 1 3 5 7 2 4 6 8 9 SET SET SET SET SET SET SET SET SET OFF BACK INT AUTO ATW OFF OFF ON ON 0 45 AUTO SYNC I...

Страница 9: ...he target object horizontally or vertically ON y OFF CAMERA y LENS y PAN TILT y AUTO MODE y ALARM y PRIVACY MASK y PASSWORD y LANGUAGE y OPTION y PRESET MENU SYNC IRIS y WHITE BALANCE y BLC SHUTTER APERTURE y AGC y GAMMA DAY NIGHT y PRESET MENU A B F E D C SET SET SET SET SET SET SET SET SET OFF BACK INT AUTO ATW OFF OFF ON ON 0 45 AUTO OFF BACK A Adjusting synchronization signal SYNC B Setting le...

Страница 10: ...te mode only B W SYNC IRIS y WHITE BALANCE y BLC SHUTTER APERTURE y AGC y GAMMA DAY NIGHT y PRESET MENU G H I INT AUTO ATW OFF OFF ON ON 0 45 AUTO OFF BACK G Setting the AGC level AGC H Setting the gamma correction level GAMMA GAIN SETTING NORMAL OFF OFF BACK MAX GAIN DNR PRESET MENU P17 SYNC IRIS y WHITE BALANCE y BLC SHUTTER APERTURE y AGC y GAMMA DAY NIGHT y PRESET MENU INT AUTO ATW OFF OFF ON ...

Страница 11: ... SETTING screen appears 2 Use the joystick lever vw to adjust the value so that the image on the monitor does not move up and down when you use the camera switcher After completing adjustment use the lever to move the cursor to MENU and select BACK or END A Adjusting synchronization signal SYNC SYNC IRIS y WHITE BALANCE y BLC SHUTTER APERTURE y AGC y GAMMA DAY NIGHT y PRESET MENU INT AUTO ATW OFF ...

Страница 12: ...ure opening value Selecting the value changes the lens aperture opening Available settings 1 close darker 17 open brighter 4 Use the joystick lever xy to select LEVEL and use the lever vw to adjust the iris level Available settings 0 video level is darker 100 video level is brighter After completing setting use the lever to move the cursor to MENU and select BACK or END B Setting lens aperture IRI...

Страница 13: ...d press the ENTER button The ATW MASKING screen appears A mask pattern is displayed in the top left of the screen 3 Use the joystick lever xy or vw to move a mask pattern to the light source area to be masked and press the ENTER button This sets the mask pattern If you want additional mask patterns to be placed repeat the above procedure To delete the mask pattern Use the joystick lever xy or vw t...

Страница 14: ... select WHITE BALANCE and use the lever vw to select desired color temperature option Available settings 3200 Color temperature of 3 200K For indoor 5600 Color temperature of 5 600K For outdoor FLUO Color temperature of 4 200K For fluorescent lighting b Manual white balance MWB You can manually adjust white balance to your desired setting 1 Use the joystick lever xy to select WHITE BALANCE use the...

Страница 15: ...b Center weighted average metering CENT Measures light mainly at the specified metering zone and compensates for brightness level according to the best image obtained 1 Use the joystick lever xy to select BLC use the lever vw to select CENT y and press the ENTER button The BLC SETTING POSITION screen appears 2 Use the joystick lever to determine the position for the center weighted average meterin...

Страница 16: ...metering and press the ENTER button This sets the mask pattern for the area to be excluded in metering If you want additional mask patterns to be set repeat the above procedure To delete the mask pattern Use the joystick lever xy or vw to place a mask pattern over the mask pattern to be cancelled then press the ENTER button 3 Use the joystick lever y to move a mask pattern to the bottom area of th...

Страница 17: ...ct LONG y and press the ENTER button The ES SETTING screen appears 2 Use the joystick lever vw to select the desired shutter speed Available settings x1 x2 x4 x8 x16 x32 Each option represents a multiple of field time The higher the number the longer the exposure time After completing setting use the lever to move the cursor to MENU and select BACK or END E Setting the electronic shutter SHUTTER T...

Страница 18: ...eased 2 Use the joystick lever xy to select MAX GAIN and use the lever vw to adjust AGC level Available settings NORMAL Initial setting MIDDLE For dark target object HIGH For very dark target object LOW For bright target object Memo The LOW option cannot be selected when the Day Night function is set to AUTO The value for the MAX GAIN setting depends on the Day Night function mode When the gain le...

Страница 19: ...lever vw to adjust the gamma correction level Available settings 0 45 γ 0 45 1 γ 1 MODE1 Increases the contrast of the dark parts MODE2 Further increases the contrast of the dark parts After completing setting use the lever to move the cursor to MENU and select BACK or END Setting the AGC level manually When the Day Night function is set to AUTO the AGC function cannot be set to OFF The AGC can be...

Страница 20: ...OLOR B W Sets the luminance level for switching from the color mode to the black and white mode Available settings 1 7 The larger the value the darker the switching luminance level 2 B W COLOR Sets the luminance level for switching from the black and white mode to the color mode Available settings 1 7 The larger the value the brighter the switching luminance level Memo In the ADJ setting changing ...

Страница 21: ...he image 1 Use the joystick lever xy to select DAY NIGHT use the lever vw to select COLOR y and press the ENTER button The D N SETTING COLOR screen appears 2 Use the joystick lever xy to select EXT ALARM and use the lever vw to select the channel used for external alarm input When EXT ALARM is set to 1 8 receiving external alarm input automatically switches the color mode to the black and white mo...

Страница 22: ...on to OFF Available settings ON The color burst signal is turned on OFF The color burst signal is turned off 3 Use the joystick lever xy to select FOCUS and use the lever vw to select focus compensation mode In general set this option to 1 If images are out of focus set this option to 2 Available settings 1 Near infrared wavelength correction around 900nm is set during the black and white mode 2 V...

Страница 23: ...focusing mode FOCUS B Setting the zooming operations ZOOM CAMERA y LENS y PAN TILT y AUTO MODE y ALARM y PRIVACY MASK y PASSWORD y LANGUAGE y OPTION y PRESET MENU LENS FOCUS y ZOOM y PRESET MENU A B SET SET SET SET SET SET SET SET SET OFF BACK AUTO SET OFF BACK FOCUS SETTING LIMIT NEAR m SENSITIVITY AREA y AF RETURN PRESET MENU 1m HIGH SET 30S OFF BACK ZOOM SETTING SPEED EL ZOOM V RESO UP PRESET M...

Страница 24: ... focusing speed while performing manual focusing 1 Use the joystick lever xy to select FOCUS use the lever vw to select MANU y and press the ENTER button The FOCUS SETTING screen appears 2 Use the joystick lever xy to select LIMIT NEAR and use the lever vw to select the nearest focusing distance to the target object Available settings 10cm 30cm 50cm 1m 3m 5m 3 Use the joystick lever xy to select S...

Страница 25: ...o select a vertical resolution Available settings ON Improves vertical resolution while using the electronic zoom OFF Does not improve vertical resolution while using the electronic zoom Memo When the vertical resolution improvement is set to ON moving target objects will cause conspicuous afterimages and blurs After completing setting use the lever to move the cursor to MENU and select BACK or EN...

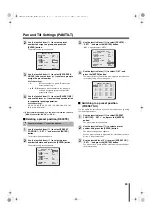
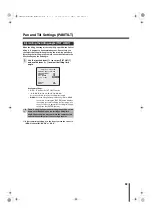
Страница 26: ... SET SET SET OFF BACK SET ON OFF OFF 6 OFF BACK A Registering a surveillance location PRESET POSITION PRESET NO SELECT 1 A 11 21 31 2 12 22 32 3 13 23 33 4 14 24 34 5 15 25 35 6 16 26 36 7 17 27 37 8 18 28 38 9 19 29 39 10 20 30 40 MENU BACK P26 Preset map screen PRESET NO 001 POSITION y TITLE y CAMERA VIEW y HOLD SEQUENCE GROUP PAUSE TIME PRESET GO y MENU SET OFF OFF OFF A 5S SET BACK P26 Preset ...

Страница 27: ... location and displays the preset setting screen again b Specifying the camera ID and title When you connect multiple cameras to the surveillance system specify the camera ID for identifying individual cameras You also can set a specific title to preset position for easier management 1 Use the joystick lever xy to select PRESET POSITION SET y and press the ENTER button The preset map screen appear...

Страница 28: ...title on the screen set CAMERA ID and TITLE in the DISPLAY screen under the INFORMATION screen to ON b Registering a view setting file CAMERA VIEW To support shooting in various surveillance conditions like when the surveillance location is bright or dark the CAMERA VIEW screen allows you to register up to 8 patterns of shooting settings as camera view setting files Specify the applied view settin...

Страница 29: ...on This sets one mask pattern for the area to be excluded in detecting If you want additional mask patterns to be set repeat the above procedure To delete the mask pattern Use the joystick lever xy or vw to place a mask pattern over the mask pattern to be cancelled then press the ENTER button 3 Use the joystick lever y to move a mask pattern to the bottom area of the screen and continue holding th...

Страница 30: ...output another alarm signal will not be output until the duration specified in this setting has passed Use the joystick lever xy to select DURATION and use the lever vw to select the interval after which the next alarm becomes in effect Available settings 5S 10S 15S 20S 30S 45S 1M 2M 3M 4M 5M S Second M Minute The following settings are common to the ones performed in the camera and lens settings ...

Страница 31: ...t OK and press the ENTER button The preset position you selected is deleted and the indication in the preset map screen changes to b Switching to a preset position PRESET GO You can switch the surveillance location to a preset position by using the following procedure 1 Use the joystick lever xy to select PRESET POSITION SET y and press the ENTER button The preset map screen appears 2 Use the joys...

Страница 32: ...ing north direction 1 Use the joystick lever to orient the camera in the direction you want to set as the starting point 2 Use the joystick lever xy to select SET NORTH use the lever vw to select SET and press the ENTER button When SET in the SET NORTH menu item changes to ON the starting point 0 degrees setting completes Available settings OFF Does not set the starting point angle information ON ...

Страница 33: ...t angle MANU Sets the tilting limit angle manually While MANU is selected pressing the ENTER button displays the setting screen Monitoring the live image use the joystick lever to determine the tilting limit angle then press the ENTER button After completing setting use the lever to move the cursor to MENU and select BACK or END E Limiting the tilting angle TILT LIMIT There is a parting line aroun...

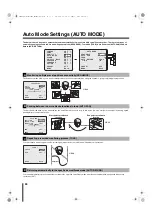
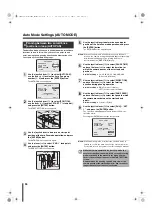
Страница 34: ...tus to the specified surveillance mode after the specified duration has passed without any operations P37 A Monitoring multiple preset positions sequentially SEQUENCE B Panning between two surveillance locations in loop AUTO PAN C Repeating a recorded monitoring process TOUR D Returning automatically to the specified surveillance mode AUTO RETURN CAMERA y LENS y PAN TILT y AUTO MODE y ALARM y PRIV...

Страница 35: ...y to select PAUSE TIME and use the lever vw to select the duration for which the camera pauses at each preset position Available settings 3S 4S 5S 6S 7S 8S 9S 10S 15S 20S 30S 45S 1M PRE S Second M Minute 6 Use the joystick lever xy to select SEQ SPEED and use the lever vw to select the speed in which the camera moves between individual preset positions Available settings 1 slow 15 fast 7 Use the j...

Страница 36: ...inute 7 Use the joystick lever xy to select DIRECTION and use the lever vw to select the rotating direction during panning operation Available settings RIGHT rotates clockwise LEFT rotates counterclockwise 8 Use the joystick lever xy to select PAN SPEED and use the lever vw to select the speed in which the camera moves between the start and end points Available settings 1 slow 15 fast 9 Use the jo...

Страница 37: ...ry is displayed in the screen The memory usage display starts from 0 100 and ends at 100 100 representing the memory is full 5 After the operations to be recorded complete press the ENTER button The operations performed are recorded as tour memory and the TOUR screen appears again If the memory becomes full the recording stops automatically at that moment 6 Use the joystick lever xy to select RUN ...

Страница 38: ...on 1 255 PREV Returns to the original surveillance mode 2 When you select PRESET in step 1 use the joystick lever y to select PRESET and use the lever vw to select a preset number The preset number selection field is displayed only when PRESET is selected Available settings 1 255 3 Use the joystick lever xy to select TIME and use the lever vw to select the duration until the AUTO RETURN function i...

Страница 39: ...SABLE MOTION ALARM DISPLAY PRESET MENU A B E D C SET SET SET SET SET SET SET SET SET OFF BACK 1 1 OFF OFF OFF OFF BACK A Setting the alarm input ALARM IN B Setting the alarm output ALARM OUT C Setting the alarm disabling duration ALARM DISABLE ALARM IN 1 POLARITY ACTION RETURN MOTION ALARM ALARM OUT LINE OUT DURATION PRESET MENU NO PRESET ON OFF OFF 5S OFF BACK P39 ALARM OUT 1 OUTPUT POLARITY ALAR...

Страница 40: ...he operation will be performed according to the last alarm 5 Use the joystick lever xy to select MOTION ALARM and use the lever vw to select how the motion sensor is used For alarm detection criteria the motion sensor built into the camera can be used in combination with the alarm input from an external device Available settings AND When both the motion sensor and the external device detect an ala...

Страница 41: ...select ALARM TIME and use the lever vw to select a duration for which the alarm signal is output The connected devices such as recorder alarm buzzer and warning lamp will operate for the duration you have specified Available settings 2S 5S 10S 15S 20S 30S 45S 1M 2M 3M 4M 5M MANU S Second M Minute Memo MANU appears only when REMOTE is selected for OUTPUT in step 2 After completing setting use the l...

Страница 42: ...e The MOTION ZONE screen appears PRESET Uses the motion sensor selected in MOTION of the CAMERA VIEW settings Memo For the PRESET option the movement is detected only at the preset position for the ZONE option the movement is detected for the area specified from whole space where pan tilt operations can be performed b Setting the motion zone The Motion Zone function allows you to specify up to fou...

Страница 43: ...he surveillance area ON Displays the surveillance area 8 To continue setting other surveillance area 2 4 After returning to the MOTION ZONE screen repeat the same procedure Steps 2 to 7 b Setting the detection sensitivity You can set the level of sensitivity for motion detection Adjusting the level of sensitivity avoids unwanted detection To set the detection sensitivity perform the following proc...

Страница 44: ...ver to move the cursor to MENU and select BACK or END When the alarm is detected the preset number and the camera ID on the screen flash notifying that the alarm is detected Monitor display legend 1 Use the joystick lever xy to select ALARM DISPLAY and use the lever vw to select ON OFF Available settings OFF The alarm information does not flash ON The alarm information flashes TIME appears under A...

Страница 45: ... continue setting other privacy masks repeat steps 2 to 4 After completing setting use the lever to move the cursor to MENU and select BACK or END After the privacy mask is set the mask can be turned on or off as necessary Use the joystick lever xy to select the mask number and use the lever vw to select ON OFF Up to 24 privacy masks can be set and the MASK NO SELECT screen is divided into three p...

Страница 46: ...ntered OK appears under the password entry field and the password lock is enabled After completing setting use the lever to move the cursor to MENU and select BACK or END b Disabling password lock 1 Use the joystick lever xy to select PASSWORD SET y and press the ENTER button The PASSWORD screen appears 2 Use the joystick lever xy to select PASSWORD LOCK ON y and press the ENTER button The screen ...

Страница 47: ...rrent password into the NOW PASSWORD field and press ENTER If the password currently used is authenticated the NEW PASSWORD field appears 4 Use the joystick lever to enter new password into the NEW PASSWORD field and press ENTER OK appears under the NEW PASSWORD field and the new password is set After completing setting use the lever to move the cursor to MENU and select BACK or END PASSWORD NOW P...

Страница 48: ...After completing setting use the lever to move the cursor to MENU and select BACK or END CAMERA y LENS y PAN TILT y AUTO MODE y ALARM y PRIVACY MASK y PASSWORD y LANGUAGE y OPTION y PRESET MENU SET SET SET SET SET SET SET SET SET OFF BACK LANGUAGE LANGUAGE LANGUE SPRACHE MENU ENGLISH FRENCH GERMAN BACK LANGUAGE LANGUAGE ENGLISH LANGUE FRENCH SPRACHE GERMAN MENU BACK LANGUE LANGUAGE ANGLAIS LANGUE ...

Страница 49: ...ET OFF BACK SET ON OFF OFF OFF SET OFF BACK A Setting the display information INFORMATION B Setting the auto flip function AUTO FLIP C Correcting the sway of the camera STABILIZER INFORMATION DISPLAY SYSTEM y PRESET MENU OFF SET OFF BACK P49 OPTION INFORMATION AUTO FLIP STABILIZER AUTO PURSUIT MIRROR REFRESH y y PRESET MENU SET ON OFF OFF OFF SET OFF BACK P50 OPTION INFORMATION AUTO FLIP STABILIZE...

Страница 50: ...n appears 2 Use the joystick lever xy to select SYSTEM SET y and press the ENTER button The system information is displayed in the screen If the address setting switch on the camera is set to 0 you can use the menu screen to specify the camera s address 1 In the system information screen select ADDRESS and press the ENTER button If the address setting switch on the camera is set to 0 the address n...

Страница 51: ...eting setting use the lever to move the cursor to MENU and select BACK or END B Setting the auto flip function AUTO FLIP An image is rotated upside down electronically when the tilting angle reaches around 90 degrees When the Auto Flip takes place the tilting motion momentarily stops OPTION INFORMATION AUTO FLIP STABILIZER AUTO PURSUIT MIRROR REFRESH y y PRESET MENU SET ON OFF OFF OFF SET OFF BACK...

Страница 52: ...era pans and tilts After completing setting use the lever to move the cursor to MENU and select BACK or END Cleans the camera s horizontal rotation contact area 1 Use the joystick lever xy to select REFRESH SET y and press the ENTER button Cleaning starts and after the cleaning completes the startup movements are performed Memo The horizontal rotation contact area of the camera always moves When t...

Страница 53: ... BRIGHT 7 PRESET OFF BACK MENU TOP 0 0 0 0 7 BOTTOM LEFT RIGHT CENTER FIX PRESET OFF BACK MENU BLC SETTING POSITION BLC WINDOW WEIGHTING BLC SETTING SIZE ATW MASKING CONTINUE y BLC MASKING CONTINUE y SET SET SET SET SET SET SET SET SET OFF BACK OFF OFF BACK y y y y y y y y y ADVANCED MENU screen CAMERA settings screen P8 L L SETTING screen P10 IRIS SETTING screen AUTO P11 IRIS SETTING screen MANU ...

Страница 54: ...S SETTING LIMIT NEAR 1m 3 OFF BACK SPEED PRESET MENU ZOOM SETTING SPEED EL ZOOM V RESO UP PRESET MENU CAMERA LENS PAN TILT AUTO MODE ALARM PRIVACY MASK PASSWORD LANGUAGE OPTION PRESET MENU SET SET SET SET SET SET SET SET SET OFF BACK SYNC INT AUTO ATW OFF OFF ON ON 0 45 AUTO OFF BACK IRIS y y y y y WHITE BALANCE BLC SHUTTER APERTURE GAMMA DAY NIGHT PRESET MENU 3 OFF OFF OFF BACK GAIN SETTING y y y...

Страница 55: ...ZE y MASKING SENSITIVITY y ZOOM DURATION PRESET MENU MOTION MASKING SENSITIVITY MOVE 5 5 5 1 OFF OFF BACK Y LEVEL Y DIFFER DURATION TEST PRESET MENU CONTINUE y CAMERA LENS PAN TILT AUTO MODE ALARM PRIVACY MASK PASSWORD LANGUAGE OPTION PRESET MENU SET SET SET SET SET SET SET SET SET OFF BACK SET ON OFF OFF 6 OFF BACK PRESET NO SELECT SET OFF SET OFF 5S OFF BACK y y y y y y y y y ADVANCED MENU scree...

Страница 56: ... ALARM OUT LINE OUT DURATION PRESET MENU AREA 1 POSITION SET OFF OFF BACK y DISPLAY PRESET MENU SENSITIVITY MOVE 5 5 5 1 OFF OFF BACK Y LEVEL Y DIFFER DURATION TEST PRESET MENU y AREA 1 AREA 1 SET SET y AREA 1 SET SIZE SIZE SIZE POSITION POSITION POSITION SET SET y START SETTING START SETTING SET y y y CAMERA LENS PAN TILT AUTO MODE ALARM PRIVACY MASK PASSWORD LANGUAGE OPTION PRESET MENU SET SET S...

Страница 57: ...ACK TITLE DIRECTION y ZOOM RATIO y PRESET MENU CAMERA VER 0 00 00 485S 1 19200 PROTOCOL ADDRESS BAUD RATE MENU BACK AUTO PURSUIT SENSITIVITY 7 TEST OFF OFF BACK PRESET MENU STABILIZER LEVEL MIDDLE OFF BACK PRESET MENU CAMERA LENS PAN TILT AUTO MODE ALARM PRIVACY MASK PASSWORD LANGUAGE OPTION PRESET MENU SET SET SET SET SET SET SET SET SET OFF BACK y y y y y y y y y ADVANCED MENU screen MASK NO SEL...

Страница 58: ...peed LONG mode x1 x2 x4 x8 x16 x32 Electronic sensitivity boosting AUTO OFF works with auto iris Up to x32 max setting possible White balance ATW AWC MWB 3200 5600 FLUO Fluorescent lighting AGC gain Low Normal Middle High Off When OFF is selected manual gain adjustment is available Motion sensor ON OFF individual settings possible Aperture H V setting possible Privacy masking ON OFF max of 24 mask...

Страница 59: ...MEMO L5BW2_XE VCC MC800P_MC700P GB book 1 ページ 2007年1月18日 木曜日 午前10時18分 ...

Страница 60: ...Printed on recycled paper 1AC6P1P3148 L5BW2 L5BX2 XE 0107KP SY SANYO Electric Co Ltd Printed in Japan L5BW2_XE VCC MC800P_MC700P GB book 1 ページ 2007年1月18日 木曜日 午前10時18分 ...

Отзывы: