3.Replacemen
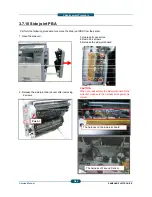
3.7.11 Eraser lamp
1. Remove 1 screw.
To remove the eraser lamp. first, remove the toner car
the step 1~12 of the 3.14 LSU disassembly.
2. Unplug the connector and remove the eraser lamp.
Service Manual
3-4
nt Procedure
tridge, imaging unit and inner cover. Refer to
SAMSUNG ELECTRONICS
47
Содержание SCX-82x0 series
Страница 13: ...10 2 Abbreviations 10 4 ...
Страница 112: ...2 Product Description SAMSUNG ELECTRONICS Service Manual 2 94 ...
Страница 378: ...8 System 8 1 Engine 1 8 System Diagram 8 1 Engine 1 Service Manual 8 Diagram SAMSUNG ELECTRONICS 1 ...
Страница 379: ...8 System 8 2 Engine 2 8 2 Engine 2 Service Manual 8 Diagram SAMSUNG ELECTRONICS 2 ...
Страница 380: ...8 System 8 3 Engine 3 8 3 Engine 3 Service Manual 8 Diagram SAMSUNG ELECTRONICS 3 ...
Страница 381: ...8 System 8 4 Scan DADF 8 4 Scan DADF Service Manual 8 Diagram SAMSUNG ELECTRONICS 4 ...
Страница 382: ...8 System 8 5 Heater Fuse 8 5 Heater Fuse Service Manual 8 Diagram SAMSUNG ELECTRONICS 5 ...


