background image

7-9

Samsung Electronics

Troubleshooting

Service Manual

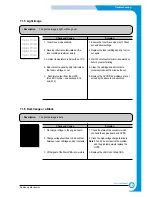
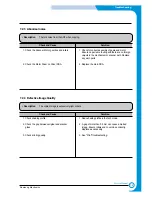
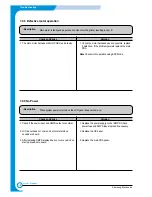
7.2.3  Abnormal noise

• Description

There is noise from the ADF when copying.

Check and Cause

Solution

1. Check the Scanner Motor, gearbox and rollers.

2. Check the Motor Driver on Driver PBA.

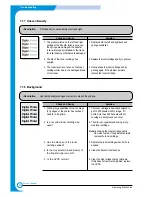
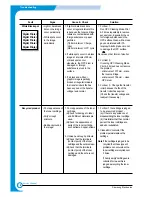
7.2.4  Defective Image Quality

• Description

The copied image is excessively light or dark

Check and Cause

Solution

1. Check shading profile.

2. Check the gap between original and scanner

glass.

3. Check printing quality.

1. Redo shading profile in the tech mode.

2. A gap of more than 0.5 mm can cause a blurred

image. Ensure rollers and cover close correctly.
Replace as necessary.

3. See "Print" troubleshooting.

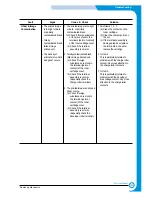
1. Check for correct assembly of gears and motor.

Ensure no parts are fouling and there are no foreign
objects in the mechanism or scanner path. Replace
any worn parts

2. Replace the main PBA.

Содержание scx-4100 series

Страница 1: ...GITAL LASER MFP CONTENTS 1 Precautions 2 Reference Information 3 Specifications 4 Summary of product 5 Disassembly and Reassembly 6 Alignment and Adjustments 7 Troubleshooting 8 Exploded Views and Parts List 9 Block Diagram 10 Connection Diagram ...

Страница 2: ...msung Electronics Co Ltd May 2004 Printed in Korea VERSION NO 1 00 CODE JC 0125A This service manual is also provided on the web the ITSELF system f Samsung Electronics Co Ltd http itself sec samsung co kr ...

Страница 3: ...access to laser radiation above a Class I level during normal operation user maintenance or prescribed service condition Warning Never operate or service the printer with the protective cover removed from Laser Scanner assembly The reflected beam although invisible can damage your eyes When using this product these basic safety pre cautions should always be followed to reduce risk of fire electric...

Страница 4: ... inserting or taking off the power plug The power plug has to be inserted completely If not a fire will be caused due to poor contact When taking off the power plug grip the plug and remove it 7 Take care of the power cable Do not allow it to become twisted bent sharply round corners or other wise damaged Do not place objects on top of the power cable If the power cable is damaged it could overhea...

Страница 5: ...owing procedures before dismantling the printer or replacing any parts 1 Check the contents of the machine memory and make a note of any user settings These will be erased if the mainboard or network card is replaced 2 Ensure that power is disconnected before servicing or replacing any electrical parts 3 Disconnect printer interface cables and power cables 4 Only use approved spare parts Ensure th...

Страница 6: ... this could cause injury 3 When you move the printer This printer weighs 8 8kg including toner cartridge and cassette Use safe lifting and handling techniques Use the lifting handles located on each side of the machine Back injury could be caused if you do not lift carefully 4 Ensure the printer is installed safely The printer weighs 8 8Kg ensure the printer is installed on a level surface capable...

Страница 7: ...nt electrostatic charge buildup in the vicinity of the assem bly 3 Use only a grounded tip soldering iron to solder or desolder ESDs 4 Use only an anti static solder removal device Some solder removal devices not classified as anti static can generate electrical charges sufficient to damage ESDs 5 Do not use Freon propelled chemicals When sprayed these can generate electrical charges sufficient to...

Страница 8: ... recommended for safe and smooth troubleshooting described in this service manual DVM Digital Volt Meter Standard Indicates more than 3 digits 1 Cleaning Equipments Standard An IPA Isopropyl Alcohol dry wipe tissue or a gentle neutral detergent and lint free cloth 5 Software Driver installation CD ROM 8 Vacuum Cleaner 6 Spring Hook Standard For general use 7 Driver Standard type type M3 long M3 sh...

Страница 9: ...ess Memory DVM Digital Voltmeter ECP Enhanced Capability Port ECU Engine Control Unit EEPROM Electronically Erasable Programmable Read Only Memory EMI Electro Magnetic Interference EP Electro photographic EPP Enhanced Parallel Port FCOT First Copy Out Time FFC FLexiable FLat Cable LAN local area network LBP Laser Beam Printer EPP Enhanced Parallel Port F W Firmware FCF FCT First Cassette Feeder Fi...

Страница 10: ...age Description Language Ping Packet internet or Inter Network Groper PPD Postscript Printer Discription PPM Page Per Minute PS Post Script PTL Pre Transfer Lamp PWM Pulse Width Moduration Q ty Quantity QCD Quality Cost and Delivery RAM Random Access Memory ROM Read Only Memory SCF SCT Second Cassette Feeder Second Cassette Tray SMPS Switching Mode Power Supply SPGP Samsung Printer Graphic Process...

Страница 11: ...er ventilation see diagram below Provide the proper environment A firm level surface Away from the direct airflow of air conditioners heaters or ventilators Free of extreme fluctuations of temperature sunlight or humidity Clean dry and free of dust 2 4 Reference Information Samsung Electronics Service Manual ...

Страница 12: ...le Pattern for the Test The sample pattern shown in below is the standard pattern used in a factory The contents of the life span and the printing speed are measured with the pattern shown in below The picture in the manual is 70 size of the actual A4 size 2 4 1 A4 5 Pattern ...

Страница 13: ...2 6 Reference Information Samsung Electronics Service Manual 2 4 2 A4 2 Pattern ...

Страница 14: ...2 7 Samsung Electronics Reference Information Service Manual 2 4 3 A4 IDC 5 Patten ...

Страница 15: ...2 8 Reference Information Samsung Electronics Service Manual MEMO ...

Страница 16: ...g Net Weight exc Toner Cartridge 8 89 Kg Gross Weight with package 12 04 Kg LCD 16 2 Char No BackLite I O Interface USB1 1 IEEE1284 Power Printing Operation 300 Wh Consumption Sleep Mode Energy Star Compliant Power Switch Yes Noise Operating 49 dBA Standby 38 dBA Warm Up Time from Cold Status Less than 42 seconds Machine Life Max Monthly Volume Print 10 000pages Duty Cycle Scan 2 000pages Average ...

Страница 17: ... Status Less than 54 seconds Duplex Print N A Printable Area 208 x 273 mm Letter Halftone Gray Scale 256 levels Items SCX 4100 Remarks SCAN Scan Method Color CIS Scan Speed through Lineart Halftone 72 sec Platen Gray 72 sec Color 40sec 150 sec 75dpi 300dpi Resolution Optical 600 600dpi Enhanced 4800dpi 4800dpi USB 2400dpi 2400dpi Parallel Halftone 256level Scan Size Max Document Max 216mm 8 5 Widt...

Страница 18: ...solution Scan 600 600dpi Print 600 600dpi Zoom Range 50 to 200 Multi Copy 1 99 Preset Yes Darkness Control 3 level Light Normal Dark Copy Mode Original Type Text Text Photo Photo Collation Copy N A Auto return to default mode Yes after 1 minute Time can be changeable 15 30 60 180sec Off Changeable Default mode Darkness Original Type Reduce Enlarge No of Copies Special Copy 2 up copy Yes Platen onl...

Страница 19: ...acity Face Down 50Sheets 20lb Face Up 1Sheet Output Control Face down Face up Paper Size Main Tray Legal A4 Letter Folio Executive B5 A5 A6 Bypass Bypass Envelope6 3 4 7 With main tray paper 3 4 9 10 DL C5 B5 Paper Weight Main Tray 16 24 lb Bypass 16 43 lb Paper Path Standard output Bottom to Top Front FIFO Straight Through Face up Single Sheet Paper Size Max 216 x 356mm 8 5 x14 Min 76 x 127mm 3 x...

Страница 20: ...el Only for upgrade FW PC FAX No Only available through PC Offset BOx Package and POP POP Yes Quick Reference guide Yes include Setup Guide and Function Guide Accessory Owner s manual Yes Electronic S W CD ROM 1 CD for User Manual Smar Thru 4 Print Driver Scan Driver RCP Toner Cartridge 1 EA Power Cable 1 EA L shape power cable Telephone Jack No Printer Cable No China Korea USB Russia Parallel cab...

Страница 21: ...3 6 Specifications Samsung Electronics Service Manual MEMO ...

Страница 22: ...4 4 1 Samsung Electronics Summary of product Service Manual 4 Summary of Product This chapter describes the functions and operating principles of the main component 4 1 Printer Components 4 1 1 Front View ...

Страница 23: ...4 2 Summary of Product Samsung Electronics Service Manual 4 1 2 Rear View ...

Страница 24: ...4 3 Samsung Electronics Summary of product Service Manual 4 1 3 Control Panel ...

Страница 25: ...4 4 Summary of Product Samsung Electronics Service Manual 4 2 System Layout SCAN PART ...

Страница 26: ...pes of fuser unit Q PID type developed by Samsung and only used on 220V Domestic models Heat Lamp type used on 220V Export models and all 110V models The Heat Lamp type fuser consists of the Heat Lamp Heat Roller Pressure Roller Thermistor and Thermostat It fixes toner to the paper using pressure and heat to complete the printing job 4 2 4 1 Heat Lamp power cut off Thermostat The thermostat is a t...

Страница 27: ...e front cover is opened The temperature of the fuser cover s surface is maintained at less than 80ºC to protect the user and a caution label is attached where the customer can see it easily when the rear cover is opened 4 2 5 Scanner Unit Scan Image Controller 1 Scan Line Time 1 67ms 2 Scan Resolution Color Max 600DPI 3 Scan Width 216mm 4 Function White Shading Correction Gamma Correction CIS Inte...

Страница 28: ... laser light A rotating polygon mirror reflects the laser light onto the OPC and each side of the mirror is one scan line The OPC drum turns as the paper feeds to scan the image down the page The HSYNC signal is created when the laser beam from LSU reaches the end of the polygon mirror and this signal is sent to the controller The controller detects the HSYNC signal to adjust the vertical line of ...

Страница 29: ...ing roller and blade Doctor blade Developing Method Non magnetic 1 element contacting method Toner Non magnetic 1 element shatter type toner The life span of toner 3 000 sheets IDC Pattern A4 standard Toner remaining amount detecting sensor No OPC Cleaning Electrostatic process Management of waste toner Electro static process Cleanerless Type OPC Drum protecting Shutter No Classifying device for t...

Страница 30: ...ta to the LSU and manages the Electrophotographic printing process Circuits on the PBA drive include the main motor paper feed cartridge fuser clutch driver pre transfer lamp driver heat lamp driver CIS driver scan motor driver and fan driver The signals from the paper feed jam sensor and paper empty sensor are inputted to the main board from the power supply PBA REGULATOR 1 8V U2 REGULATOR 3 3V U...

Страница 31: ...1 8V internal 3 3V external 4 3 2 Flash Memory This stores the system program Firmware upgrade is achieved by downloading from the new image using the PC Interface Capacity 1M Byte Access Time 70 nsec 4 3 3 SDRAM This is used as a buffer system working memory area etc while printing and scanning Capacity Access Time 15 nsec 4 3 4 Sensor input circuit 1 Paper Empty Sensing The Paper Empty sensor Ph...

Страница 32: ...ver Open Sensing The Cover open sensor actuator is located on the front cover and the senor is in the main frame When the front cover is open the 24V and 5V supplies to the DC fan solenoid main motor polygon motor part of LSU HVPS and LSU Laser diode are cut off The CPU monitors signal COVER_OPEN GPIO_11 to recognize when the cover is open 6 DC FAN SOLENOID Driver It is driven by a transistor and ...

Страница 33: ...s it to the toner cartridge The CPU is used to modify some of these voltage settings to provide the ideal voltages to create the image The HVPS part uses the 24V and outputs the high voltage for THV MHV BIAS and the outputted high voltage is supplied to the toner OPC cartridge and transfer roller MAIN PBA CON CN3 FAN CON CN1 H L CON F101 250V L2A EXIT SENSOR CN4 PANEL CON MHV OPC DEV SUPPLY THV CO...

Страница 34: ...urface exposed by the LSU Laser Scanning Unit When printing the exposed voltage on the OPC is 180V unexposed is 970V and the exposing voltage on the DEV is 330V Therefore toner with polarity is developed onto an exposed section of the OPC Output voltage 200V 600V DC 20V Error a If DEV is GND print density gets extremely low b When DEV is floating due to poor connection between the frame and cartri...

Страница 35: ...tting voltage fluctuating range AC 198V 264V AC 90V 135V Rated frequency 50 60 Hz Frequency fluctuating range 47 63 Hz Inputting Current Under 4 0Arms 2 0Arms when heat lamp is off 2 Rated Power Output 3 Consumption Power 4 Length of Power Cord 1830 50mm 5 Power Switch Fitted NO Item CH1 CH2 CH3 System 5V 24V 24VS 1 Stand By 0 2A 0 07A 0 07A AVG 60 Wh 2 PRINTING 1 0A 0 5A 1 0A AVG 300 Wh 3 Sleep M...

Страница 36: ...eated using AC power The AC power is controlled by a Triac THY1 a semiconductor switch On Off control is achieved when the gate of the Triac is turned on off by a Photo triac PC1 this is an insulting part In the other words the AC control part is a passive circuit It turns the heat lamp on off by taking a signal from the engine control section When the HEATER ON signal is activated by the engine t...

Страница 37: ...or the trailing edge of the paper does not pass the feed sensor within certain time During this time the feed sensor cannot be Off After the leading edge of the paper passes the feed sensor the paper does not reach the exit sensor within a certain time The exit sensor cannot be On during this time There is already paper between the feed sensor and the exit sensor 4 5 1 3 Jam 2 Jam in the Exit area...

Страница 38: ...at error are blinking It has been lower than 80 C over 10 seconds Printing 2 consecutive pages it has been lower than 145 C over 4 seconds 3 consecutive page it has been 25 C lower than the fixed fusing temperature over 4 seconds Over heat error It have been higher than 220 C over 3 seconds All over heat error are blinking 4 5 5 LSU The LSU consists of the LD Laser Diode and the polygon motor cont...

Страница 39: ...4 18 Summary of Product Samsung Electronics Service Manual MEMO ...

Страница 40: ...machine note the cable routing that will be affected Whenever servicing the machine you must perform as follows 1 Check to verify that documents are not stored in memory 2 Be sure to remove the toner cartridge before you disassemble parts 3 Unplug the power cord 4 Use a flat and clean surface 5 Replace only with authorized components 6 Do not force plastic material components 7 Make sure all compo...

Страница 41: ...lectronics Service Manual 5 2 Front and Rear Cover Units 1 Take the Cassette out of the printer 2 Remove the Front Cover in the direction of arrow 3 Remove the 4 screws securing the Rear Cover and remove it as shown below Cassette Rear Cover ...

Страница 42: ...ver you should remove Rear Cover see page 5 2 Front Cover see page 5 2 2 Remove 1 screw at the front of the unit Unclip the right cover along the top edge and remove it from the Frame Assembly 3 Remove 1 screw at the front of the unit Unclip the right cover along the top edge and remove it from the Frame Assembly Right Cover Left Cover ...

Страница 43: ...nnectors from the main PBA and release the ground wire from the Motor Drive Ass y as shown below 3 Carefully lift the Scanner Ass y from the base taking care to thread the cables through the frame Scanner Ass y 5 4 Scanner Ass y Caution 1 Before disassembling the Scanner Ass y first lift it carefully at the front edge The support lever will automatically raise into position 2 Take care not to trap...

Страница 44: ... and remove it 2 Release 8 clips 2 per side securing the scanner upper frame to the scanner lower frame and remove the upper frame 3 Remove the CCD Cable as shown below Platen Cover Scan Upper Caution 1 Before disassembling the scanner module remove the 2 plastic spacers from each end of the scanner module SLIDE CIS FFC Cable ...

Страница 45: ... Shaft and take out the Scanner Module 5 Push the Belt Holder and take out the Belt as shown below 6 Remove the Pulley Idle as shown below 7 Remove the 2 screws and take out the Scan Motor Ass y Belt Pulley Idle Pulley Bracket Spring ETC Belt Scanner Module CIS Shaft Scan Motor Ass y ...

Страница 46: ...Service Manual 5 5 Middle Cover 1 Disconnect the OPE harness from the Main PBA and remove the 4 screws securing the Middle Cover Remove it as shown below 2 Remove the 4 screws securing the OPE Unit from the Middle Cover Middle Cover OPE Harness OPE Unit ...

Страница 47: ...rs from the boards and then remove 4 screws Remove the Fuser Ass y taking care not to damage the Exit Sensor 3 Remove 2 screws and take the Thermostat out of the Fuser 4 Remove 2 screws and take the Halogen Lamp out of the Heat Roller 5 Remove 1 screw and take the Idle Gear out Fuser Ass y Thermostat Halogen Lamp Heat Roller Idle Gear 5 6 Fuser Heat Lamp Type ...

Страница 48: ...sassembly and Reassembly Service Manual 6 Remove 4 screws and divide the Fuser into two parts 7 Unwrap the Thermistor Harness as shown below 8 Remove the Thermister from the Fuser Cover Fuser Cover Thermister Thermister Harness ...

Страница 49: ... 4 Middle Cover see page 5 6 2 Remove the white Exit Gear and release a bearing clip at one end then remove the shaft and rollers as shown below Exit Gear Bearing Exit Roller 1 2 5 8 LSU 1 Before you remove the LSU you should remove Rear Cover see page 5 2 Side Covers see page 5 3 Scanner Ass y see page 5 4 Middle Cover see page 5 6 2 Unplug 2 connector from the LSU 3 Unplug 4 screws and take the ...

Страница 50: ... SMPS and remove 1 screw Then take out the Fan DC Fan 5 10 Drive Ass y 1 Before you remove the Drive Ass y you should remove Rear Cover see page 5 2 Left Side Cover see page 5 3 2 Remove the 6 screws from the Drive Ass y Note when re fitting the motor Drive Ass y tighten the screws in the order that they are numbered on the Motor Drive Ass y base plate 3 Unplug 1 connector from the Drive Ass y Dri...

Страница 51: ...move the 14 screws securing the Engine Shield Ass y and unplug the all connectors Then remove the Engine Shield Ass y Engine Shield Ass y 5 12 Main PBA 1 Before you remove the Main PBA you should remove Rear Cover see page 5 2 Side Covers see page 5 3 Fuser Connector see page 5 7 Engine Shield Ass y see page 5 11 2 Unplug 1 connector and remove 5 screws from the Main PBA Then lift the Main PBA out...

Страница 52: ...ould remove Rear Cover see page 5 2 Side Covers see page 5 3 Fuser Connector see page 5 7 Engine Shield Ass y see page 5 11 2 Unplug 1 connector and remove 3 screws then take the Inlet Bracket out 3 Remove 1 screw and unplug 1 connector from the Main PBA 4 Remove 3 screws and take the SMPS out SMPS Inlet Bracket ...

Страница 53: ...page 5 4 Middle Cover see page 5 6 LSU see page 5 9 2 Remove 3 screws and take the Transfer Earth out 3 Unplug the PTL Holder Connector then remove the PTL Holder and PTL Lens as shown below Take care to note the orientation of the PTL lens and ensure it is refitted correctly 4 Unlatch the Bush and remove it Then lift the Transfer Roller out as shown below Transfer Roller Bush Transfer Earth PTL H...

Страница 54: ...4 Middle Cover see page 5 6 LSU see page 5 9 Drive Ass y see page 5 10 2 Remove 2 screws from the Guide Paper and take it out 3 Pull up the Feed Idle Bush and Feed Idle Shaft as shown below 4 Remove 3 screws from the Feed Bracket and take it out 5 Remove the Idle Gear and Feed Gear2 6 Remove the Feed Gear 1 Ass y as shown below Feed Bracket Feed Gear2 Idle Gear Feed Gear1 Ass y Guide Paper Bush Fe...

Страница 55: ...5 16 Disassembly and Reassembly Samsung Electronics Service Manual 7 Remove the Feed Roller and Feed Roller1 as shown below Feed Roller1 Feed Roller ...

Страница 56: ...e Covers see page 5 3 Scanner Ass y see page 5 4 Middle Cover see page 5 6 LSU see page 5 9 Drive Ass y see page 5 10 Feed Bracket and Gears See page 5 14 steps 4 6 2 Remove the Pick up Gear Ass y as shown below 3 Remove the Pick up Ass y as shown below 4 Remove 2 screws then remove the Regi Solenoid and Pick Up Solenoid Pick up Solenoid Regi Solenoid Pick up Gear Ass y Pick up Ass y 1 2 Bush ...

Страница 57: ...5 18 Disassembly and Reassembly Samsung Electronics Service Manual MEMO ...

Страница 58: ...enu Exit key To return to the user menu Press the Menu Exit key 6 1 2 Diagnostic Menu Exit Menu Exit Darkness Main Menu Engine test Remark ENGINE TEST Motor Test 1 On 2 Off MTR FAN SOL ETC PickUp Test 1 On 2 Off Fan Test 1 On 2 Off Manual Clt Test 1 On 2 Off PTL Test 1 On 2 Off ENGINE TEST LSU Motor Test 1 On 2 Off LSU TEST LSU Hsync Test 1 On 2 Off LD Test 1 On 2 Off ENGINE TEST Feed Sen Test Che...

Страница 59: ...receiving a print command the printer feeds paper from the main cassette or manual feeder as required 2 The paper being fed passes the paper feed sensor Jam 0 occurs if the sensor is not operated within a certain time 3 Having passed the paper feed sensor the paper moves to the paper exit sensor via printing process Jam 1 occurs if the sensor is not operated within a certain time 4 The paper then ...

Страница 60: ...APER JAM 2 CHECK INSIDE In the fuser area or around the toner cartridge BYPASS JAM In the manual feeder 1 Open and close the front cover The jammed paper is automatically ejected from the machine If the paper is not ejected continue to step 2 2 Pull the paper tray open 3 Remove the jammed paper by gently pulling it straight out If there is any resistance and the paper does not move when you pull o...

Страница 61: ...t edge of the scanner unit The support lever will automatically pop up 4 Pull the paper out gently 5 Close the jam cover by pushing the support tab to the left and hold it down whilst lowering the cover carefully until the cover fully down this will hold down the tab If there is any resistance and the paper does not move when you pull or if you cannot see the paper in the jam cover continue to ste...

Страница 62: ... Replace the toner cartridge and close the front cover Printing automatically resumes 6 3 3 In the Fuser Area or Around the Toner Cartridge Bypass Jam appears on the display when you try to print using the manual feeder and the machine does not detect paper due to no paper or improper paper loading The error message may also occur when the paper is not properly fed into the machine through the man...

Страница 63: ...aper Setting options to the factory default Copy Setup Restores all of the Copy Setup options to the factory default All Settings Resets all of your settings to the factory default Machine Setup Resets all of the system settings such as the display language and save modes to the factory default 4 Press Start Enter The selected memory is cleared and the display asks you to continue clearing the nex...

Страница 64: ...en Heat Error Over Heat LSU Error No Paper Add Paper Paper Jam 0 Open Close Door Paper Jam 1 Open Close Door Paper Jam 2 Check Inside The front or rear cover is not securely latched The toner cartrige is not installed There is a problem in the fuser unit A problem has occurred in the LSU Laser Scanning Unit The paper tray has run out of paper Paper has jammed in the feeding area of the paper tray ...

Страница 65: ...pical defect 1 OPC Drum 75 5mm white spot on black image or black spot 2 Charge Roller 37 7mm black spot 3 Supply Roller 47 8mm light or dark horizontal image band 4 Developing Roller 35 2mm horizontal image band 5 Transfer Roller 45 3mm image ghost 6 Heat Roller 57 1mm Black spot and image ghost 7 Pressure Roller 59 7mm black spot on the backside PTL L S U Fuser Toner Cartridge 1 2 3 7 6 5 4 MP S...

Страница 66: ...7 1 2 Vertical White Line Description White vertical voids in the image Digital Printer Digital Printer Digital Printer Digital Printer Digital Printer Check and Cause Solution 1 1 Contamination of the window or internal lenses of LSU mirror 2 Foreign object inside the toner cartridge or low toner 3 Foreign object contamination or burr on the edge of the toner cartridge window 4 If the fuser is de...

Страница 67: ...ts occur periodically in the printing Digital Printer Digital Printer Digital Printer Digital Printer Digital Printer Check and Cause Solution 1 If dark or blurry black spots occur periodi cally the rollers in the Developer may be contaminated with foreign matte or paper particles Charge roller 37 7 mm interval OPC drum 75 5 mm interval 2 If faded areas or voids occur in a black image at intervals...

Страница 68: ...print out again 3 Wait 30 minutes after printer is powered on before you start printing 4 Clean the cartridge and set contacts Generally clean dirt from inside the set 5 Replace the HVPS if the problems are not solved by the above four instructions 7 1 6 Dark Image or a Black Description The printed image is dark Digital Printer Digital Printer Digital Printer Digital Printer Digital Printer Check...

Страница 69: ...ption Light dark background appears in whole area of the printing Digital Printer Digital Printer Digital Printer Digital Printer Digital Printer Check and Cause Solution 1 Printing large quantities of low coverage 2 pages or the printer has not been used for a long time 2 Is a recycled toner cartridge be used 3 Has the life span of the toner cartridge ended 4 Is the movement Up and Down of the tr...

Страница 70: ... blade in the toner cartridge 1 and 2 Clean all HV contacts If problem persists replace the HVPS If problem still persists replace the Main PBA 3 Replace the toner cartridge and try to print out 4 Check the transfer roller lifetime and replace it 5 Wait about 30 minutes after power on before using printer 6 Replace the toner cartridge and try to print out again 7 1 10 Ghost 2 Description Ghost occ...

Страница 71: ... 1 Toner leakage due to improperly sealed toner cartridge 2 If the transfer roller is contaminated stains on the face of page will occur 1 Replace the toner cartridge 2 If the transfer roller is contaminated run PC Cleaning Mode Print 2 or 3 times and then perform Self Test 2 or 3 times to remove contamination 7 3 12 Ghost 4 Description A White ghost occurs in a black image printing at 35 5 mm int...

Страница 72: ...ressure roller Check and clean the area between the H R and the Thermistor Caution Take care not to deform the rollers 7 1 15 Blank Page Print out 1 Description Blank page is printed Check and Cause Solution Bad ground contacts in OPC and or toner cartridge 1 Check if the Ground OPC or the OPC Ground Zener diode are defective or open circuit set inside left side 2 Remove contamination of the termi...

Страница 73: ... the Main PBA 2 Check shading profile 1 Check the CIS harness is properly connected 2 Redo shading profile in the tech mode Check and Cause Solution 1 Check the Scanner Cover is properly closed 2 Check shading profile 3 Check white black reference voltage on Main PBA e q CIS_SI CIS_CLK at CN7 Or Check the FFC 1 Room light can pass through a thin original 2 Redo shading profile in the tech mode 3 R...

Страница 74: ...y light or dark Check and Cause Solution 1 Check shading profile 2 Check the gap between original and scanner glass 3 Check printing quality 1 Redo shading profile in the tech mode 2 A gap of more than 0 5 mm can cause a blurred image Ensure rollers and cover close correctly Replace as necessary 3 See Print troubleshooting 1 Check for correct assembly of gears and motor Ensure no parts are fouling...

Страница 75: ...e Solution 1 Check the Solenoid by using Tech Mode 2 Check cassette MP knock up plate and springs 3 Check paper separator pad 4 Check the pick up roller for contamination and correct assembly 5 If continuous clusters occur check all rollers between pickup and registration sensor 6 If the paper feeds into the printer and Jam 0 occurs perform Tech Mode to check feed sensor 1 Replace the solenoid 2 R...

Страница 76: ...ith toner 1 Check if the exit sensor actuator is defective Check if the actuator exit is deformed Check if the lever part is deformed Check whether burrs occur in the assembly part of the exit actuator and if the actuator operates smoothly Check if foreign objects or paper debris are preventing the correct operation of the actuator 2 If the paper is stuck in the fuser disassemble the fuser and rem...

Страница 77: ...ubber with a soft cloth dampened with IPA Isopropyl Alcohol or water 4 Use paper with a smother surface finish 7 3 6 Paper rolled in the fuser Description Paper rolled around fuser rollers or Concertina jam Check and Cause Solution 1 Contamination of the pressure roller or heat roller 2 Damaged or deformed ribs claws or springs 1 After disassembling the fuser clean contamination from between the h...

Страница 78: ...1 Use paper that conforms to the printer specification 2 Ensure paper is stored properly to prevent curl Note To remove paper rolled in the OPC Remove the toner cartridge from the set taking care not to touch the green surface Use the gearwheel at the side to rotate the OPC drum and pull the paper from the cassette Clean fingerprints on the OPC gently with soft tissue taking care not to scratch th...

Страница 79: ...it 3 Heat lamp ON OFF test 4 Drive gear melted 1 Replace the whole fuser assembly if the thermostat is open circuit 2 Replace the whole fuser assembly if the ther mistor sensor is faulty 3 Replace the fuser 7 4 2 LSU Error Description A message PMOTOR ERROR HSYNC ERROR is displayed in the LCD panel Check and Cause Solution 1 LSU cable or connector faulty 2 LSU motor is faulty 3 Check the HSYNC sig...

Страница 80: ...tat and thermistor 1 Use EDC Mode to test the fuser Replace Fuser unit Replace SMPS or Main PBA as appropriate 7 4 4 Paper Empty Description Paper Empty is displayed in the LCD panel even when paper is loaded in the cassette Check and Cause Solution 1 Deformed paper sensor actuator or faulty sensor 2 SMPS PBA or Main PBA is defective 3 Faulty cables or connectors 1 Replace the defective actuator o...

Страница 81: ...place the SMPS PBA or MAIN PBA as appropriate 7 4 6 Cover Open Description The Cover Open message appears on the LCD even when the print cover is closed Check and Cause Solution 1 The Open Cover microswitch may be stuck or faulty 2 The tab on the front cover may be damaged or broken 3 Check the connector and cables between Switch and main PBA 1 Use TECH mode cover sensor test to check cover switch...

Страница 82: ...rs on the LCD even when the print cover is open Check and Cause Solution 1 The Open Cover microswitch may be stuck or faulty 2 Check the connector and cables between Switch and main PBA 1 Use TECH mode cover sensor test to check cover switch operation Check and replace switch if necessary 2 Replace the Main Control board or Cover Open S W as necessary ...

Страница 83: ...lem persists replace the main PBA Note Check motor operation using EDC Mode 7 4 9 No Power Description When system power is turned on the LCD panel does not come on Check and Cause Solution 1 Check if the power input and SMPS output are normal 2 LCD panel does not come on but normal start up sounds are heard 3 After replacing SMPS display does not come on and no start up sounds are heard 1 Replace...

Страница 84: ...4 10 Printed Vertical Lines become curved Description When printing vertical lines are not straight Check and Cause Solution 1 Check stability of 24V supply to LSU 1 24V stable Replace LSU 24V unstable replace SMPS if the problem persists replace the main PBA ...

Страница 85: ...near the end of its life white streaks or light print occurs You can temporarily reestablish the print quality by redistributing the remaining toner in the cartridge 1 Open the Front Cover 2 Lightly pushing the used cartridge down pull it out Note Help the environment by recycling your used toner car tridge Refer to the recycling brochure packed with the toner cartridge for details 3 Unpack the ne...

Страница 86: ... intervals a Check the distance between contamination marks b Check the appearance of both ends of the toner cartridge OPC drum 2 Random page contamination a Check that the terminals contact points of the toner cartridge and the set are clean b Check that the terminals contact points of the toner cartridge and the set are not damaged 1 All of 1 2 3 If image quality improves by shaking replace with...

Страница 87: ...oner cartridge and the set are clean b Check that the terminals contact point of the toner cartridge and the set are not damaged 1 For item 1 Run OPC Cleaning Mode Print 4 5 times repeatedly to remove excess toner Especially check for foreign substances on the OPC surface Clean with a clean gauze moistened with IPA Isopropyl Alcohol take care not to damage the OPC surface Never use other forms of ...

Страница 88: ...ct of the toner cartridge or set b Check if the terminal assembly is normal Especially check the charge roller terminal 3 The printed image is dark and ghost occurs a Check if foreign substances are stuck to the terminal point of contact of the toner cartridge or set b Check if the terminal assembly is normal Especially check the developer roller terminal 1 All of Items 1 2 3 a Clean the contacts ...

Страница 89: ...n between PC and printer port are correcct If you use windows check that the printer driver in the controller is set up correctly set up the correct port is selected and Use On line is selected in the driver If the printer driver is properly set up try printing a test page from the driver proper ties Check in which program printing is not working Try opening Memo Pad and printing If the printer is...

Страница 90: ...ns there is a hard disk space problem rather than a printer RAM problem In this case pro vide more space on the hard disk Secure more space using the disk utilities program 2 The connection of the cable and printer port is not correct Check that the cable is properly connected and if you are using the parallel port check that the port settings in CMOS is correct 3 For the printer port Select ECP S...

Страница 91: ...irtual memory this is caused by insufficient space on the hard disk 1 Ensure that ECP best or SPP is selected in the CMOS BIOS setup 2 Ensure that the correct driver is loaded Use the driver supplied on the CD or downloaded from the Samsung web site DO NOT use the Microsoft driver supplied with the Windows operating system If the printer is a GDI or SPL type printer ensure that ALL OTHER GDI or SP...

Страница 92: ... previous failed print jobs on the hard disk with the name in the form jnl Delete these files and Reboot Windows to restart the printer 3 Shut down all other programs except the current one if possible 4 Delete the printer driver completely and reinstall it 5 After rebooting the computer check for viruses restore the damaged files and reinstall the application program which is not working properly...

Страница 93: ...7 28 Troubleshooting Samsung Electronics Service Manual MEMO ...

Страница 94: ... 8 Exploded Views and Parts List 8 1 Main Assembly page 8 2 8 2 Frame Assembly page 8 4 8 3 Scanner Unit Assembly page 8 7 8 4 Fuser Unit Assembly page 8 9 8 5 Middle Cover Unit Assembly page 8 11 8 6 Driver Unit Assembly page 8 13 8 7 Cassette Unit Assembly page 8 14 ...

Страница 95: ...8 2 Exploded View Parts List Samsung Electronics Service Manual 8 1 Main Assembly 0 10 1 4 6 Toner Cartridge 5 1 5 2 5 4 5 3 5 4 5 5 5 3 8 9 16 13 17 Frame 11 7 8 1 8 3 8 2 12 15 14 2 2 2 2 1 ...

Страница 96: ...ADJUST M_MANUAL_R JC70 00482A 1 X 5 4 ADJUST RACK M_MANUAL JC70 00304A 2 O 5 5 GEAR RACK PINION JC66 00387A 1 X 5 6 LABEL P EXTRACT DEVE JC68 01085J 1 X S SCREW TAPTITE 6003 000264 3 X 6 MEA UNIT CASSETTE_MB JC97 01914A 1 O SCX 4100 7 UNIT HUMMING_VE LSU JC59 00018C 1 O 8 MEA ETC TR not assign 1 O 8 1 ROLLER TRANSFER JC66 00725A 1 O 8 2 GEAR TRANSFER JC66 00395A 1 O 8 3 PPR SPACER TR JC72 00851A 2...

Страница 97: ... 1 4 3 6 7 61 12 6 9 53 9 51 13 14 15 18 19 21 22 23 24 25 26 37 31 27 28 29 29 30 58 63 58 1 58 2 58 3 58 4 58 5 58 6 58 6 58 4 40 41 56 42 44 53 45 46 47 48 59 59 1 59 2 59 3 59 4 50 52 52 54 2 55 11 10 8 35 36 Transfer Roller 38 60 39 43 32 34 33 62 49 49 3 49 2 49 1 0 5 16 17 57 ...

Страница 98: ... 00049A 4 O 14 IPR P TERMINAL CON JC70 00312A 3 O 15 IPR P TERMINAL CR JC70 00313A 1 O 16 HOUSING TERMINAL JC61 00592A 1 O 17 PMO LOCKER CST JC72 00983A 2 O 18 PMO ACTUATOR CVR OPEN JC72 00974A 1 O 19 PMO PLATE GUIDE DEVE_R JC72 00985A 1 O 20 SPRING ETC GUIDE DEVE JC61 70932A 2 O 21 IPR P GROUND_GUIDE PAPER JC70 00458A 1 O 22 PMO PLATE GUIDE DEVE_L JC72 00984A 1 O 23 PMO ACTUATOR FEED JC72 00976A ...

Страница 99: ...167 1 X Spring Pick up gear 50 BRACKET P FEED JC61 00602A 1 O 51 IPR P GROUND_TR JC70 00311A 1 O 52 SHAFT FEED JC66 00398A 2 O 53 RING CS 6044 000001 3 X 54 GEAR FEED 2 JC66 00394A 1 O 55 GEAR IDLE 23 JC66 00396A 1 O 56 GUIDE P PAPER JC61 00718A 1 O 57 FOOT FRONT JC61 00836A 2 O 58 AS PICK UP JC81 01693A 1 O 58 1 BUSH M PICK_UP L JC61 00586A 1 O 58 2 SHAFT P PICK_UP JC66 00399A 1 O 58 3 STOPPER PI...

Страница 100: ...8 7 Samsung Electronics Exploded View Parts List Service Manual 8 3 Scanner Unit Assembly 0 1 2 4 5 28 13 21 23 20 25 27 14 15 12 10 9 7 9 8 11 12 29 17 24 19 16 18 26 20 22 3 ...

Страница 101: ... 00714A 2 X 10 IPR CARRIAGE CIS JC70 00480A 1 X 11 HOLDER CIS JC61 00930A 1 X 12 SCREW TAPTITE 6003 001064 2 X 13 BELT SCANNER JB66 00007A 1 O 14 IPR SHAFT CIS JC66 00718A 1 X 15 CAP PULLEY JC67 00069A 1 X 16 GEAR M PULLEY JC66 00721A 1 X 17 SCREW TAPTITE 6003 000269 2 X 18 BRACKET SCAN MOTOR JC61 00952A 1 X 19 MOTOR STEP SCAN JC31 00035A 1 O 20 BRACKET SCAN L JC61 00941A 2 X 21 PULLEY IDLE JC66 0...

Страница 102: ...ectronics Exploded View Parts List Service Manual 8 4 Fuser Unit Assembly 1 32 3 2 34 4 5 31 32 16 19 6 33 7 8 9 10 12 13 26 20 15 21 22 23 24 25 27 28 31 29 30 37 S2 39 14 31 11 35 40 40 S3 S3 41 40 39 38 0 18 17 39 ...

Страница 103: ...110V JC39 00239A 1 O 110V CBF HARNESS FUSER 220V JC39 00238A 1 O 220V 16 GEAR FUSER JC66 00037C 1 X 17 BUSH M HR L JC61 00948A 1 X 18 ROLLER HEAT JC71 00012B 1 O 19 BUSH M HR R JC61 00947A 1 O 20 LAMP HALOGEN_110V 4713 001182 1 O 110V LAMP HALOGEN_220V 4713 001183 1 O 220V 21 ROLLER M EXIT F UP JC66 00380A 1 X 22 RUBBER EXIT JC73 00017A 2 X 23 ROLLER PRESSURE JC66 00731A 1 O 24 BEARING PRESSURE R ...

Страница 104: ...mark 36 WASHER PLAIN 6031 001051 1 X 37 LABEL R HV FUSER JC68 00407A 1 X 38 SCREW TAPTITE 6006 001078 1 X 39 SCREW MACHINE 6006 001193 5 X 40 SCREW TAPTITE 6603 000269 6 X 41 SCREW TAPTITE 6003 000196 1 X Fuser Unit Assembly Parts List SA Service Available O Service available X Service not available ...

Страница 105: ...8 12 Exploded View Parts List Samsung Electronics Service Manual 8 5 Middle Cover Unit Assembly 0 5 2 3 4 7 9 8 10 11 12 1 5 6 ...

Страница 106: ... MIDDLE JC97 01958A 1 O 1 COVER M_MIDDLE JC63 00473A 1 X 2 PMO STACKER JC72 01340A 1 X 3 STOPPER M LEVER JC61 00949A 1 X 4 SPRING ETC TS CHARGE APOLLO JC61 00026A 1 X 5 PMO SUB_M_STACKER JC72 01343A 2 X 6 PMO BUSHING_F DOWN JC72 00387A 1 O 7 WINDOW M LCD JC64 00153A 1 X 8 KEY M_START JC64 00151A 1 X 9 KEY M_STOP JC64 00150A 1 X 10 KEY M_MENU JC64 00152A 1 X 11 PBA SUB PANEL JC92 01586A 1 O 12 COVE...

Страница 107: ...JC61 00598A 1 O 2 GEAR RDCN 53 26 JC66 00388A 1 O 3 GEAR RDCN 113 33 JC66 00391A 1 O 4 GEAR RDCN 57 18 JC66 00389A 2 O 5 WASHER PLAIN 6031 000023 2 X 6 BRACKET P MOTOR 1400 JC61 00599A 1 X 7 GEAR RDCN 103 41 JC66 00390A 1 O 8 GEAR RDCN 90 31 JC66 00392A 1 O 9 MOTOR STEP 7 5 JC31 00020A 1 O 10 PMO IMPELLER_DRV JC72 00825A 1 X Drive Unit Assembly Parts List SA Service Available O Service available X...

Страница 108: ...8 15 Samsung Electronics Exploded View Parts List Service Manual 8 7 Cassette Unit Assembly 0 1 4 19 5 6 7 8 2 9 10 20 13 11 12 14 16 18 3 15 17 ...

Страница 109: ...PAD JC61 00580A 1 O 8 SPRING ETC LOCKER PLATE JG61 70531A 1 O 9 PLATE P KNOCK_UP JC61 00603A 1 X 10 SPRING CS 6107 001166 2 X 11 PMO EXTENSION SMALL JC72 00971A 1 O 12 GUIDE M EXTENSION L2 JC61 00918B 1 X 13 FRAME M_CASSETTE JC61 00876A 1 X 14 PMO PLATE_LOCKER JC72 00972A 1 O 15 SPRING ETC EXIT ROLL FD JC61 70911A 1 X 16 ROLLER M IDLE FEED JC66 00529A 2 O 17 SPRING ES 6107 001047 2 X 18 GUIDE M_CA...

Страница 110: ...9 9 9 1 Samsung Electronics Block Diagram Service Manual 9 Block Diagram ...

Страница 111: ...Connection Diagram 1 GND 2 TX 3 RST 4 RX 5 5V 1 nP_EMPTY 2 nP_FEED 3 5V 4 5V 5 GND 6 GND 7 3 3V 8 GND 9 GND 10 GND 11 24VS 12 24VS 13 MANUAL 14 24V 15 OPE_RX 16 THV_REED 17 nOPE_RST 18 THV_PWM 19 THV_EN 20 BIAS_PWM 21 MHV_PWM 22 OPE_TX 23 5V 24 FAN 25 FUSER_ON 26 P_EXIT ...

Отзывы: