34
_ English
MAKING YOUR FIRST RECORDING
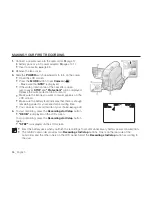
1.
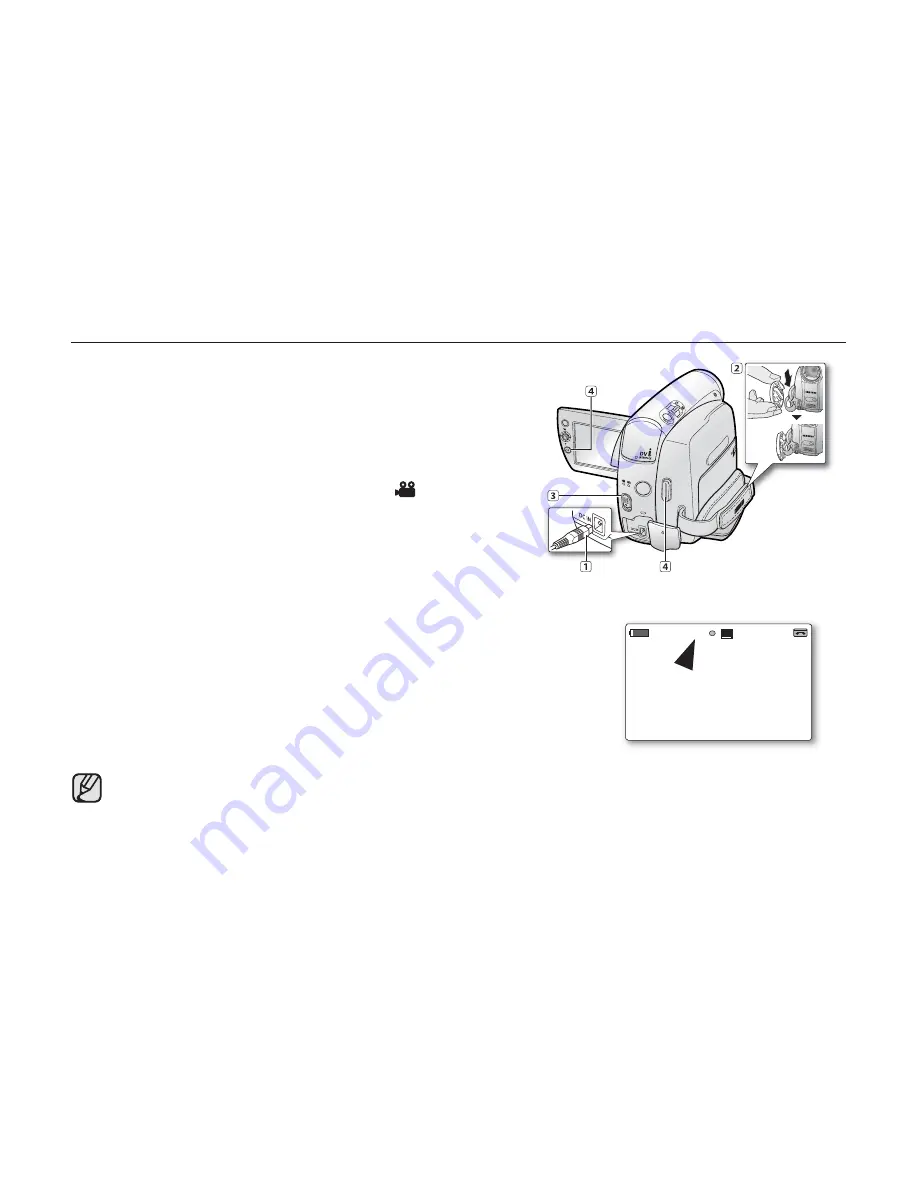
Connect a power source to the camcorder.
➥
page 17
(A battery pack or a AC power adapter)
➥
pages 14,17
Insert a cassette.
➥
page 33
2.
Remove the lens cover.
3.
Slide the
POWER
switch downwards to turn on the power.
Open the LCD screen.
Press the
MODE
button to set
Camera
(
).
- Make sure that
STBY
is displayed.
If the write protection tab of the cassette is open
(set to save),
STOP
and
"Protection!"
will be displayed.
Release the write protection tab to record.
Make sure the image you want to record appears on the
LCD screen.
Make sure the battery level indicates that there is enough
remaining power for your expected recording time.
You can select a record mode of your choice.
➥
page 43
4.
To start recording, press the
Recording start/stop
button.
"REC
●
"
is displayed on the LCD screen.
To stop recording, press the
Recording start/stop
button
again.
"STBY"
is displayed on the LCD screen.
Eject the battery pack when you fi nish the recordings to prevent unnecessary battery power consumption.
The miniDV camcorder provides two
Recording start/stop
buttons. One is on the rear side of the
camcorder and the other one is on the LCD panel. Select the
Recording start/stop
button according to
the use.
•
•
•
•
•
•
•
•
•
•
•
MODE
POWER
CHG
VOL
MENU
OPEN
OPEN
10Sec
10Sec
16Bit
16Bit
S
No Tape !
No Tape !
W
T
29
29
1/50
1/50
M
60min
60min
0:00:00
0:00:00
SP
16:9 Wide
16:9 Wide
REC
REC


