121
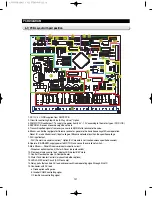
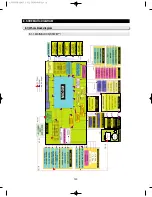
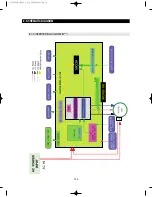
6-1) PCB Layout with part position
PCB DIAGRAM
1. DC12V, 5V, GND supplied from SMPS PCB
2. Circuit for controlling Step-Valve (3-Way Valve) * Option
3. FAN MOTOR control part : To supply the power from 8.3V ~ 12V according to the motor types. (F,R,C,ICE)
4. EEPROM : Save and record every kinds of data.
5. Transmit inputted signals from every sensor into MICOM after eliminate the noise.
6. Micom : control the regrigerator Ceramic resonator : generate the basic frequency of Micom operation.
Reset IC : make Micom reset if input voltage of Micom is detected less than the specified voltage
7. PLC input/output
- PLC (Power Line communication) * Option(PLC module is not inserted unless specified occasion)
8. Operate ICE-MAKER, supply power to MOTOR, and sense the variation of switch.
9. Main Micom
↔
Panel Micom serial communication circuit
- Dispenser option input part (Water & Cover Ice route switch)
10. Flex room display control part : display LED, detect KEY state.
11. Control Flex room damper & Damper heater
12. Water Tank Heater Controls (also controls other options)
13. LED LAMP Control Circuit (F,R,Flex Lamp)
14. Relay parts that controls AC load and receives Micom operating signal through Sink IC.
15. Connector with AC load
a. Diode option setting area
b. Inverter COMP controlling signal
C. Flow Sensor controlling signal
AW3 SM-EN 2011.3.31 2:57 PM 페이지121 in
Содержание RF4287HARS
Страница 17: ...18 PRODUCT SPECIFICATIONS 2 5 Dimensions of Refrigerator Inches AW3SM EN2011 3 312 52PM 18 in...
Страница 20: ...21 PRODUCT SPECIFICATIONS 2 7 1 PRINCIPLE OF FREEZEER BACK CLUSTER PIPE AW3SM EN2011 3 312 52PM 21 in...
Страница 86: ...87 TROUBLESHOOTING IPM FREEWHEELING DIODE VOLTAGE VALUE AW3SM EN2011 3 312 56PM 87 in...
Страница 96: ...97 TROUBLESHOOTING SPM Internal DIODE Voltage AW3SM EN2011 3 312 56PM 97 in...
Страница 98: ...99 TROUBLESHOOTING INVERTER PCB Circuit Diagram AW3SM EN2011 3 312 56PM 99 in...
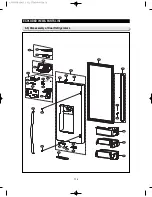
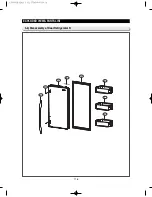
Страница 115: ...116 EXPLODED VIEW PARTS LIST 5 6 Disassembly of Door Refrigerator R 5 1 3 2 6 4 5 5 AW3SM EN2011 3 312 57PM 116 in...
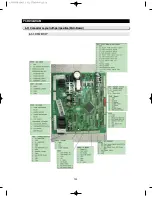
Страница 122: ...123 6 3 Connector Layout with part position Main Board PCB DIAGRAM 6 3 1 RF4287HA AW3SM EN2011 3 312 57PM 123 in...
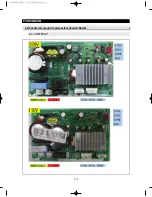
Страница 123: ...124 6 4 Connector Layout with part position Inverter Board PCB DIAGRAM 6 4 1 RF4287HA AW3SM EN2011 3 312 57PM 124 in...
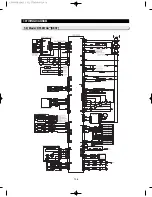
Страница 124: ...125 7 1 Model RFG295AA BETTER 7 WIRING DIAGRAM BLU BLU AW3SM EN2011 3 312 57PM 125 in...
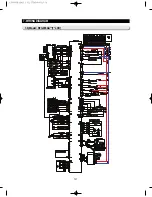
Страница 125: ...126 7 2 Model RF4287AA BEST 7 WIRING DIAGRAM AW3SM EN2011 3 312 57PM 126 in...
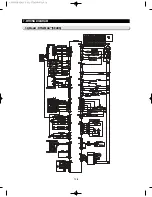
Страница 126: ...127 7 3 Model RFG299AA 7 LCD 7 WIRING DIAGRAM BLU BLU AW3SM EN2011 3 312 57PM 127 in...
Страница 127: ...128 7 4 Model RFG294AA SEARS 7 WIRING DIAGRAM AW3SM EN2011 3 312 57PM 128 in...
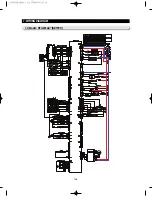
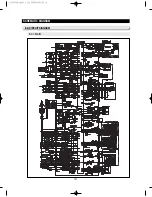
Страница 128: ...129 8 1 Whole block diagram 8 SCHEMATIC DIAGRAM 8 1 1 MAIN BLOCK RF4287 AW3SM EN2011 3 312 58PM 129 in...
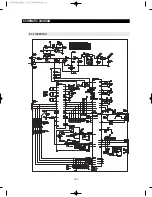
Страница 129: ...130 8 SCHEMATIC DIAGRAM 8 1 2 INVERTER BLOCK RF4287 AW3SM EN2011 3 312 58PM 130 in...
Страница 130: ...131 8 2 CIRCUIT DIAGRAM SCHEMATIC DIAGRAM 8 2 1 MAIN AW3SM EN2011 3 312 58PM 131 in...
Страница 131: ...132 SCHEMATIC DIAGRAM 8 2 2 INVERTER AW3SM EN2011 3 312 58PM 132 in...

