background image

I

N

S

T

R

U

C

T

I

O

N

M

A

N

U

A

L

P r o j e c t i o n   C o l o r   T e l e v i s i o n   P L H 4 0 3 W

Projection TV

PLH403W(eng)SEM  05/12/27  4:12 PM  Page i

Содержание PL-H403W

Страница 1: ...I N S T R U C T I O N M A N U A L P r o j e c t i o n C o l o r T e l e v i s i o n P L H 4 0 3 W Projection TV ...

Страница 2: ... chocs electriques introduire la lame le plus large de la fiche dans la borne correspondante de la prise et pousser jusqu au fond Note to CATV system installer This reminder is provided to call CATV system installer s attention to Article 820 40 of the National Electrical Code Section 54 of Canadian Electrical Code Part I that provides guidelines for proper grounding and in particular specifies th...

Страница 3: ... Displays 25 Channel Memory 26 Changing Channels 28 Setting the Clock 29 Sound Control 30 Picture Control 32 Setting Up Your Remote Control 34 Remote Control Codes 36 Viewing a VCR DVD or Camcorder Tape 37 Setting Timers 38 Special Features 42 Special Video Features 42 Special Audio Features 44 Viewing Closed Caption Information 45 Using External Speakers 46 Using Wireless Headphones 47 Changing t...

Страница 4: ...jury Do not use the TV where contact with water is possible such as near bath tubs sinks washing machines swimming pools etc Do not place the TV on an unstable cart stand tripod bracket or table where it can fall A falling TV can cause serious injury to a child or adult and serious damage to the appliance Use only with a cart stand tripod bracket or table recommended by the manufacturer or sold wi...

Страница 5: ...uilt up static charges Section 810 of the National Electrical Code ANSI NFPA No 70 1984 provides information about proper grounding of the mast and supporting structure grounding of the lead in wire to an antenna discharge unit size of grounding conductors location of antenna discharge unit connection to grounding electrodes and requirements for the grounding electrode Do not attempt to service th...

Страница 6: ...SAMSUNG ...

Страница 7: ...Your New Wide TV ...

Страница 8: ...d sound settings and the ability to memorize your favorite settings Automatic channel tuning for up to 181 channels A special filter to reduce or eliminate reception problems Fine tuning control for the sharpest picture possible A built in multi channel sound decoder for stereo and bilingual listening Built in dual channel speakers 13 watts per channel A special sleep timer Picture in Picture capa...

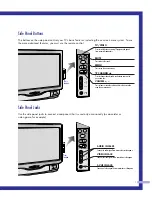
Страница 9: ...NNEL VOLUME L3 R3 V3 I N P U T 4 S VHS 2 IN TV VIDEO Press to switch between viewing TV programs and signals from connected components MUTE Press to mute the sound MENU Press to see the on screen menu CHANNEL Press to change channels and move between items on the on screen menu S VHS IN JACK Connect an S video signal from a camcorder or video game AUDIO IN JACKS Connect the audio signal from a cam...

Страница 10: ...on in about 30 seconds Air vent cover at the rear of the TV is not properly installed Inside temperature of the TV is too high Turn the TV off and clean the air vent cover on the back of the TV Turn the TV on after 1 hour Lamp inside the TV needs to be replaced POWER TIMER LAMP TEMP Light is On Light is Blinking Light is Off It takes about 30 seconds for the TV to warm up so normal brightness may ...

Страница 11: ...s antenna or cable system to your TV S VIDEO IN jack Connects an S Video signal from an S VHS VCR or laserdisc player VIDEO INPUT jacks Connect video signals from external sources like VCRs or laserdisc players EXTERNAL SPEAKER jacks AUDIO INPUT jacks Connect audio signals from external sources like VCRs or laserdisc players VIDEO MONITOR OUT jack Sends a video signal from the TV to an external so...

Страница 12: ... using the on screen menus REMOTE CONTROL p 34 35 Selects what the remote controls TV VCR or CABLE 100 p 28 Select channels over 100 PIP on off p 49 SWAP p 51 CH and CH Channel VOL and VOL Volume Controls volume channel selection and menu items TV VIDEO p 37 S STD Sound standard p 31 P STD Picture standard p 33 PRE CH Previous Channel p 28 SLEEP p 39 P SIZE PIP size p 51 DISPLAY p 25 CH SCAN p 28 ...

Страница 13: ...place both batteries and do not mix old and new batteries in the remote control If you won t be using the remote con trol for a long time remove the batteries and store them in a cool dry place 1 Slide the back cover all the way out to open the battery compartment of the remote control 2 Install two AAA size batteries Make sure to match the and ends of the batteries with the diagram inside the com...

Страница 14: ...SAMSUNG ...

Страница 15: ...Connections ...

Страница 16: ...twin leads 1 Place the wires from the twin leads under the screws on the 300 75 ohm adapter included Use a screwdriver to tighten the screws 2 Plug the adapter into the VHF UHF terminal on the back panel of the TV Antennas with 75 ohm Round Leads If your antenna looks like this it is an antenna with 75 ohm round leads 1 Plug the antenna lead into the VHF UHF terminal on the back panel of the TV 75...

Страница 17: ...ou must combine the two antenna signals before connecting them to the TV This requires a combiner attachment which you can buy at an electronics store 1 Connect both antenna leads to the combiner 2 Plug the combiner into the VHF UHF terminal on the rear panel of the TV 15 75 VHF UHF VHF UHF VHF UHF ...

Страница 18: ...you do not need to use a cable box 1 Plug the incoming cable into the VHF UHF antenna terminal on the back of the TV Cable with a Cable Box that Descrambles All Channels 1 Find the cable that is connected to the ANTENNA OUT terminal on your cable box This terminal might be labeled ANT OUT VHF OUT or simply OUT 2 Connect the other end of this cable to the VHF UHF antenna terminal on the back of the...

Страница 19: ... terminal on the A B switch 4 Connect another cable between the other OUT terminal on the splitter and the A IN terminal on the RF A B switch 5 Connect the last coaxial cable between the OUT terminal on the RF A B switch and the VHF UHF terminal on the rear of the TV After you ve made this connection set the A B switch to the A position for normal viewing Set the A B switch to the B position to vi...

Страница 20: ... the left and right audio input jacks of the TV If your VCR is stereo you must con nect two separate sets of cables 5 Connect a video cable between the VIDEO OUT jack on the VCR and the VIDEO IN jack on the TV 75 VHF UHF Incoming Cable or Antenna VCR Rear Panel VIDEO OUT AUDIO OUT L R IN OUT ANTENNA Coaxial Cable VCR Rear Panel IN OUT ANTENNA VIDEO OUT AUDIO OUT L R MONITO OUT INPUT 1 2 3 75 VHF U...

Страница 21: ...UDIO OUT jacks on the TV and the AUDIO IN jacks on the VCR The VCR s input jacks might be on the front or back of the VCR 2 Connect a video cable between the VIDEO OUT jack on the TV and the VIDEO IN jack on the VCR 19 Coaxial Cable VCR Rear Panel IN OUT ANTENNA VIDEO OUT AUDIO OUT L R MONITOR OUT INPUT 1 2 3 75 VHF UHF V1 L1 R1 V2 L2 R2 Y Cb Cr V L R TV Rear Panel MONITOR OUT INPUT 1 2 3 S VHS 1 ...

Страница 22: ...dio cables are usually included with the camcorder 3 Connect a video cable between the VIDEO OUTPUT jack on the cam corder and the VIDEO terminal on the side of the TV A video cable is usually included with the camcorder To watch a tape fol low your camera s instructions and the section on Viewing a VCR DVD or Camcorder Tape in this manual Camcorder Output Jacks TV Side Panel Input Jacks VIDEO AUD...

Страница 23: ... Component Mode the PICTURE SIZE ASPECT can not be adjusted and the MONITOR OUT PIP features do not operate If you want to use PIP while viewing DVD select VIDEO 2 after connecting the DVD VIDEO OUT jack to V2 on the TV If you want to view captions when viewing a DVD disc in the Component mode set the DVD player s Caption function to on 75 VHF UHF DVD Player Rear Panel IN OUT ANTENNA Audio Cable T...

Страница 24: ...SAMSUNG ...

Страница 25: ...Operation ...

Страница 26: ...s 3 Press CH to highlight Language 4 Press VOL to select the language Press the MENU button on the remote control to exit the menu Video Audio Setup Time PIP Caption Move Ent Exit AIR CATV Auto Prog Fine Tune Demo LNA NR Scroll Adj Speaker Language AIR 13 01 ON Off Int English Move Sel Menu 1 2 3 4 5 6 8 0 SWAP STILL MENU PIP CH SCAN ASPECT CH S STD MTS SURR P STD TV VCR CABLE SET TV VIDEO ADD ERA...

Страница 27: ...he screen The Video menu is selected 2 Use the CH and CH buttons to select items in the menu Use the VOL and VOL buttons to display change or use the selected items On screen menus disappear from the screen automatically after about thirty seconds or you can press the MENU button on your remote control to exit the menu Displaying Status Information 1 Press the DISPLAY button on the remote control ...

Страница 28: ...t line of the menu is highlighted 4 If you are connected to an antenna leave AIR displayed If you connected cable press VOL to display the type of cable system STD HRC or IRC If you are not sure which type of cable system you have contact your cable company Video Audio Setup Time PIP Caption Move Ent Exit AIR CATV Auto Prog Fine Tune Demo LNA NR Scroll Adj Speaker Language AIR 20 00 Off On Int Eng...

Страница 29: ...nt to add or erase 2 To add a channel select it and press the ADD button on the remote control The channel will be added to the TV s memory and the word Add will appear in the corner of the screen 3 To erase a channel select it and then press the ERASE button on the remote control The word Erase will appear in the corner of the screen You can still view a channel that has been erased from memory b...

Страница 30: ... single digit channels 0 9 faster press 0 before the single digit Example For channel 4 press 0 then 4 To select a channel over 100 press the 100 button first Example For channel 122 press 100 then 2 then 2 Using the Previous Channel 1 Press the PRE CH button on the remote control The TV changes to the last channel you were watching Scanning channels 1 You can automatically scan all of the channel...

Страница 31: ...our After selecting the correct hour press VOL again The minute will be highlighted 5 Press the CH or CH button to select the minute When you have selected the correct minute press MENU twice to exit the menus Video Audio Setup Time PIP Caption Move Ent Exit Clock On time Off time On time vol 6 06 30 AM AM AM Minute Sel Menu Off Off Clock On time Off time On time vol 6 12 00 AM AM AM Move Sel Menu...

Страница 32: ...he MUTE button again or raise or lower the volume with the VOL and VOL buttons Customizing the Sound 1 Press the MENU button on the remote control to display the on screen menu Press CH to select the audio menu 2 Press VOL to display the audio menu You will see the items Bass Treble Balance and Headphone Bass Treble Balance Headphone Main 50 50 L 50 R 50 Move Adj Menu Video Audio Setup Time PIP Ca...

Страница 33: ...the S STD button on the remote control to change the automatic sound setting 2 Press the S STD button again to select the Standard Music Movie Speech or Custom sound setting Guide to Automatic Sound Settings Choose Standard for the factory settings the best choice for most people Choose Music when watching music videos or concerts Choose Movie when watching a movie Choose Speech when watching a sh...

Страница 34: ...hed adjusting an item wait a moment The level indicator will disappear and the Video menu will return You can continue to make adjustments or press the MENU button to exit Video Audio Setup Time PIP Caption Move Ent Exit Contrast Brightness Tint Color Sharpness 100 50 G 50 R 50 Move Adj Menu 50 50 Brightness 50 Contrast Brightness Tint Color Sharpness 100 50 G 50 R 50 Move Adj Menu 50 50 1 2 3 4 5...

Страница 35: ...atedly to select the Standard Mild or Custom picture setting Guide to Automatic Picture Settings Choose Standard to set the TV to operate at top performance according to your TV s specifications Choose Mild when viewing the TV in low light or when playing video games Choose Custom if you want to adjust the settings yourself Picture Standard ...

Страница 36: ... your remote control enter both digits of the VCR code listed on page 36 of this manual for your brand of VCR Make sure you enter both digits of the code even if the first digit is a 0 If more than one code listed try the first one 5 Press the POWER button on the remote control Your VCR should turn on if your remote is set up correctly If your VCR does not turn on after set up repeat steps 2 3 and...

Страница 37: ...ot turn on after set up repeat steps 2 3 and 4 but try one of the other codes listed for your brand of cable box If no other codes are listed try each code 00 through 35 Notes on Using Remote Control Modes VCR Cable and TV When your remote control is in VCR mode the volume buttons still control your TV s volume When your remote is in TV mode the VCR control buttons PLAY PAUSE etc still operate you...

Страница 38: ... 15 34 55 15 19 34 00 36 11 09 38 42 46 48 09 12 38 50 11 09 00 09 11 13 20 21 43 17 30 16 44 30 37 52 61 66 17 00 65 00 36 28 12 14 15 23 34 21 31 09 63 09 12 14 16 65 16 32 44 09 09 31 38 46 11 28 34 05 13 19 49 09 41 09 16 32 44 48 54 29 00 09 11 19 20 21 31 33 43 65 08 18 24 26 65 15 34 67 19 20 43 47 53 58 60 09 11 16 19 20 27 33 43 44 21 31 36 02 06 07 08 09 16 09 17 46 00 00 43 15 00 15 09 ...

Страница 39: ...ntil you see the TV s picture When you connect equipment to the TV you can choose between the following sets of jacks Video1 Video 2 Component or S VHS 1 on the TV s rear panel and Video3 or S VHS 2 on the TV s side panel Remote Control VCR Buttons Slide the bottom panel of the remote control down to access buttons that can control the tape functions of a connected VCR including Rewind Play Fast F...

Страница 40: ...ke sure the correct time of day AM or PM appears next to the hour 4 Press VOL to highlight the On time minute Press CH or CH to select the minute when you want the TV to turn on 1 2 3 4 5 6 8 0 SWAP STILL MENU PIP CH SCAN ASPECT CH S STD MTS SURR P STD TV VCR CABLE SET TV VIDEO ADD ERASE STOP PAUSE PRE CH SLEEP REW PLAY POWER VOL 100 7 DISPLAY 9 MUTE FF REC VOL LOCATE P SIZE PIP CH Clock On time O...

Страница 41: ...he TV turns on Press the MENU button twice to return to normal viewing Setting the Sleep Timer You can set your TV to automatically turn off after a preset interval 1 Press the SLEEP button on the remote control 2 You ll see Sleep Off at the bot tom left of the screen Press the SLEEP button to select the time interval for the TV to stay on The interval can ranges from 10 to 120 minutes in ten minu...

Страница 42: ...SAMSUNG ...

Страница 43: ...Special Features ...

Страница 44: ... Press the VOL and VOL buttons to adjust the fine tuning 5 If you want to add the fine tuning set ting to the TV s memory press the ADD button on the remote control If you want to return the setting to 00 press ERASE Press the MENU button twice to return to normal viewing Video Audio Setup Time PIP Caption Move Ent Exit AIR CATV Auto Prog Fine Tune Demo LNA NR Scroll Adj Speaker Language AIR 20 00...

Страница 45: ... signal as it reaches your TV 1 Press the MENU button on the remote control to display the menu Press CH to select Setup 2 Press VOL Press CH to select LNA 3 Press VOL to turn LNA on The LNA effect depends on each Channel Press the MENU button twice to return to normal viewing IMPORTANT NOTE When the warning Not available in video mode appears it means the function you tried to activate will not o...

Страница 46: ...o you can set your TV to play the soundtrack in stereo or in mono Some stations also broadcast a Secondary Audio Program SAP SAP programs are usually versions of the program in another language but they sometimes carry additional information like news or weather 1 Press the MTS button on the remote control You can choose between Stereo SAP and Mono The text at the bottom left of the screen tells y...

Страница 47: ...In caption mode captions appear at the bot tom of the screen and they usually cover only a small portion of the picture In text mode information unrelated to the program such as news or weather is displayed Text often covers a large portion of the screen 4 If you wish use CH CH or VOL to change the captioning channel or field Then press MENU twice to return to normal viewing Different channels and...

Страница 48: ...eakers Setting Up External Speakers 1 Press the MENU button on the remote control to display the menu Press CH to select Setup 2 Press VOL to display the Setup menu Press CH to select Speaker 3 Press VOL to select the Ext option Press VOL to switch between the Int and Ext options Press MENU until the menus disap pear AIR CATV Auto Prog Fine Tune Demo LNA NR Scroll Adj Speaker Language AIR 13 01 ON...

Страница 49: ... to select the Audio menu Press VOL for the Audio menu 2 Press CH to select Headphone 3 Press VOL to switch the Head phones between the Main or Sub audio source MAIN is for the main TV picture audio and SUB is for the PIP picture audio Note Sub is only available in the PIP mode 1 2 3 4 5 6 8 0 SWAP STILL MENU PIP CH SCAN ASPECT CH S STD MTS SURR P STD TV VCR CABLE SET TV VIDEO ADD ERASE STOP PAUSE...

Страница 50: ...the Scroll adj function To access Scroll adj press MENU on your remote control and select Scroll adj from the SETUP menu Then press VOL or VOL to scroll the picture up and down Normal Sets the picture to 4 3 normal mode This is a standard TV screen size NOTE When PIP or CAPTION is selected in the ZOOM1 or ZOOM2 mode the Mode is automatically converted into the WIDE mode When PIP or CAPTION selecte...

Страница 51: ... Note If you turn the TV off while watching and turn it on again then the mode will return to Normal view 2 The PIP image will appear in the corner of the screen 3 Press the PIP button again to turn off the PIP image NOTE PIP does not operate in the Component mode The channel number indicated on the upper right corner of the screen is for the main image The channel displayed underneath that one is...

Страница 52: ...the main image NOTE When an external signal is selected in the PIP mode COMPONENT video can not be selected Changing the Picture in Picture Channel After you set the PIP signal source antenna or cable it is easy to change channels 1 Press the PIP CH or CH to change the channel of the PIP image 2 The PIP channel will appear in the upper right corner of the screen above the main image Video Audio Se...

Страница 53: ...IP image 1 Press LOCATE button repeatedly to move the PIP image from corner to corner on the screen Changing the Size of the PIP image 1 Press P SIZE button repeatedly to change the size of the PIP image You can choose between a small size shown and a 4 3 size 1 2 3 4 5 6 8 0 SWAP STILL MENU PIP CH SCAN ASPECT CH S STD MTS SURR P STD TV VCR CABLE SET TV VIDEO ADD ERASE STOP PAUSE PRE CH SLEEP REW ...

Страница 54: ...SAMSUNG Appendix ...

Страница 55: ...Appendix ...

Страница 56: ...r channel Press the TV VIDEO button Make sure the TV is plugged in Check the antenna connections No color or wrong colors Make sure the program is broadcast in color Adjust the picture settings Picture rolls vertically Adjust the antenna Check all wire connections If you are using a VCR check the tracking Erratic operation or intermittent failure Unplug the TV for 30 seconds then try again Remote ...

Страница 57: ...net or touch the parts inside Wipe your TV with a clean dry cloth Never use water cleaning fluids wax or chemicals Do not put heavy objects on top of the cabinet Temperature If your TV is suddenly moved from a cold to a warm place unplug the power cord for at least two hours so that moisture that may have formed inside the unit can dry completely Using the TV in Another Country If you plan to take...

Страница 58: ...the rear vent of your projection TV every six months to keep the unit from overheating 1 Turn the TV off and unplug it 2 Remove the screw and take off the cover 3 Remove the dust from the vent cover using a vacuum cleaner 4 Replace the cover and the screw 75 VHF UHF Air vent cover ...

Страница 59: ...ns of the TV To stop the demo press any button except POWER button Press MENU to return to normal operation Video Audio Setup Time PIP Caption Move Ent Exit Video Audio Setup Time PIP Caption Move Ent Exit AIR CATV Auto Prog Fine Tune Demo LNA NR Scroll Adj Speaker Language AIR 13 01 ON Off Int English Move Sel Menu 1 2 3 4 5 6 8 0 SWAP STILL MENU PIP CH SCAN ASPECT CH S STD MTS SURR P STD TV VCR ...

Страница 60: ...lectronics Mexico S A de C V Saturno No 44 Col Nueva Industrial Vallejo Gustavo A Madero C P 07700 Mexico TEL 52 5 747 5100 EXPORTER Samsung Electronics co Ltd 416 Mae tan 3dong Pal dal Gu Suwon City Kyungki Do Korea AA68 00173A ENG ...

Отзывы: