background image

Shooting Functions

93

93

Shooting Functions

Shooting Functions

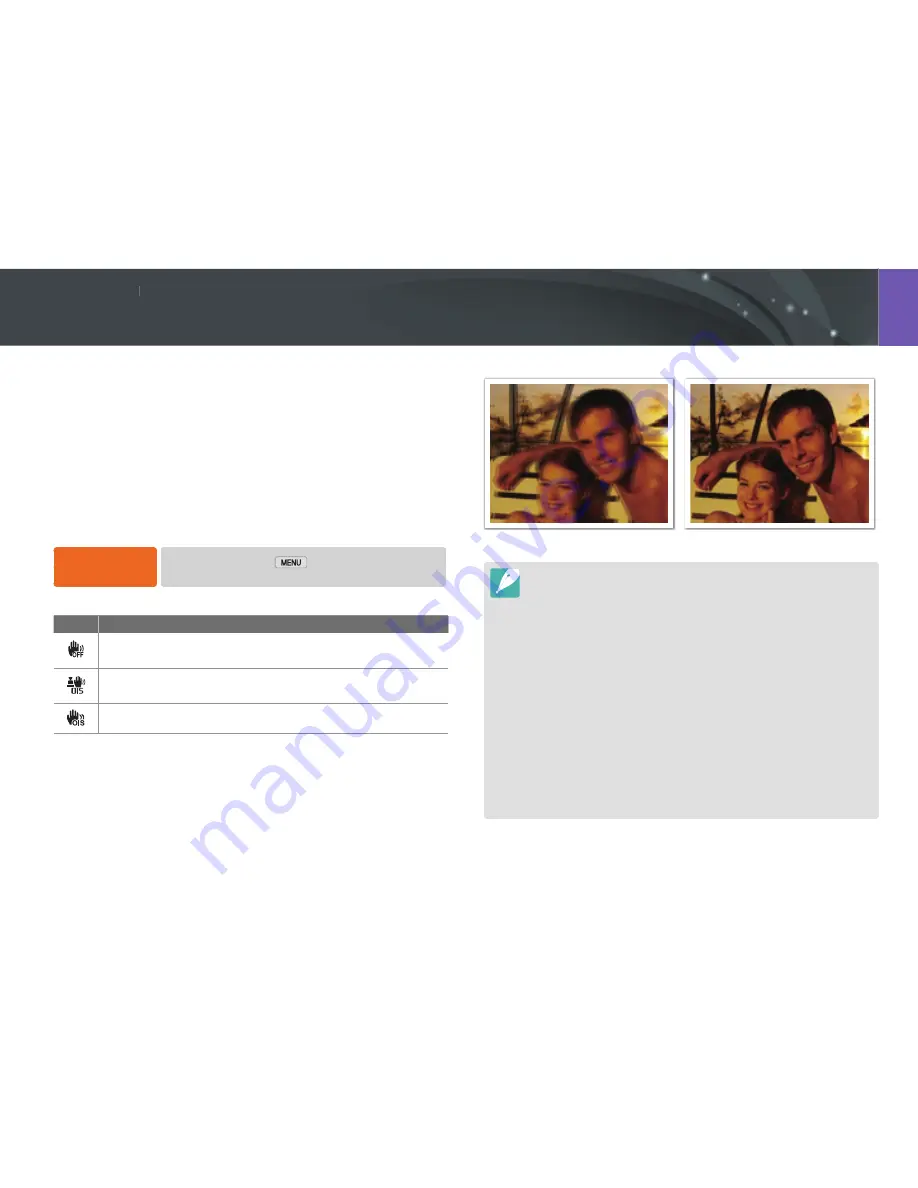
Use the Optical Image Stabilization (OIS) function to minimize camera 
shake. OIS may not be available with some lenses.

Camera shake tends to occur in dark places or when shooting indoors. 
In such cases, the camera uses slower shutter speeds in order to increase 
the amount of light taken in, which can result in a blurry photo. You can 
prevent this situation by using the OIS function.

If your lens has an OIS switch, you have set the switch to 

ON

 to use the OIS 

function.

To set OIS options,


In Shooting mode, touch 


1


OIS (Anti-Shake)


 an option.

* Default

Icon

Description

Off

: The OIS function is off. (This option may not be available with 

some lenses.)

Mode 1

*: The OIS function is applied only when you press 

[

Shutter

] in full or half.

Mode 2

: The OIS function is on.

Optical Image Stabilization (OIS)

Without OIS correction

With OIS correction

• 

OIS may not function properly when: 


-

you move your camera to follow a moving subject 


-

there is too much camera shake 


-

the shutter speed is slow (for example, when you select 

Night

 in  

Smart mode) 


-

the battery is low


-

you capture a close-up shot

• 

If you use the OIS function with a tripod, your images may be blurred by 
the vibration of the OIS sensor. Deactivate the OIS function when you use a 
tripod.

• 

If the camera is hit or dropped, the display will be blurry. If this occurs, turn off 
the camera, and then turn it on again.

• 

Use the OIS function only when needed because the function consumes 
more battery power.

• 

To set an OIS option on the menu, set the OIS switch on your lens to 

ON

.

• 

This option may not be available with some lenses.

• 

Off

 may not be available with some lenses.

Содержание NX2000

Страница 1: ...ENG This user manual includes detailed usage instructions for your camera Please read this manual thoroughly USER MANUAL...

Страница 2: ...nd the Windows logo are registered trademarks of the Microsoft Corporation Mac and Apple App Store are registered trademarks of the Apple Corporation Google Play Store is a registered trademark of Goo...

Страница 3: ...age to your camera s internal components Avoid covering the camera with blankets or clothes The camera may overheat which may distort the camera or cause a fire Do not handle the power supply cable or...

Страница 4: ...and research groups If you have any reason to suspect that your camera is interfering with a pacemaker or other medical device turn off the camera immediately and contact the manufacturer of the pace...

Страница 5: ...lectric shock Do not drop or subject the camera to strong impacts Doing so may damage the screen or external or internal components Exercise caution when you connect cables and install batteries and m...

Страница 6: ...may result in noise in your photos This is normal and does not affect your camera s overall performance Avoid interference with other electronic devices Your camera emits radio frequency RF signals th...

Страница 7: ...warnings and precautions Camera buttons For example Shutter represents the shutter button Page number of related information The order of options or menus you must select to perform a step for exampl...

Страница 8: ...ns 37 Selecting functions options 38 Using m 38 Using the Smart panel 39 Using the touch screen 40 Tips Concepts in Photography Shooting postures 13 Holding the camera 13 Standing photography 14 Crouc...

Страница 9: ...flash layout 50 Connecting the external flash 51 GPS module layout optional 53 Attaching the GPS module 53 Shooting modes 55 Auto mode 55 Smart mode 57 Using the Best Face mode 58 Capturing panoramic...

Страница 10: ...ssist 90 MF Assist 90 Focus Peaking 90 Measuring the exposure value of the focus area 91 Framing mode 92 Optical Image Stabilization OIS 93 Drive shooting method 94 Single 94 Continuous 94 Burst 95 Ti...

Страница 11: ...LAN and configuring network settings 124 Connecting to a WLAN 124 Setting network options 125 Manually setting the IP address 125 Using the login browser 125 Network connection tips 126 Entering text...

Страница 12: ...Available programs when using i Launcher 163 Using i Launcher 163 Requirements for Windows OS 163 Requirements for Mac OS 164 Opening i Launcher 164 Using Multimedia Viewer 165 Downloading the firmwar...

Страница 13: ...171 Using on beaches or shores 171 Storing for extended period of time 171 Using the camera with caution in humid environments 172 Other cautions 172 About memory card 173 Supported memory card 173 M...

Страница 14: ...the lens for support Shooting postures A correct posture for stabilizing the camera is necessary for taking a good photo Even if you hold a camera correctly the wrong posture can cause the camera to s...

Страница 15: ...ing photography Compose your shot stand up straight with your feet shoulder length apart and keep your elbows pointed down Crouching photography Compose your shot crouch with one knee touching the gro...

Страница 16: ...hter photo aperture opened wide The size of the aperture is represented by a value known as an F number The f number represents the focal length divided by the diameter of the lens For example if a le...

Страница 17: ...ns several blades These blades move together and control the amount of light passing through the center of the aperture The number of blades also affects the shape of light when shooting night scenes...

Страница 18: ...e Exposure Value EV which is marked in intervals of 1 s 1 2 s 1 4 s 1 8 s 1 15 s 1 1000 s 1 2000 s and so on Exposure 1 EV 1 EV 1s 1 2 s 1 4 s 1 8 s 1 15 s 1 30 s Shutter Speed Therefore the faster th...

Страница 19: ...rule it is best to use a low ISO setting to prevent noise in your photos unless you are shooting in darkened environments or at night Changes in the quality and brightness according to ISO sensitivit...

Страница 20: ...re A change in shutter speed aperture value or ISO sensitivity can be offset by adjustments to the others to maintain the amount of light The results however change according to the settings For examp...

Страница 21: ...e which allows you to capture a wide shot A long focal length translates into a narrow angle which allows you to capture telephoto shots Short focal length wide shot wide angle wide angle lens Long fo...

Страница 22: ...l DOF which stresses the subject and makes the rest of it blurred can be obtained by using a telescope lens or selecting a low aperture value Conversely a photo with a large DOF which shows all the el...

Страница 23: ...a photo of a low DOF A photo captured with a 20 mm telescope lens A photo captured with a 100 mm telescope lens DOF depends on the distance between the subject and the camera The shorter the distance...

Страница 24: ...world with a camera No matter how the world is beautiful however a poor composition cannot capture the beauty of it When it comes to composition it is very important to prioritize subjects Compositio...

Страница 25: ...creates an unbalanced composition You can stabilize the photo by capturing a second subject in the opposite corner to balance the weight of the photo Subject 1 Subject 2 Subject 1 Subject 2 Unstable...

Страница 26: ...lash guide number The model number of a flash refers to the flash s power and the maximum amount of light created is represented by a value known as a guide number The bigger the guide number the more...

Страница 27: ...od of bouncing light off of the ceiling or walls so that the light spreads evenly over the subject Normally photos captured with flash may appear unnatural and cast shadows Subjects in photos captured...

Страница 28: ...Chapter 1 My Camera Learn about your camera s layout display icons lens optional accessories and basic functions...

Страница 29: ...xternal flash Software CD ROM User manual included Adobe Photoshop Lightroom DVD ROM Quick Start Guide Strap The illustrations may differ from your actual items You can purchase optional accessories a...

Страница 30: ...mode View thumbnails or enlarge reduce a photo 2 DIRECT LINK button Start a preset Wi Fi function p 31 3 Internal antenna Avoid contact with the internal antenna while using the wireless network 4 Mic...

Страница 31: ...nsfer between the camera and a computer or the battery is charging 3 Mode button Access the Mode screen p 36 4 Playback button Enter Playback mode 5 USB and shutter release port Connect the camera to...

Страница 32: ...on to launch when you press DIRECT LINK p 150 To set a DIRECT LINK option In Shooting mode touch 5 Key Mapping DIRECT LINK an option Using the DIRECT LINK button You can turn on the Wi Fi feature conv...

Страница 33: ...e You can also adjust some options with the command dial in the Smart panel In the Smart panel rotate the command dial to move to a desired option press the command dial to select it and then rotate t...

Страница 34: ...Insert the battery with the Samsung logo facing up Removing the battery and memory card Rechargeable battery Battery lock Slide the lock up to release the battery Memory card Push the card gently unti...

Страница 35: ...ght on Charging Red light off Fully charged Red light blinking Error Use only the AC adapter and USB cable supplied with your camera If you use another AC adapter the camera battery may not charge or...

Страница 36: ...ne 2 Drag the option list up or down and then touch a time zone Time Zone GMT 00 00 London GMT 01 00 CapeVerde GMT 02 00 Mid Atlantic GMT 03 00 Buenos Aires Sao Paulo GMT 03 30 Newfoundland 3 Touch Da...

Страница 37: ...tically by the camera p 55 Smart Capture a photo with options that are preset for a specific scene p 57 Expert Program Capture a photo with settings you have adjusted manually except the shutter speed...

Страница 38: ...ption Wi Fi MobileLink Send photos or videos to a smart phone p 129 Remote Viewfinder Use a smart phone as a remote shutter release and see a preview on your smart phone of an image from your camera p...

Страница 39: ...Mode screen touch Expert Program 2 Touch 3 Touch 1 Photo Size AutoShare Photo Size Quality ISO White Balance Picture Wizard 4 Drag the option list up or down and then touch an option If you touch a p...

Страница 40: ...pert Program 2 Touch 3 Touch EV You can also adjust some options by dragging the dial on the screen with your finger Alternatively rotate the command dial to move to a desired option press the command...

Страница 41: ...The touch screen may not recognize your inputs if you touch multiple items at the same time When you touch or drag the screen discolorations may occur This is not a malfunction but a characteristic o...

Страница 42: ...an optional GPS module Photos that were captured without inserting a memory card cannot be transferred to a memory card or a computer 2 Shooting options Icon Description Photo size RAW file Drive mode...

Страница 43: ...you align the camera with the horizontal and vertical lines on the display If the level gauge is not level calibrate the level gauge using the Horizontal Calibration function p 152 Vertical Horizontal...

Страница 44: ...e thumbnails 1 2 3 London No Description 1 Captured photo 2 RGB histogram p 150 3 Shooting mode Metering Flash White Balance Aperture value Shutter speed ISO Focal length Exposure value Photo size Dat...

Страница 45: ...de Shutter speed Aperture value Exposure value ISO sensitivity AEL Display all information about shooting including histogram date and time p 150 Hide information about shooting except basic shooting...

Страница 46: ...Learn about the functions of each lens and select one that suits your needs and preferences Lens layout SAMSUNG 20 50 mm F3 5 5 6 ED II lens example 7 1 2 3 5 6 4 No Description 1 Lens mount index 2...

Страница 47: ...ens pull and hold the zoom lock switch away from the camera body and rotate the zoom ring as shown in the illustration To unlock the lens rotate the zoom ring as shown in the illustation until you hea...

Страница 48: ...4 6 7 8 No Description 1 Lens mount index 2 Zoom ring 3 Focus ring p 90 4 Lens hood mount index 5 Lens 6 i Function button p 67 7 AF MF switch p 82 8 Lens contacts When not using the lens attach the...

Страница 49: ...Description 1 i Function button p 67 2 Lens mount index 3 Focus ring p 90 4 Lens 5 Lens contacts SAMSUNG 45 mm F1 8 T6 2D 3D example 6 2 1 3 4 5 No Description 1 i Function button p 67 2 Lens mount in...

Страница 50: ...focal lengths result in wider angles of view 3 ED ED stands for Extra low Dispersion Extra low dispersion glass is effective in minimizing chromatic aberration a distortion that occurs when a lens fai...

Страница 51: ...essories refer to the manual for each accessory The illustrations may differ from the actual items You can purchase Samsung approved accessories at a retailer or a Samsung service center Samsung is no...

Страница 52: ...nnecting the external flash 1 Remove the hot shoe cover from the camera 2 Mount the flash by sliding it into the hot shoe 3 Lock the flash into place by turning the hot shoe fastening dial clockwise 4...

Страница 53: ...o bursts of the flash Do not move until the flash fires a second time SEF8A may not be compatible with other NX series cameras For more details about optional flashes refer to the user manual for the...

Страница 54: ...onal 1 2 3 4 5 No Description 1 Status lamp 2 Power button 3 Hot shoe fastening dial 4 Hot shoe connection 5 Battery cover Attaching the GPS module 1 Remove the hot shoe cover from the camera 2 Mount...

Страница 55: ...My Camera Accessories 54 3 Lock the GPS module into place by turning the hot shoe fastening dial towards LOCK 4 Press the power button of the GPS module...

Страница 56: ...lly adjusts factors that contribute to exposure including shutter speed aperture value metering White Balance and exposure compensation As the camera controls most of the functions some shooting funct...

Страница 57: ...ect is not moving for a certain period of time when shooting in the dark Actively moving subjects Fireworks when using a tripod 4 Press Shutter to capture the photo The camera may detect different sce...

Страница 58: ...escription Action Freeze Capture subjects moving at high speed Rich Tones Capture a photo with vibrant colors Panorama Capture a wide panoramic scene in a single photo Waterfall Capture scenes with wa...

Страница 59: ...alf press Shutter to focus 3 Press Shutter to capture the photo The camera captures 5 photos consecutively The first photo is set as the background image The camera automatically detects faces after s...

Страница 60: ...ressed slowly move the camera in the direction you selected In 3D Panorama mode you can capture a scene only in horizontal directions An arrow toward the direction of motion is displayed and the entir...

Страница 61: ...d MPO 3D formats On your camera s display you can view only JPEG files To view 3D files connect your camera to a 3D TV or 3D monitor with an optional HDMI cable While viewing wear proper 3D glasses Ca...

Страница 62: ...s For a list of options refer to Shooting Functions p 73 3 Half press Shutter to focus and then press Shutter to capture the photo Program Shift Program Shift function lets you adjust the shutter spee...

Страница 63: ...raits flowers or landscape shots Large Depth of Field Small Depth of Field 1 On the Mode screen touch Expert Aperture Priority 2 Press the command dial once and then rotate it to the left or right to...

Страница 64: ...r blurred set the shutter speed to below 1 30 s Slow shutter speed Fast shutter speed 1 On the Mode screen touch Expert Shutter Priority 2 Press the command dial once and then rotate it to the left or...

Страница 65: ...73 5 Half press Shutter to focus and then press Shutter to capture the photo Using the Bulb function Use the Bulb function to shoot night scenes or the night sky While you are pressing Shutter the shu...

Страница 66: ...oting Functions p 73 3 Touch 5 Save as Custom Mode You can also touch 4 Touch a location to save C1 C2 or C3 You can overwrite the settings if an old mode is saved to the same location 5 Touch Selecti...

Страница 67: ...screen touch Auto Smart or Expert Program Aperture Priority Shutter Priority Manual or Custom This feature may not work in some modes 2 Set the desired options 3 Press Video recording to start recordi...

Страница 68: ...reduce the video size for example from 1280X720 to 640X480 When formatting a memory card always format using the camera If you format on another camera or a PC you can lose files on the card or cause...

Страница 69: ...en press Shutter to capture the photo Available options Shooting mode Program Aperture Priority Shutter Priority Manual Aperture O O Shutter Speed O O ISO O O O O EV O O O White Balance O O O O Z O O...

Страница 70: ...screen to select an option Photo resolution varies according to the zoom ratio if you use the Z 3 2 16 9 1 1 x1 2 4560X3040 13 9M 4560X2568 11 7M 3040X3040 9 2M x1 4 3888X2592 10 1M 3888X2184 8 5M 259...

Страница 71: ...oot properly in conditions below 8 5 LV 900 lux For best results capture photos in places with sufficient light When you photograph objects that contain polarizing material such as a display sunglasse...

Страница 72: ...O O O O O O O Quality p 75 O O O O O ISO p 76 O O O O O White Balance p 77 O O O O Picture Wizard p 80 O O O O Smart Filter p 81 O O O O AF Mode p 82 O O O O O O AF Area p 85 O O O O O Touch AF p 88...

Страница 73: ...93 O O O O O O O Drive Continuous Burst Timer Bracketing p 94 O O O O O O O Metering p 98 O O O O Dynamic Range p 100 O O O O Flash p 101 O O O O O O Exposure compensation p 104 O O O Exposure lock p...

Страница 74: ...Chapter 2 Shooting Functions Learn about the functions you can set in Shooting mode You can enjoy more customized photos and videos by using the shooting functions...

Страница 75: ...ommended for 5472x3648 3 2 Printing on A1 paper 3888x2592 3 2 Printing on A2 paper 2976x1984 3 2 Printing on A3 paper 1728x1152 3 2 Printing on A5 paper 5472x3080 16 9 Printing on A1 paper or viewing...

Страница 76: ...e enough space on the memory card to save photos in the RAW format To set the quality In Shooting mode touch 1 Quality an option Icon Format Description JPEG Super Fine Compressed for the best quality...

Страница 77: ...ever this may increase electronic noise and result in a grainy photo To set ISO sensitivity In Shooting mode touch 1 ISO an option Examples ISO 100 ISO 400 ISO 800 ISO 3200 Increase the ISO value in p...

Страница 78: ...udy Select when taking outdoor photos on a cloudy day or in shadows Photos captured on cloudy days tend to be more bluish than on sunny days This option offsets that effect Fluorescent White Select wh...

Страница 79: ...ernatively as the color temperature decreases the color distribution becomes warmer Touch and then adjust the color tempertature Clear sky Fluorescent H Fluorescent L Cloudy Halogen lamp Daylight Tung...

Страница 80: ...79 Shooting Functions White Balance Examples Auto WB Daylight Fluorescent Daylight Tungsten...

Страница 81: ...t with different styles and find your own settings To set a photo style In Shooting mode touch 1 Picture Wizard an option Examples Standard Vivid Portrait Landscape Forest Retro Cool Calm Classic You...

Страница 82: ...mo cameras Miniature Apply a tilt shift effect to make the subject appear in miniature Colored Pencil Apply a colored pencil painting effect Watercolor Apply a watercolor painting effect Wash drawing...

Страница 83: ...ases you can have a focus by selecting Single AF Fast moving subjects or subjects of a color similar to the background are difficult to focus Select an appropriate focusing mode for such instances If...

Страница 84: ...he focus area The area turns green when the focus is achieved Continuous AF While you are pressing Shutter halfway the camera continues to automatic focusing Once the focus area is fixed on the subjec...

Страница 85: ...focus While you are rotating the focus ring the focus area is magnified When you use the Focus Peaking function the color you selected appears on the focused subject This mode is recommended for shoo...

Страница 86: ...with the white frame automatically Depending on the Picture Wizard options Face Detection may not be effective When you set manual focus Face Detection may not be available Face Detection may not be e...

Страница 87: ...fway the camera displays the focus areas as shown in the photo below Face detection AF The camera focuses on human faces preferentially Faces of up to 10 people can be detected This setting is recomme...

Страница 88: ...elf Portrait AF It can be difficult to check whether your face is in focus when you are taking a self portrait When this function is on the beep from the camera gets faster when your face is located a...

Страница 89: ...frame Your camera is tracking the subject Green frame Your subject is in focus when you half press Shutter Red frame Your camera failed to focus Focus on the subject or capture a photo by touching on...

Страница 90: ...ay fail when the subject is too small the subject moves excessively the subject is backlit or you are shooting in a dark place colors or patterns on the subject and the background are the same the sub...

Страница 91: ...h 1 MF Assist an option Default Option Description Off Do not use the MF Assist function Enlarge x5 The focus area is magnified by 5 times when you rotate the focus ring Default Option Description Enl...

Страница 92: ...function is turned on the camera automatically sets an optimal exposure by calculating the brightness of the focus area This function is only available when you select Spot metering or Multi metering...

Страница 93: ...perture value or shutter speed the exposure changes according to the settings so the display may darken With this function on the brightness of the display is constant regardless of the settings so yo...

Страница 94: ...n is applied only when you press Shutter in full or half Mode 2 The OIS function is on Optical Image Stabilization OIS Without OIS correction With OIS correction OIS may not function properly when you...

Страница 95: ...d effects You can also select Timer to capture a photo of yourself To set the shooting method In Shooting mode touch 1 Drive an option Available options may differ depending on shooting conditions Sin...

Страница 96: ...mber of shots The photo size is set to 5M It may take longer to save a photo You cannot use the flash with this option Shutter speed must be faster than 1 30 second Photos captured with this option ma...

Страница 97: ...ooting mode touch 5 Bracket Set an option White Balance Bracketing WB Bracket When you press Shutter the camera captures 3 consecutive photos the original and two more with different White Balance set...

Страница 98: ...ard setting The camera captures a photo and applies the three Picture Wizard options you have set to the image captured You can select three different settings in Bracket Set menu Vivid Standard Retro...

Страница 99: ...t If a subject looks lighter than its actual color the camera captures an underexposed photo of it The brightness and overall mood of the photo can also be affected by how the camera measures the amou...

Страница 100: ...tion as it calculates the amount of light in a designated area The subject is in bright color while the background is dark The Spot mode is recommended for a situation like this where a huge differenc...

Страница 101: ...e options In Shooting mode touch 1 Dynamic Range an option Without Dynamic Range effect With Dynamic Range effect Icon Description Off Do not use Dynamic Range Smart Range Correct the loss of bright d...

Страница 102: ...educes red eyes Fill in The flash fires whenever you capture a photo Brightness is automatically adjusted Fill in Red The flash fires whenever you capture a photo and reduces red eyes Icon Description...

Страница 103: ...or touch to adjust the intensity touch Flash 0 Reducing the red eye effect If the flash fires when you capture a photo of a person in the dark a red glow may appear in the eyes To reduce the red eye...

Страница 104: ...too small In some shooting modes you cannot use this function If you attach an intensity adjustable external flash to the camera the intensity settings of the flash will be applied If the subject is t...

Страница 105: ...able in 3 increments The camera displays the exposure warning in red for each step beyond 3 range To adjust the exposure value press the command dial twice and then rotate it while the exposure value...

Страница 106: ...k the exposure and then capture a photo To lock the exposure value adjust the photo s exposure and then touch the custom button After locking the exposure aim the lens where you desire and then press...

Страница 107: ...Available only with some Smart Filter options 1920X810 24 fps Approx 2 35 1 View on an HDTV 1280X720 60 fps 16 9 View on an HDTV 1280X720 30 fps 16 9 View on an HDTV 640X480 30 fps 4 3 View on a TV 3...

Страница 108: ...0X normal speed If you select an option other than x1 sound will not be recorded The available options may differ depending on shooting conditions Fader You can fade in or fade out a scene using the f...

Страница 109: ...Shooting mode touch 6 Voice an option Wind cut When you record videos in noisy environments unintended sounds can be recorded in videos In particular severe wind noise recorded in videos distracts yo...

Страница 110: ...Chapter 3 Playback Editing Learn about how to play back and edit photos and videos Refer to chapter 6 for editing files on a PC...

Страница 111: ...u may not be able to edit or play back files that were captured with other cameras due to unsupported sizes or codecs Use a computer or another device to edit or play back these files Viewing image th...

Страница 112: ...he location information 2 Touch a list to open it 3 Touch a file to view in the single image view 4 Touch to return to the previous view Viewing files as a folder Continuous and burst shots appear as...

Страница 113: ...2 Touch to scroll to a file and then touch the check box Touch the check box again to cancel your selection 3 Touch You cannot delete a protected file Lock Unlock all files Lock or unlock all files 1...

Страница 114: ...pears touch Yes Deleting multiple files You can select multiple files and delete them 1 In Playback mode touch z Delete Select Alternatively in thumbnails view touch and then select files to delete 2...

Страница 115: ...spread them apart on the screen to reduce or enlarge a photo The screen responds more slowly than when you use the command dial Viewing a slide show You can view photos in a slide show apply various e...

Страница 116: ...order DPOF DPOF Digital Print Order Format lets you set the number of copies to be printed The camera saves the DPOF information in the MISC folder of your memory card If you have set DPOF informatio...

Страница 117: ...volume or mute the sound Rotate again to scan more quickly 2X 4X 8X Trimming a video during playback 1 In Playback mode scroll to a video and then touch 2 Touch to start playing the video 3 Touch at t...

Страница 118: ...ck 1 While viewing a video touch at the point where you want to capture an image 2 Touch You cannot capture an image from a video recorded in 3D mode The resolution of the captured image will be the s...

Страница 119: ...may not be edited with the Image Edit function In this case use a supplied image editing software The camera will save edited photos as new files When you edit photos the camera will automatically co...

Страница 120: ...so rotate a photo in Playback mode by touching z Rotate a desired option The camera will overwrite the original file Resizing photos Change the size of a photo and save it as a new file 1 Touch 2 Touc...

Страница 121: ...o the original image Auto adjustment Adjust brightness contrast or saturation automatically Brightness Adjust brightness Contrast Adjust contrast Saturation Adjust saturation RGB adjustment Adjust RGB...

Страница 122: ...1 Touch 2 Drag the slider or touch to adjust the option As the number increases the skin tone becomes brighter and smoother 3 Touch To cancel correction touch 4 Touch to save Reducing red eye 1 Touch...

Страница 123: ...ake the subject appear in miniature Colored Pencil Apply a colored pencil painting effect Watercolor Apply a watercolor painting effect Wash drawing Apply a washed out effect Option Description Oil Sk...

Страница 124: ...Chapter 4 Wireless network Learn how to connect to wireless local area networks WLANs and use functions...

Страница 125: ...s Touch Add wireless network to add an AP manually Your AP name must be in English to add the AP manually Icon Description Ad hoc AP Secured AP WPS AP Signal strength Open network setting options When...

Страница 126: ...r the subnet mask Gateway Enter the gateway DNS Server Enter the DNS address Using the login browser You can enter your login information via the login browser when connecting to some APs sharing site...

Страница 127: ...ork and a TV simultaneously Connecting to a network may incur additional charges Costs will vary based on the conditions of your contract If you cannot connect to a WLAN try another AP from the availa...

Страница 128: ...ing text and return to the previous page Change case Switch between Symbol Number mode and the normal mode Change the input language Enter a space Save the displayed text Delete the last letter You ca...

Страница 129: ...sert a memory card to use this feature If you set this function the setting is maintained even when you change the Shooting mode This feature may not be supported in some modes or may not be available...

Страница 130: ...iles from the smart phone you can view up to 1 000 recent files and send up to 150 files at a time If you select files from the camera you can view files that were selected from the camera The maximum...

Страница 131: ...nect to only one camera at a time 5 On the camera allow the smart phone to connect to your camera If the smart phone has been connected to your camera before it is connected automatically 6 On the sma...

Страница 132: ...o install and launch Samsung SMART CAMERA App on an NFC enabled smart phone turn on the NFC feature and place the smart phone near an NFC tag p 29 on the camera This feature is supported by smart phon...

Страница 133: ...mart phone touch and hold to focus The focus is automatically set to Multi AF You can touch the area on the screen where you want to focus 7 Release to capture the photo Photos saved to the smart phon...

Страница 134: ...ing the program ensure that the PC is connected to a network If no internet connection is available you must install the program from the provided CD Sending photos or videos to a PC 1 On the Mode scr...

Страница 135: ...even if you are connecting to the same access point again If you turn off the camera or remove the battery while sending files the file transfer will be interrupted While you are using this feature th...

Страница 136: ...l Changing email settings In the email menu you can change settings for storing your information You can also set or change the email password For information about entering text refer to Entering tex...

Страница 137: ...LAN it will search for available AP devices p 124 2 Touch 3 Touch Setting Password On To deactivate the password touch Off 4 When the pop up appears touch OK 5 Enter a 4 digit password 6 Enter the pas...

Страница 138: ...new password again Sending photos or videos via email You can send photos or videos stored on the camera via email For information about entering text refer to Entering text p 127 1 On the Mode screen...

Страница 139: ...with the recipient s email account may cause the photo to be rejected or recognized as spam You may not be able to send an email if no network connection is available or if your email account setting...

Страница 140: ...automatically attempt to connect to a WLAN via the most recently connected AP device If the camera has not previously been connected to a WLAN it will search for available AP devices p 124 3 Enter you...

Страница 141: ...f the selected photo resolution is higher than 2M it will be automatically resized to a lower resolution On some websites the maximum photo resolution may vary The method of uploading photos or videos...

Страница 142: ...by touching Change Web storage 2 Enter your ID and password and then touch Login OK For information about entering text refer to Entering text p 127 To select an ID from the list touch an ID If you h...

Страница 143: ...reen A sharing file list is created Wait until other devices can find your camera 2 Connect the Samsung Link device to a network and then turn on the Samsung Link feature Refer to your device s user m...

Страница 144: ...device for example by removing the battery the device considers the camera to still be connected The order of photos or videos on the camera may be different than on the Samsung Link device Depending...

Страница 145: ...ls view you can select multiple photos Touch Upload when you are finished selecting photos 4 Select the device from the camera s list of Wi Fi Direct devices Ensure that the device s Wi Fi Direct opti...

Страница 146: ...Chapter 5 Camera settings menu Learn about the user settings and general settings menu You can adjust the settings to better suit your needs and preferences...

Страница 147: ...EV step is chosen when you set the ISO to Auto Default Option Value 1 3 Step ISO 125 ISO 160 ISO 200 ISO 250 ISO 320 ISO 400 ISO 500 ISO 640 ISO 800 ISO 1000 ISO 1250 ISO 1600 ISO 2000 ISO 2500 ISO 3...

Страница 148: ...ce interval range of the 3 bracketed photos AB 3 AB 2 AB 1 MG 3 MG 2 MG 1 For example AB 3 adjusts the Amber value plus or minus three steps MG 3 adjusts the Magenta value the same amount P Wiz Bracke...

Страница 149: ...by IEC International Electrotechnical Commission It is widely used for creating colors on PC monitors and is also the standard color space for Exif sRGB is recommended for regular images and images yo...

Страница 150: ...can be adjusted when you press i Function on an i Function lens Option Description Aperture Set to adjust the aperture value Shutter Speed Set to adjust the shutter speed EV Set to adjust the exposur...

Страница 151: ...assigned to the Custom button F on the screen or DIRECT LINK button on the camera Default Button Function Custom Set a function for the Custom button Off Do not use the Custom button Optical Preview...

Страница 152: ...Select a guide to help you compose a scene Off 3 X 3 2 X 2 Cross Diagonal AF Lamp When shooting in dark places turn the AF lamp on in order to have a better auto focus The Auto Focus functions more a...

Страница 153: ...ra displays a photo immediately after you capture it Off 1 sec 3 sec 5 sec Hold Default Item Description Display Adjust Adjust the display brightness auto brightness setting display color or level gau...

Страница 154: ...tput appropriate for your country when connecting the camera to an external video device such as a monitor or HDTV NTSC USA Canada Japan Korea Taiwan Mexico etc PAL Supports only PAL B D G H or I Aust...

Страница 155: ...ring files and folders Reset After using the reset function the next file name is started at 0001 Series New file numbers continue the existing number sequence even if you have installed a new memory...

Страница 156: ...ime language and video out will not change Do not turn the camera off while the update is in progress Default Item Description GPS Geotagging Set to capture photos with location information using the...

Страница 157: ...the sensor can get dust on it when you change lenses This can lead to dust particles appearing in the photos you capture It is recommended not to change lenses when you are in a particularly dusty are...

Страница 158: ...Chapter 6 Connectingtoexternaldevices Make full use of the camera by connecting it to external devices such as a computer HDTV or 3D TV...

Страница 159: ...DMI cable you can connect the camera to an HDTV using the Anynet CEC method If the HDTV supports Anynet CEC the TV turns on automatically when used in conjunction with the camera This feature may not...

Страница 160: ...it to a 3D TV 6 Move to a 3D file and then touch to switch to 3D mode Touch to switch to 2D Mode 7 Turn on your TV s 3D function Refer to your TV s user manual for more details 8 Control the camera t...

Страница 161: ...ur camera If the cable is reversed it may damage your files The manufacturer is not responsible for any loss of data If you try to plug the USB cable into the HDMI port the camera may not work properl...

Страница 162: ...us lamp stops blinking 2 Click on the tool bar at the bottom right of your computer screen 3 Click the pop up message 4 Click the message box indicating safely removed 5 Remove the USB cable Transferr...

Страница 163: ...devices Transferring files to your computer 3 Turn on the camera The computer recognizes the camera automatically and displays a removable disk icon 4 Open the removable disk 5 Transfer photos or vid...

Страница 164: ...to a PC wirelessly Using i Launcher i Launcher allows you to play back files with Multimedia Viewer and provides a link to download the PC Auto Backup program Requirements for Windows OS Item Require...

Страница 165: ...y The manufacturer is not responsible for any damage that results from using unqualified computers such as a computer you assembled yourself Requirements for Mac OS Item Requirements OS Mac OS 10 5 or...

Страница 166: ...8 9 AVI MJPEG Photos JPG GIF BMP PNG TIFF MPO Files that have been recorded with other manufacturers devices may not play back smoothly Viewing photos 1 2 3 4 5 6 7 8 9 10 11 No Description 1 File nam...

Страница 167: ...d file 4 Move to the next file 5 Stop No Description 6 Pause 7 Move to the previous file 8 Progress bar Downloading the firmware From the Samsung i Launcher screen click Firmware Upgrade Downloading t...

Страница 168: ...captured by a camera are often transformed to JPEG formats and stored in the memory according to the settings of the camera at the time of shooting RAW les are not transformed to JPEG formats and are...

Страница 169: ...Chapter 7 Appendix Get information about error messages camera maintenance trouble shooting tips specifications and optional accessories...

Страница 170: ...nsert a memory card that contains photos File Error Delete the damaged file or contact a service center Memory Full Delete unnecessary files or insert a new memory card Error messages Suggested remedi...

Страница 171: ...exposed to the external environment This problem is normal and the exposure to dust occurs in everyday use of the camera You can remove dust from the sensor by operating the sensor cleaning function...

Страница 172: ...rolonged period Using or storing the camera Inappropriate places to use or store the camera Avoid exposing the camera to very cold or very hot temperatures Avoid using your camera in areas with extrem...

Страница 173: ...h as microwave ovens stoves or radiators These devices may be deformed and can overheat and cause a fire or explosion Do not expose the lens to direct sunlight as this may discolor the image sensor or...

Страница 174: ...This product supports microSD Secure Digital microSDHC Secure Digital High Capacity or microSDXC Secure Digital eXtended Capacity memory cards Memory card adapter Memory card To read data with a compu...

Страница 175: ...472X3648 130 163 217 39 30 31 33 10 1M 3888X2592 277 356 505 33 34 35 5 9M 2976X1984 471 570 727 35 36 36 2 0M 1728X1152 1 053 1 426 1 941 37 37 38 Burst 430 514 638 16 9M 5472X3080 153 190 251 31 32...

Страница 176: ...48 Approx 88 58 For Sharing 30 fps Approx 213 41 Approx 271 09 is available only with some Smart Filter options The figures above are measured without using the zoom function Available recording time...

Страница 177: ...loss of data Cautions when using memory cards Avoid memory cards to very cold or very hot temperatures below 0 C 32 F or above 40 C 104 F Extreme temperatures can cause memory cards to malfunction Ins...

Страница 178: ...nd federal regulations Guidelines for charging the battery Charge the battery only by the method described in this user manual The battery can ignite or explode if not charged properly About the batte...

Страница 179: ...hen you use the camera for an extended period the area around the battery chamber may become warm This does not affect the normal use of the camera Do not pull the power supply cable to disconnect the...

Страница 180: ...shock Let the battery charge for at least 10 minutes before turning on the camera If you connect the camera to an external power source when the battery is depleted using high energy consuming functi...

Страница 181: ...to the port on the front side of your computer the USB port of your computer does not support the power output standard 5 V 500 mA Handle and dispose of batteries and chargers with care Never dispose...

Страница 182: ...by putting it into your pocket Using the flash or recording videos depletes the battery quickly Recharge if needed Batteries are consumable parts that must be replaced over time Get a new battery if t...

Страница 183: ...ld meet the DCF standard If you encounter this situation display files on your computer Situation Suggested remedies The photo is blurry Ensure that the focus option you set is suitable for the kind o...

Страница 184: ...Windows 8 open Start screen and then select All apps Samsung i Launcher Or click Applications Samsung i Launcher on your Mac OS computer Situation Suggested remedies Cannot set the DPOF for RAW files...

Страница 185: ...n depends on lens i Function Z X1 2 1 4 1 7 2 0 Dust Reduction Type Super sonic drive Display Type TFT LCD with Touch Panel C type Touch Control Enabled Size 3 7 Approx 93 8 mm Resolution WVGA 800X480...

Страница 186: ...500 ISO 3200 ISO 4000 ISO 5000 ISO 6400 ISO 8000 ISO 10000 ISO 12800 ISO 16000 ISO 20000 ISO 25600 Drive Mode Mode Single Continuous Burst 5M only Timer Bracket Auto Exposure White Balance Picture Wiz...

Страница 187: ...e Priority Shutter Priority Manual Custom Wi Fi Smart mode Beauty Face Best Face Landscape Macro Action Freeze Rich Tones Panorama Waterfall Silhouette Sunset Night Fireworks Light Trace Creative Shot...

Страница 188: ...720 30 fps 640X480 320X240 only x1 x5 x10 x20 Quality HQ Normal Sound Stereo Edit Still image capture Time trimming Playback Type Single image Thumbnails 15 28 Slide show Movie Edit Smart Filter Red e...

Страница 189: ...nal microphone Yes DC power input DC 5 0V 1A via micro USB Power Source Type Rechargeable battery BP1130 1 130 mAh The power source may differ depending on your region Dimensions W X H X D 119 X 64 5...

Страница 190: ...res to help you capture a properly exposed image AEL AFL Auto Exposure Lock Auto Focus Lock These features help you lock the exposure or focus on which you want to focus or calculate the exposure AF A...

Страница 191: ...tible printers sometimes available at photo shops can read the information from the card for convenient printing Camera shake Blur If the camera is moved while the shutter is open the entire image may...

Страница 192: ...gh compression video format established by international standard organizations ISO IEC and ITU T This codec is capable of providing good video quality at low bit rates developed by the Joint Video Te...

Страница 193: ...otosite records the brightness of the light that strikes it during an exposure Common sensor types are CCD Charge coupled Device and CMOS Complementary Metal Oxide Semiconductor IP Internet protocol a...

Страница 194: ...in a digital image High resolution images contain more pixels and typically show more detail than low resolution images Noise Misinterpreted pixels in a digital image that may appear as misplaced or...

Страница 195: ...This is defined from color space for PC monitors and is also used as the standard color space for Exif Vignetting A reduction of an image s brightness or saturation at the periphery outer edges compa...

Страница 196: ...SAMSUNG 16 mm F2 4 SAMSUNG 20 mm F2 8 SAMSUNG 30 mm F2 SAMSUNG 50 200 mm F4 5 6 ED OIS III SAMSUNG 60 mm F2 8 Macro ED OIS SSA SAMSUNG 18 200 mm F3 5 6 3 ED OIS Lens SAMSUNG 85 mm F1 4 ED SSA SAMSUNG...

Страница 197: ...130 BC3NX01 Camera bag Camera case Memory card Filter USB cable HDMI cable Strap These illustrations may differ from your actual items Refer to the user manuals of these optional accessories for detai...

Страница 198: ...Display brightness 152 Display type 44 Drive 94 E Enlarging 114 Exposure Value EV 15 104 F Fader 107 Files Deleting 113 Photo type 75 Protecting 112 Video type 106 Flash Bounce photography 26 Flash op...

Страница 199: ...ion Playback mode 119 Shooting mode Movie 106 Shooting mode Photo 74 Retouching faces 121 Rotating 119 Rule of thirds 23 S Samsung Link 141 Service center 181 Settings 152 Shooting modes Aperture Prio...

Страница 200: ...and conditions of the purchase contract This product and its electronic accessories should not be mixed with other commercial wastes for disposal Correct disposal of batteries in this product Applicab...

Страница 201: ...etween the equipment and receiver Connect the equipment into an outlet on a circuit different from that to which the receiver is connected Consult the dealer or an experienced radio TV technician for...

Страница 202: ...ollowing two conditions 1 This device may not cause harmful interference and 2 This device must accept any interference received including interference that may cause undesired operation Caution Any c...

Страница 203: ...Please refer to the warranty that came with your product or visit our website www samsung com for after sales service or inquiries...

Отзывы: