Classroom Technology Essentials.
Quick Setup Guide for AFL-80 Document Camera
Making the Basic Connections
USB D/T
USB
Video
S-Video
OUT
IWB
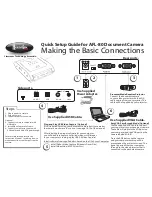
Plug-and-Play USB Video Capture (Optional)
It isn't required for using your document camera but it sure makes
the camera much more fun to use. (see page 10-12 of the manual)
After installing the proper software for your computer
you will be able to capture unlimited video or still images
to your computer via plug-n-play USB 2.0 Video Capture!
Install software from supplied discs based on the OS of your Computer
Install Debut Video Capture (Windows Driver Disc)
Install VideoGlide (MAC Driver Disc)
Use Supplied USB Cable.
Use Supplied
Power Adapter.
Use Supplied VGA Cable.
Presenter Mode Requires Projector
Connect the document camera
to your video projector with the VGA
cable coming from your projector. This
cable will be supplied by your projector.
Easy VGA Passthrough Mode (Optional)
Use the supplied VGA Cable to connect
your copmuter to your document camera.
The cable will plug into the VGA port on
your computer and the VGA port on the
camera labeled RGB-IN.
Press the RGB button on the camera
and your computer desktop will be
presented on the projector screen. The
signal is passed from your computer
through to the video projector that is
connected to the document camera.
Steps
1. Plug in power to camera.
2. Turn on camera.
3. Connect projector to camera.
Optional
4. Connect camera to computer with
USB cable.
5. Install Video Capture Software.
6. Connect computer to camera with
VGA cable to enable VGA passthrough.
For more information refer to the
Instruction Manual. Including how to
make connections to other ports on the
camera.
1
2
3
4
5
6
Side ports.
Rear ports.


