18 English
Be
for
e y
ou begin
Position
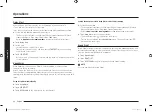
The oven comes with 3 oven racks and 2 side racks (one on each side). The side
racks serve as rack guides and support the oven racks in 5 different oven rack
positions. Insert the racks to the correct position inside of the oven. Each rack
guide has a stop that prevents you from accidentally pulling an oven rack out
completely.
05
04
03
02
01
01
Level 1
02
Level 2
03
Level 3
04
Level 4
05
Level 5
Rack
position
Food type
5
Hamburgers, Steak, Toasts
4
Toasts, Fish fillets, Chicken
pieces, Steak
3
Cakes, Muffins, Brownies,
Cookies, Pound cake,
Lasagna
2
Angel food cake, Pies, Most
roasts, Homemade pizza
1
Large roast
CAUTION
•
Do not cover an oven rack with aluminum foil. This will disturb the heat
circulation, resulting in poor baking.
•
Do not place aluminum foil on the oven bottom. The aluminum can melt and
damage the oven.
•
Arrange the oven racks only when the oven is cool.
•
Take caution in removing cookware and/or racks out of the oven. Hot meals or
racks can cause burns.
•
When placing an oven rack in the topmost rack position (position 5) on the ladder
racks, make sure the oven rack is situated stably on the embossed stop.
Before you begin
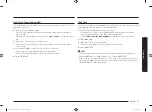
Setting the clock
The clock must be set to the correct time of day for the automatic oven timing
functions to work properly.
•
The time of day cannot be changed during timed cooking, delay-timed cooking,
or a self-cleaning cycle.
1.
Touch
Clock
.
• The hour element blinks.
2.
Touch or to set the hour, and then touch
START/SET
.
• The minute element blinks.
3.
Touch or to set the minute, and then touch
START/SET
.
NOTE
When the time format is set to 12-hour format, you cannot manually change the
AM/PM. It will change automatically when you toggle through the hour element.
New oven smell
Before using the oven for the first time, clean inside the oven to remove the new
oven smell.
1.
Remove all accessories from inside the oven.
2.
Run the oven with Bake mode at 550 °F for 40 minutes. This will burn any
remaining production substances in the oven.
3.
When complete, turn off the oven.
Racks
For first time use, clean the accessories thoroughly with warm water, detergent
and a soft clean cloth. The racks may be deformed while they are gaining heat.
Once they have cooled down, they will recover their original appearance and
performance.
NV31T4551SS_AA_DG68-01265A-00_EN+MES+CFR.indb 18
2020-02-25 12:59:49
Содержание NV31T4551SS
Страница 41: ...English 41 Appendix Memo NV31T4551SS_AA_DG68 01265A 00_EN MES CFR indb 41 2020 02 25 12 59 55...
Страница 42: ...Memo NV31T4551SS_AA_DG68 01265A 00_EN MES CFR indb 42 2020 02 25 12 59 55...
Страница 43: ...Memo NV31T4551SS_AA_DG68 01265A 00_EN MES CFR indb 43 2020 02 25 12 59 55...
Страница 85: ...Espa ol 41 Ap ndice Notas NV31T4551SS_AA_DG68 01265A 00_EN MES CFR indb 41 2020 02 25 1 00 08...
Страница 86: ...Notas NV31T4551SS_AA_DG68 01265A 00_EN MES CFR indb 42 2020 02 25 1 00 08...
Страница 87: ...Notas NV31T4551SS_AA_DG68 01265A 00_EN MES CFR indb 43 2020 02 25 1 00 08...
Страница 129: ...Fran ais 41 Annexe Notes NV31T4551SS_AA_DG68 01265A 00_EN MES CFR indb 41 2020 02 25 1 00 21...
Страница 130: ...Notes NV31T4551SS_AA_DG68 01265A 00_EN MES CFR indb 42 2020 02 25 1 00 21...
Страница 131: ...Notes NV31T4551SS_AA_DG68 01265A 00_EN MES CFR indb 43 2020 02 25 1 00 21...


