background image

Safety information

_ 1

safety information

These warnings and precautions are included to prevent injury to you and others, and to prevent any potential damage to 
your machine. Be sure to read and understand all of these instructions before using the machine.
Use common sense for operating any electrical appliance and whenever using your machine. Also, follow all warnings and 
instructions marked on the machine and in the accompanying literature. After reading this section, keep it in a safe place 
for future reference.

Important safety symbols

This section explains the meanings of all icons and signs in the user's guide. These safety symbols are in order, according to the degree of 

danger.

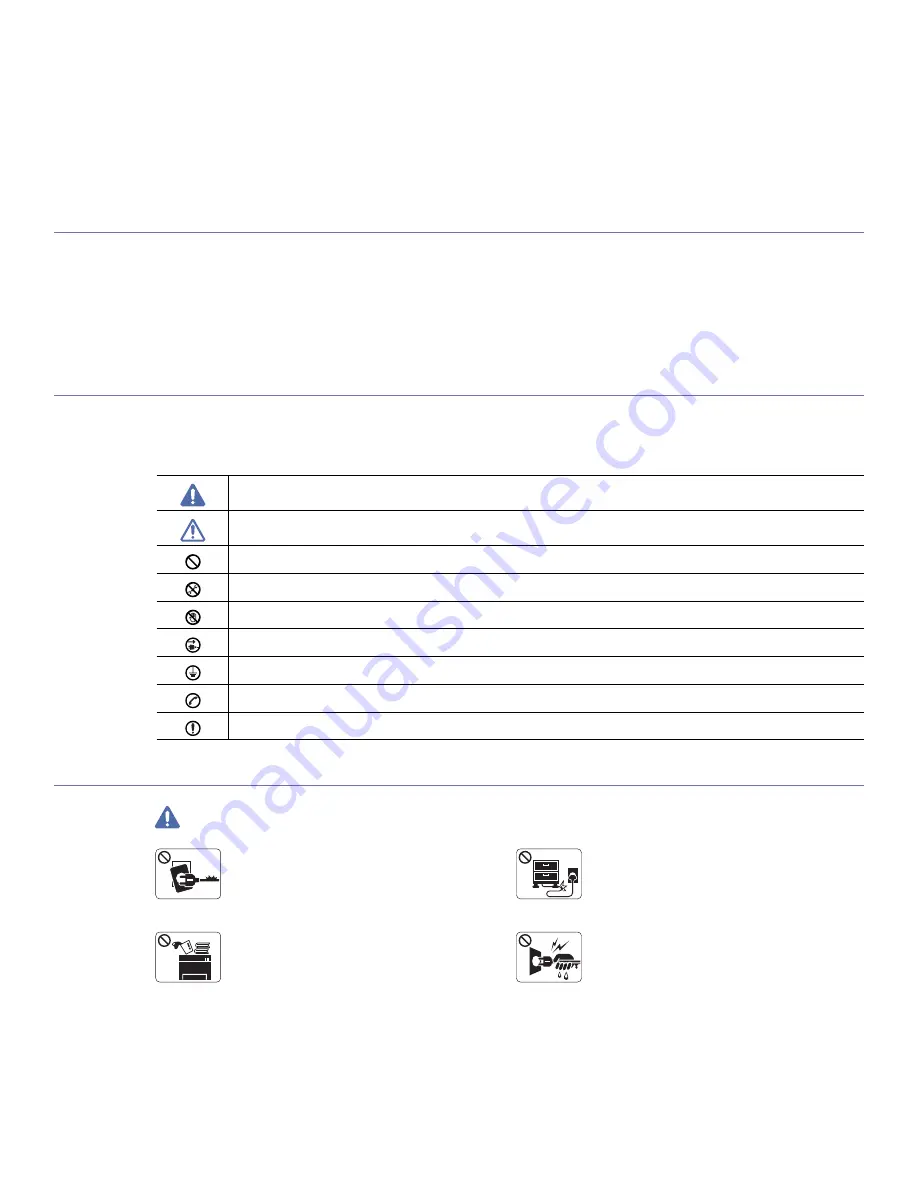
Explanation of all icons and signs used in the user’s guide

Operating environment

 Warning

Warning

Hazards or unsafe practices that may result in severe personal injury or death.

Caution

Hazards or unsafe practices that may result in minor personal injury or property damage.

Do not attempt.

Do not disassemble.

Do not touch.

Unplug the power cord from the wall socket.

Make sure the machine is grounded to prevent electric shock.

Call the service center for help.

Follow directions explicitly.

Do not use if the power cord is damaged or if the 

electrical outlet is not grounded.

 This could result in electric shock or fire. 

Do not bend, or place heavy objects on the power 

cord. 

 Stepping on or allowing the power cord to be 

crushed by a heavy object could result in electric 

shock or fire. 

Do not place anything on top of the machine (water, 

small metal or heavy objects, candles, lit cigarettes, 

etc.).

 This could result in electric shock or fire. 

Do not remove the plug by pulling on the cord; do not 

handle the plug with wet hands. 

 This could result in electric shock or fire. 

Содержание CLX-318 Series

Страница 1: ...CLX 318x Series Multi Functional Printer User s Guide imagine the possibilities Thank you for purchasing a Samsung product ...

Страница 2: ...ting 3 Restoring factory default settings 3 Installing wired network connected machine s driver 3 Windows 5 Macintosh 5 Linux 6 IPv6 Configuration 6 Activating IPv6 6 Setting IPv6 addresses 6 Using SyncThru Web Service WIRELESS NETWORK SETUP CLX 3185FW CLX 3185WK ONLY 1 1 Using a wireless network 1 Choosing your network connection 1 Printing a network configuration report 1 IP addresses 1 Wireless...

Страница 3: ...Transparencies 5 Labels 6 CardStock Custom sized paper 6 Letterhead Preprinted paper 6 Glossy photo 6 Matte photo 6 Setting the paper size and type 6 Setting the paper size 6 Setting the paper type 6 Using the output support PRINTING 1 1 Introducing useful software program 1 Samsung AnyWeb Print 1 Samsung Easy Color Manager 1 Printer driver features 1 Printer driver 1 Basic printing 2 Canceling a ...

Страница 4: ...ceiving a fax in your machine 4 Changing the receive modes 4 Receiving automatically in Fax mode 4 Receiving manually in Tel mode 4 Receiving faxes manually using an extension telephone 4 Receiving automatically in Answering Machine Fax mode 4 Receiving faxes using DRPD mode 5 Receiving in secure receiving mode 5 Activating secure receiving mode 5 Receiving faxes in memory 5 Adjusting the document...

Страница 5: ...fe 4 Maintenance parts 4 Checking replacables 4 Tips for moving storing your machine TROUBLESHOOTING 1 1 Redistributing toner 1 Tips for avoiding paper jams 2 Clearing original document jams CLX 3185FN CLX 3185FW only 2 Clearing paper jams 3 In the tray 3 In the fuser unit area 4 In the paper exit area 5 Understanding display messages 5 Checking display messages 8 Solving other problems 8 Power pr...

Страница 6: ...se of this user s guide Samsung and the Samsung logo are trademarks of Samsung Electronics Co Ltd Microsoft Windows Windows Vista Windows 7 and Windows Server 2008 R2 are either registered trademarks or trademarks of Microsoft Corporation TrueType LaserWriter and Macintosh are trademarks of Apple Computer Inc All other brand or product names are trademarks of their respective companies or organiza...

Страница 7: ...arning Warning Hazards or unsafe practices that may result in severe personal injury or death Caution Hazards or unsafe practices that may result in minor personal injury or property damage Do not attempt Do not disassemble Do not touch Unplug the power cord from the wall socket Make sure the machine is grounded to prevent electric shock Call the service center for help Follow directions explicitl...

Страница 8: ... been followed unplug the machine from all interface connections and request assistance from qualified service personnel Otherwise this could result in electric shock or fire If the machine exhibits a sudden and distinct change in performance unplug the machine from all interface connections and request assistance from qualified service personnel Otherwise this could result in electric shock or fi...

Страница 9: ...utility company Do not overload wall outlets and extension cords This can diminish performance and could result in electric shock or fire Use only No 26 AWGa or larger telephone line cord if necessary Otherwise it can cause damage to the machine a AWG American Wire Gauge Use the power cord supplied with your machine for safe operation If you are using a cord which is longer than 2 meters 6 feet wi...

Страница 10: ... if inhaled or ingested When storing supplies such as toner cartridges keep them away from children Toner dust can be dangerous if inhaled or ingested Do not burn any of the supplies such as toner cartridge or fuser unit This could cause an explosion or uncontrollable fire Using recycled supplies such as toner can cause damage to the machine In case of damage due to the use of recycled supplies a ...

Страница 11: ...Class I level during normal operation user maintenance or prescribed service condition Wavelength 800 nm Beam divergence Paraller 12 degrees Perpendicular 30 degrees Maximum power or energy output 5 mW WARNING Never operate or service the printer with the protective cover removed from Laser Scanner assembly The reflected beam although invisible can damage your eyes When using this product these ba...

Страница 12: ... for this product in an environmentally responsible manner This marking on the product accessories or literature indicates that the product and its electronic accessories e g charger headset USB cable should not be disposed of with other household waste at the end of their working life To prevent possible harm to the environment or human health from uncontrolled waste disposal please separate thes...

Страница 13: ...na Increase the separation between the equipment and receiver Connect the equipment into an outlet on a circuit different from that to which the receiver is connected Consult the dealer or experienced radio TV technician for help Change or modifications not expressly approved by the manufacturer responsible for compliance could void the user s authority to operate the equipment Canadian Radio Inte...

Страница 14: ...less device or devices which may be embedded in your printer is well below the RF exposure limits as set by the FCC This transmitter must not be collocated or operation in conjunction with any other antenna or transmitter Operation of this device is subject to the following two conditions 1 This device may not cause harmful interference and 2 this device must accept any interference received inclu...

Страница 15: ...our telephone equipment is not operating properly you should immediately remove it from your telephone line as it may cause harm to the telephone network The equipment complies with Part 68 of the FCC rules and the requirements adopted by the ACTA On the rear of this equipment is a label that contains among other information a product identifier in the format US AAAEQ TXXXX If requested this numbe...

Страница 16: ...nnect the brown wire to the pin which is marked with the letter L or colored red You must have a 13 amp fuse in the plug adaptor or at the distribution board Declaration of Conformity European Countries Approvals and Certifications Hereby Samsung Electronics declare that this product is in compliance with the essential requirements and other relevant provisions of CLX 3185 Series R TTE Directive 1...

Страница 17: ...power Radio LAN type devices radio frequency RF wireless communication devices operating in the 2 4 GHz 5 GHz band may be present embedded in your printer system which is intended for home or office use This section is only applicable if these devices are present Refer to the system label to verify the presence of wireless devices Wireless devices that may be in your system are only qualified for ...

Страница 18: ...ation regulations require wireless devices to be turned off while traveling in an airplane IEEE 802 11 also known as wireless Ethernet and Bluetooth communication devices are examples of devices that provide wireless communication In environments where the risk of interference to other devices or services is harmful or perceived as harmful the option to use a wireless device may be restricted or e...

Страница 19: ... not just the SSL code The SSL documentation included with this distribution is covered by the same copyright terms except that the holder is Tim Hudson tjh cryptsoft com Copyright remains Eric Young s and as such any Copyright notices in the code are not to be removed If this package is used in a product Eric Young should be given attribution as the author of the parts of the library used This ca...

Страница 20: ...Regulatory information_ 10 China only ...

Страница 21: ...Regulatory information_ 11 ...

Страница 22: ...in this user s guide are mainly based on Windows XP Convention Some terms in this guide are used interchangeably as below Document is synonymous with original Paper is synonymous with media or print media Machine refers to printer or MFP The following table offers the conventions of this guide The date format may differ from country to country Do not touch the surface of the drum located in the to...

Страница 23: ... color as they like http solution samsungprinter com personal colormanager Material name Description Quick Installation Guide This guide provides information on setting up your machine This guide is provided in the box with the printer User s Guide This guide provides you with step by step instructions for using your machine s full features maintaining your machine troubleshooting and replacing su...

Страница 24: ... paper you can print on both sides of the paper manual See Printing on both sides of the paper Manual on page 3 Print in various environments You can print with various operating systems such as Windows Linux and Macintosh operating systems See System requirements on page 2 Your machine is equipped with Hi Speed USB 2 0 interface and network interface Your machine is equipped with wireless network...

Страница 25: ...n the basis of CLX 3185 CLX 3185N CLX 3185NK and CLX 3186N are the same machine despite the name difference This User s Guide is written on the basis of CLX 3185N CLX 3185FN and CLX 3186FN are the same machine despite the name difference This User s Guide is written on the basis of CLX 3185FN Features CLX 3180K CLX 3185 CLX 3185K CLX 3186 CLX 3185N CLX 3185NK CLX 3186N CLX 3185WK CLX 3185FN CLX 31...

Страница 26: ...85FW Understanding the Status LED Introducing the useful buttons Acknowledging the status of the toner cartridge Machine overview CLX 3185 CLX 3185N CLX 3185WK Front view 1 3 7 6 5 4 2 12 11 8 9 10 This illustration may differ from your machine depending on its model 1 5 9 2 6 10 3 7 11 4 8 12 Scanner lid Front door Waste toner container USB porta Output support Imaging unit Tray 1 Control panel S...

Страница 27: ...ction_ 2 Rear view This illustration may differ from your machine depending on its model 1 2 3 5 4 1 Rear door handle 4 USB port 2 Rear door 5 Network porta a CLX 3185N CLX 3185WK only 3 Power cord receptacle ...

Страница 28: ...s such as the darkness the document type setting the copy size and the number of copies 9 Wireless LED CLX 3185WK Shows the current status of the wireless network connection See Understanding the Status LED on page 8 10 Status LED Shows the status of your machine See Understanding the Status LED on page 8 11 Color Start Begins a printing job in color mode 12 Black Start Begins a printing job in bl...

Страница 29: ...ocument width guides 5 Tray 1 9 Control panel 13 Imaging unit 2 Document feeder input tray 6 Front door handle 10 Document feeder cover 14 Scanner lid 3 Document feeder output tray 7 Front door 11 Toner cartridges 15 Scanner glass 4 USB port 8 Document output tray 12 Waste toner container 16 Scan unit 5 9 10 8 7 6 4 2 3 1 11 13 12 15 14 16 ...

Страница 30: ...ew This illustration may differ from your machine depending on its model 1 Rear door handle 5 Network port 2 Rear door 6 Telephone line socket 3 Power cord receptacle 7 Extension telephone socket EXT 4 USB port 1 2 3 4 5 6 7 ...

Страница 31: ... decreases values 8 Menu Enters Menu mode and scrolls through the available menus See Menu overview on page 4 9 OK Confirms the selection on the screen 10 Number Keypad Dials a number or enters alphanumeric characters See Entering characters using the number keypad CLX 3185FN CLX 3185FW only on page 2 11 Address Book Allows you to search for stored email addresses 12 Redial Pause Redials the last ...

Страница 32: ... CLX 3185FN Allows you to directly print files stored on a USB memory device when it is inserted into the USB port on the front of your machine See Using USB memory device CLX 3185N CLX 3185FN CLX 3185WK CLX 3185FW only on page 1 WPS CLX 3185FW If your wireless access point supports Wi Fi Protected Setup WPS you can configure the machine easily without a computer See WPS button CLX 3185WK CLX 3185...

Страница 33: ... screen 1 Press Print Screen on the control panel 2 Press OK when Full appears The machine prints the whole monitor screen The page will be printed on the default page like A4 or Letter You can only use this function with a USB connected machine Print Screen can only be used with Windows and Macintosh operating systems You can only use this function if the machine driver is installed Eco Copy butt...

Страница 34: ...s function simplifies the process of configuring the wireless network options such as a network name SSID data encryption and authentication You can complete the wireless connection settings by just pressing this button To perform this function refer to Wireless network setup CLX 3185FW CLX 3185WK only on page 1 Acknowledging the status of the toner cartridge The status of toner cartridges is indi...

Страница 35: ...ng to optimize your printing See Altitude adjustment on page 1 Place the machine on a flat stable surface so that there is no incline greater than 2 mm 0 08 inch Otherwise printing quality may be affected 2 Unpack the machine and check all the enclosed items 3 Remove all tape 4 Install the toner cartridge 5 Load paper See Loading paper in the tray on page 4 6 Make sure that all cables are connecte...

Страница 36: ...ents on your machine Smart Panel This program allows you to monitor the machine s status and alerts you when an error occurs during printing Samsung Scan and Fax Manager You can find out about Samsung Scan and Fax Manager program information and installed scan driver s condition Fax Utilities You can send a fax from your computer without going to the machine CLX 3185FN CLX 3185FW only SetIP Use th...

Страница 37: ...etter which represents your CD ROM drive and click OK If the AutoPlay window appears in Windows Vista click Run Setup exe in Install or run program field and click Continue in the User Account Control windows If the AutoPlay window appears in Windows 7 or Windows Server 2008 R2 click Run Setup exe in Install or run program field and click Yes in the User Account Control window 3 Select Install Now...

Страница 38: ... Double click the MAC_Installer folder 5 Double click the Installer OS X icon 6 Enter the password and click OK 7 The Samsung Installer window opens Click Continue 8 Read the license agreement and click Continue 9 Click Agree to agree to the license agreement 10 Select Easy Install and click Install Easy Install is recommended for most users All components necessary for machine operations will be ...

Страница 39: ... root in the Login field and enter the system password You must log in as a super user root to install the machine software If you are not a super user ask your system administrator 3 From the Samsung website download and unpack the Printer Settings Utility package to your computer 4 Click at the bottom of the desktop When the Terminal screen appears type in the following root localhost root tar z...

Страница 40: ...uter and press Enter in your keyboard In case the host computer requires a User name and Password fill in User ID and password of the host computer account 5 Right click the printer icon you want to share and select Connect 6 If a set up complete message appears click OK 7 Open the file you want to print and start printing Macintosh The following steps are for Mac OS X 10 5 10 6 Refer to Mac Help ...

Страница 41: ... settings See Using SyncThru Web Service CLX 3185N CLX 3185WK CLX 3185FN CLX 3185FW only on page 1 SyncThru Web Admin Service Web based machine management solution for network administrators SyncThru Web Admin Service provides you with an efficient way of managing network devices and lets you remotely monitor and troubleshoot network machines from any site with corporate internet access Download t...

Страница 42: ...ears and press OK 6 Press the left right arrow until Static appears and press OK 7 Press the left right arrow until IP Address appears and press OK 8 Enter the IP address using numeric keypad and press OK Enter a byte between 0 and 255 using the number keypad and press the left right arrow to move between bytes Repeat this to complete the address from the 1st byte to the 4th byte 9 Enter other par...

Страница 43: ...wall You have successfully changed the IP address subnet mask and gateway IPv4 setting using SetIP Program Linux SetIP program should be automatically installed during the printer driver installation 1 Print the machine s network configuration report to find your machine s MAC address 2 Open the opt Samsung mfp share utils 3 Double click the SetIPApplet html file 4 Click to open the TCP IP configu...

Страница 44: ...achine If your machine is not found in the network or locally the error message appears Check if you want to install the software without connection of the printer Check this option to install this program without a machine connected In this case the print a test page window will be skipped and completes the installation Search again When you press this button the firewall notice window appears Tu...

Страница 45: ...he Applications folder System Preferences and click Print Fax 19 Click Add on the Printer List For Mac OS X 10 5 10 6 click the icon A display window will pop up 20 For Mac OS X 10 3 select the IP Printing tab For Mac OS X 10 4 click IP Printer For Mac OS X 10 5 10 6 click IP 21 Select HP Jetdirect Socket in Protocol When printing a document containing many pages printing performance may be enhanc...

Страница 46: ... OK 4 Press the left right arrow until IPv6 Activate appears and press OK 5 Press the left right arrow until On appears and press OK 6 Turn the machine off and turn it on again 7 Reinstall your printer driver Setting IPv6 addresses Machine supports the following IPv6 addresses for network printing and managements Link local Address Self configured local IPv6 address Address starts with FE80 Statel...

Страница 47: ...chine came with a Default IP address of 192 0 0 192 which you can verify by printing out Network Configuration Report or Configuration Report DHCP IP assignment Connect your machine to the network and wait a few minutes for the DHCP server to assign an IP address to the machine Then print the Network Configuration Report as explained above If the report shows that the IP address has changed the as...

Страница 48: ...e WPS mode you want appears and press OK PBC mode Pressing both the WPS button on the control panel of your machine and the WPS PBC button on a Wi Fi Protected Setup WPS enabled access point or wireless router respectively you can easily connect your machine to a wireless network PIN mode Entering the supplied PIN number on a Wi Fi Protected Setup WPS enabled access point or wireless router you ca...

Страница 49: ...S button on the control panel when the wireless function is off the machine automatically tries to re connect to the access point or wireless router with the previously used wireless connection settings and address 1 Connecting If you press the WPS button on the control panel when the wireless function is off the machine automatically tries to re connect to the access point or wireless router with...

Страница 50: ...EP or WPA In case of WEP Select Open System or Shared Key for the authentication and enter WEP security key Click Next WEP Wired Equivalent Privacy is a security protocol preventing unauthorized access to your wireless network WEP encrypts the data portion of each packet exchanged on a wireless network using a 64 bit or 128 bit WEP encryption key In case of WPA Enter the WPA shared key and click N...

Страница 51: ...Authentication is not used and encryption may or may not be used depending on the need for data security Shared Key Authentication is used A device that has a proper WEP key can access the network Encryption Select the encryption None WEP64 WEP128 Network Key Enter the encryption network key value Confirm Network Key Confirm the encryption network key value WEP Key Index If you are using the WEP E...

Страница 52: ...g has failed you may check if the USB cable is connected between the computer and machine properly and follow the instruction on the window 15 After searching the window shows the wireless network devices Select the name SSID of access point you are using and click Next If you cannot find out the network name you want to choose or if you want to set the wireless configuration manually click Advanc...

Страница 53: ... If you select Custom Install you can choose individual operations will be installed 12 When the message which warns that all applications will close on your computer appears click Continue 13 Select the Wireless Setting and Installation option and then click OK 14 The software searches the wireless network If the searching has failed you may check if the USB cable is connected between the compute...

Страница 54: ...ur machine Wireless network printer your machine Network cable Setting IP address First you have to set up an IP address for network printing and managements In most cases a new IP address will be automatically assigned by a DHCP Dynamic Host Configuration Protocol server located on the network In a few situations the IP address must be set manually This is called a static IP and is often required...

Страница 55: ...192 168 1 150 enter 192 168 1 X X is number between 1 and 254 other than the computer s address Subnet Mask Enter a Subnet Mask Default Gateway Enter a Default Gateway 6 Select Apply then OK and OK again The printer will automatically print the configuration report Confirm that all the settings are correct Quit Safari You may close and eject the installation CD ROM If necessary restart the compute...

Страница 56: ...Network Settings in the top menu bar 4 Click Restore Default in the left side bar and click the Clear button next to Factory Default or Network Click OK in each of the following three windows that pop up 5 Disconnect the printer from the network recycle the power and print a Network Configuration Report to confirm the reset This will reset all the parameters and the printer will no longer be on th...

Страница 57: ...e machine s IP address Reinstall the machine driver and change the settings to connect to the machine on the network Due to the characteristics of DHCP the allocated IP address could change if the machine is not used for a long time or if the access point has been reset Check the wireless environment You might not be able to connect to the network in the infrastructure environment where you need t...

Страница 58: ...he machine s display Changing the display language To change the language that appears on the display follow the steps below 1 Press Menu on the control panel 2 Press the left right arrow until System Setup appears and press OK 3 Press the left right arrow until Machine Setup appears and press OK 4 Press the left right arrow until Language appears and press OK 5 Press the left right arrow to displ...

Страница 59: ... ringer key sound and alarm sound CLX 3185FN CLX 3185FW only 1 Press Menu on the control panel 2 Press the left right arrow until System Setup appears and press OK 3 Press the left right arrow until Sound Volume appears and press OK 4 Press the left right arrow until the sound option you want appear and press OK Key Sound you can select On or Off Alarm Sound you can select On or Off Speaker you ca...

Страница 60: ...until System Setup appears and press OK 3 Press the left right arrow until Paper Setup appears and press OK 4 Press the left right arrow until Paper Type appears and press OK 5 Press the left right arrow to select the paper type you want 6 Press OK to save the selection 7 Press Stop Clear to return to ready mode From your computer Windows 1 Click the Windows Start menu 2 For Windows 2000 select Se...

Страница 61: ... copying or Stop Clear to cancel 6 Press OK to save the selection 7 Press Stop Clear to return to ready mode Setting the humidity mode Print quality is affected by humidity levels Paper may be damp if your location is a humid area set the humidity mode 1 Ensure that you have installed the printer driver with the provided Printer Software CD 2 Double click the Smart Panel icon on the Windows task b...

Страница 62: ...the registration guide at the top left corner of the glass 3 Close the scanner lid Leaving the scanner lid open while copying may affect copy quality and toner consumption Dust on the scanner glass may cause black spots on the printout Always keep it clean See Cleaning the scan unit on page 3 If you are copying a page from a book or magazine lift the scanner lid until its hinges are caught by the ...

Страница 63: ...ts how crisp the printing looks on the paper Some print media may meet all of the guidelines in this section and still not produce satisfactory results This may be the result of the sheets characteristics improper handling unacceptable temperature and humidity levels or other variables over which cannot be controlled Before purchasing large quantities of print media ensure that it meets the requir...

Страница 64: ...the tray Unextend the tray by pushing manually the extended portion back into the tray Adjust the paper length guide and paper width guide Do not push the paper width guide too far causing the media to warp Do not use a paper with more than 6 mm 0 24 inch curl If you do not adjust the paper width guide it may cause paper jams 5 Close the paper cover Slide the tray back into the machine After loadi...

Страница 65: ...e application you need to press the Color Start or Black Start button each time you print a page Load only one type size and weight of print media at a time in the tray To prevent paper jams do not add media while printing This also applies to other types of print media Print media should be loaded face up with the top edge going into the tray first and be placed in the center of the tray Always l...

Страница 66: ...er printers In case of color printing using transparencies the picture quality would be lower than mono printing when the printouts are used on the overhead projector Transparencies used in the machine must be able to withstand machine s fusing temperature Place them on a flat surface after removing them from the machine Do not leave unused transparencies in the paper tray for long periods of time...

Страница 67: ...tting the paper size and type After loading paper in the paper tray set the paper size and type using the control panel These settings will apply to copy and scan modes For computer printing select the paper size and type in the application program you use on your computer See Opening printing preferences on page 2 The settings made from the machine driver override the settings on the control pane...

Страница 68: ...Media and tray_ 7 The printed pages stack on the output support and it will help the printed pages to align ...

Страница 69: ...u can use various special printing features The following table shows a general overview of features supported by your printer drivers Some models or operating systems may not support some of the feature s in the following table Printer driver supported Blank not supported Basic printing Your machine allows you to print from various Windows Macintosh or Linux applications The exact steps for print...

Страница 70: ...or Windows 7 or Windows Server 2008 R2 right click your printer icon context menus See what s printing If See what s printing item has a mark you can select other printer drivers connected with the selected printer 4 From the Document menu select Cancel You can also access this window by simply double clicking the machine icon in the Windows task bar You can also cancel the current job by pressing...

Страница 71: ...ication access Printing Preferences See Opening printing preferences on page 2 2 Click the Basic tab select Poster Printing in the Type drop down list 3 Select the page layout you want Available layouts Poster 2x2 Document will be enlarged and be divided into 4 pages Poster 3x3 Document will be enlarged and be divided into 9 pages Poster 4x4 Document will be enlarged and be divided into 16 pages 4...

Страница 72: ...you use it when you want to have large gray letters reading DRAFT or CONFIDENTIAL printed diagonally across the first page or all pages of a document There are several predefined watermarks that come with the machine They can be modified or you can add new ones to the list Using an existing watermark 1 To change the print settings from your software application access Printing Preferences See Open...

Страница 73: ...not appear in theText drop down list select Edit from the list and click Load Select the overlay file you want to use If you have stored the overlay file you want to use in an external source you can also load the file when you access the Open window After you select the file click Open The file appears in the Overlay List box and is available for printing Select the overlay from the Overlay List ...

Страница 74: ...other printer drivers connected with the selected printer Printing to a file PRN You will sometimes need to save the print data as a file You can print the document to a file instead of routing it directly to a printer The document is saved with the printer formatting such as font selection and color specifications in a prn file that can be printed on another printer To save a print job as a file ...

Страница 75: ...er Set Paper Type to correspond to the paper loaded in the tray from which you want to print This will let you get the best quality printout If you load a different type of print material select the corresponding paper type Printer Features The Printer Features dialog provides Advanced Options and Color Adjust options Select Printer Features from the drop down list to access the following features...

Страница 76: ...w appears When you type only lpr and press Enter the Select file s to print window appears first Just select any files you want to print and click Open 2 From the LPR GUI window select your machine from the list and change the print job properties 3 Click OK to start printing Configuring Printer Properties Using the Printer Properties window provided by the Printers configuration you can change th...

Страница 77: ...py function buttons on the control panel If you press Stop Clear while setting the copy options all of the options you have set for the current copy job will be canceled and returned to their default status Or they will automatically return to their default status after the machine completes the copy in progress Darkness If you have an original containing faint marking and dark images you can adju...

Страница 78: ...left right arrow until the setup option you want appears and press OK 5 Press the left right arrow until the setting you want appears and press OK 6 Repeat steps 4 through 5 as needed 7 Press Stop Clear to return to ready mode While you are setting copy options pressing Stop Clear cancels the changed settings and restores the defaults ID card copying Your machine can print 2 sided originals on one...

Страница 79: ...mage without its background This copy feature removes the background color and can be helpful when copying an original containing color in the background such as a newspaper or a catalog 1 Depending on the model the operating procedure may differ For CLX 3185 and CLX 3185N press Menu on the control panel For CLX 3185FN and CLX 3185FW press Copy and Menu in order on the control panel 2 Press the le...

Страница 80: ...he selection On Prints output in sets to match the sequence of originals Off Prints output sorted into stacks of individual pages 6 Press Stop Clear to return to ready mode 7 Enter the number of copies using the left right arrow or numeric keypad 8 Press Start to begin copying One complete document will print followed by the second complete document ...

Страница 81: ...achine You can use this program to scan images or documents This feature can be used via the local connection or the network connection See SmarThru on page 3 WIA WIA stands for Windows Images Acquisition To use this feature your computer must be connected directly with the machine via an USB cable See Scanning using the WIA driver on page 6 Scanning originals and sending to your computer Scan to ...

Страница 82: ... CLX 3185FW only If you have connected your machine to a network and set up network parameters correctly you can scan and send images over the network Setting up an e mail account To scan and send an image as an email attachment You need to set up network parameters using SyncThru Web Service 1 Enter your machine s IP address as the URL in a browser and click Go to access the SyncThru Web Service ...

Страница 83: ...d press OK 5 Press the left right arrow until the desired status appears and press OK 6 Repeat steps 5 and 6 to change other settings 7 When you have finished press Stop Clear to return to ready mode Changing the default scan settings To avoid having to customize the scan settings for each job you can set up default scan settings for each scan type 1 Depending on the model the operating procedure ...

Страница 84: ...2 Press the left right arrow until the number category you want appears and press OK 3 Press OK when All appears 4 Press the left right arrow until the name and address you want appears You can search upwards or downwards through the entire memory in alphabetical order Searching with a particular first letter 1 Press Address Book until Search Send appears on the bottom line of the display and pres...

Страница 85: ...ut Show Preview Checking this box allows you to preview applied scan options You can modify the options before scanning Default Allows you to go back to default options Change Port tab Local Scanner Select when your machine is connected via USB port Network Scanner Select when your machine is connected via network port Auto detection on the network Automatically detects your machine IP or Host nam...

Страница 86: ...a pop up window appears with information about that option s feature which is provided from the Scan Assistant Scanning with TWAIN enabled software If you want to scan documents using other software you will need to use TWAIN compliant software such as Adobe Photoshop Follow the steps below to scan with TWAIN compliant software 1 Make sure that the machine is connected to your computer and powered...

Страница 87: ...S X 10 4 10 5 Click Devices and click Browse Devices For Mac OS X 10 6 Select your device below SHARED Skip to step 7 5 For Mac OS X 10 4 Select your machine in TWAIN devices option Make sure that Use TWAIN software check box is checked and click Connect If a warning message appears click Change Port to select port If TWAIN UI appears from the Preference tab click Change Port to select port Refer ...

Страница 88: ... Type drop down list See Adding Job Type Settings on page 8 Click Default to restore the default setting for the scan options 9 When you have finished click Scan to start scanning The status bar appears on the bottom left of the window to show you the progress of the scan To cancel scanning click Cancel 10 The scanned image appears If you want to edit the scanned image use the toolbar See Using th...

Страница 89: ... Out Zooms the image out Zoom In Zooms the image in Scale Allows you to scale the image size you can enter the size manually or set the rate to scale proportionally vertically or horizontally Rotate Allows you to rotate the image you can select the number of degrees from the drop down list Flip Allows you to flip the image vertically or horizontally Brightness Allows you to adjust the brightness o...

Страница 90: ...of making a telephone connection is different from one country to another Using a fax in your computer You can send and receive a fax from your computer without going to the machine Sending a fax Windows To send a fax from your computer the Samsung Network PC Fax program must be installed This program will be installed when you installed the printer driver 1 Open the document to be sent 2 Select P...

Страница 91: ...settings on page 5 4 Enter the receiving fax machine s number You can use speed dial numbers or group dial numbers For details about storing and searching for a number see Setting up Address Book on page 6 5 Press Color Start or Black Start on the control panel The machine starts to scan and send a fax to destinations If you want to send fax directly from your computer use Samsung Network PC Fax S...

Страница 92: ...eat steps 7 You can add up to 10 destinations Once you entered a group dial number you cannot enter another group dial numbers anymore 10 When you have finished entering fax numbers press the left right arrow to select No at the Another No prompt and press OK 11 Enter the job name you want and press OK For details on how to enter alphanumeric characters see Entering characters using the number key...

Страница 93: ...a fax the machine answers the call on a specified number of rings and automatically receives the fax To change the number of rings see Fax setup CLX 3185FN CLX 3185FW only on page 1 Receiving manually in Tel mode You can receive a fax call by pressing On Hook Dial and then pressing Black Start or Color Start when you hear a fax tone from the remote machine The machine begins receiving a fax and re...

Страница 94: ...ss Stop Clear to return to ready mode When a fax is received in secure receiving mode your machine stores it in memory and shows Secure Receive to let you know that there is a fax received Printing received faxes 1 Access the Secure Receive menu by following steps 1 through 4 in Activating secure receiving mode 2 Press the left right arrow until Print appears and press OK 3 Enter the four digit pa...

Страница 95: ...o which faxes are to be sent and press OK 9 Enter the starting time using left right arrow or numeric keypad and press OK 10 Enter the ending time using left right arrow or numeric keypad and press OK 11 Press Stop Clear to return to ready mode Subsequent sent faxes will be forwarded to the specified fax machine Forwarding a sent fax to email address You can set the machine to forward every fax yo...

Страница 96: ...ored in the number you choose the display shows the message to allow you to change it 6 Enter the name you want and press OK For details on how to enter alphanumeric characters See Entering characters using the number keypad CLX 3185FN CLX 3185FW only on page 2 7 Enter the speed dial number you want and press OK 8 Press OK when the speed dial information appears correctly 9 Press OK when Yes appea...

Страница 97: ... the name 6 Press the left right arrow until the name you want appears and press OK Or enter the first letters Press the left right arrow until the name you want appears and press OK 7 Press OK when Yes appears to confirm the deletion 8 Press Stop Clear to return to ready mode Printing Address Book You can check your Address Book settings by printing a list 1 Press Fax on the control panel 2 Press...

Страница 98: ...y a metal shielded USB memory device Only use a USB memory device that has obtained compatibility certification otherwise the machine might not recognize it Insert a USB memory device into the USB memory port on the front of your machine Do not remove the USB memory device while the machine is in operation or writing to or reading from USB memory The machine warranty does not cover damage caused b...

Страница 99: ... a USB memory device into the USB memory port on your machine and then press Direct USB If one has already been inserted press Direct USB 2 Press OK when USB print appears Your machine automatically detects the device and reads data stored on it 3 Press the left right arrow until the folder or file you want appears and press OK If you see D in the front of a folder name there are one or more files...

Страница 100: ...folders in the selected folder If you selected a file the display shows the size of the file for about 2 seconds Go to the next step If you selected a folder press the left right arrow until the file you want to delete appears and press OK 6 Press OK when Yes appears to confirm your selection 7 Press Stop Clear to return to ready mode Formatting a USB memory device 1 Insert the USB memory device i...

Страница 101: ...ote fax machine if it was busy You can set an interval between attempts Prefix Dial You can set a prefix of up to five digits This number dials before any automatic dial number is started It is useful for accessing a PABX exchange ECM Mode This mode helps with poor line quality and makes sure any faxes you send are sent smoothly to any other ECM equipped fax machine Sending a fax using ECM may tak...

Страница 102: ... contains pages larger than the paper in your machine and Auto Reduction has been turned on the machine will reduce the fax to fit on the existing paper and nothing will be discarded Junk Fax Setup This setting may not be available depending on your country Using this feature the system will not accept faxes sent from remote stations whose numbers are stored in the memory as junk fax numbers This ...

Страница 103: ...l Type You can improve the copy quality by selecting the document type for the current copy job Eco Copy You can cut toner consumption and paper usage by using this option Option Description All Report You can print reports and lists about all options Configuration This list shows the status of the user selectable options You may print this list to confirm your changes after changing settings Supp...

Страница 104: ...network options to the factory default Address Book Clears all of the fax numbers entries stored in memory Sent Report Clears all records of sent faxes Fax RCV Report Clears all records of received faxes Option Description TCP IP Select appropriate protocol and configure parameters to use the network environment There are lots of parameters to be set If you are not sure leave as is or consult the ...

Страница 105: ...ine Fax Nob Date Timeb Clock Modeb Language Default Mode Power Save Timeout Altitude Adj Auto Continue Import Setting Export Setting Paper Setup Paper Size Paper Type Sound Volume Key Sound Alarm Sound Speakerb Ringerb Report All Report Configuration Supplies Info Address Bookb Send Reportb Sent Reportb Fax RCV Reportb Schedule Jobsb JunkFax Reportb Network Info c User Auth Listc PCL Font List Fax...

Страница 106: ...onfig Ethernet Speed Auto 10M Half 10M Full 100M Half 100M Full Wirelessd WPS Setting WLAN Setting WLAN Default WLAN Signal Clear Setting Network Info a CLX 3185 CLX 3185N CLX 3185FN only b CLX 3185FN CLX 3185FW only c CLX 3185N CLX 3185FN CLX 3185FW CLX 3185WK only d CLX 3185WK CLX 3185FW only Items Option ...

Страница 107: ...access to Settings tab and Security tab 1 Click Login on the upper right of the SyncThru Web Service website A log in page appears 2 Type in the ID and Password then click Login If it s your first time logging into SyncThru Web Service type in the below default ID and password ID admin Password sec00000 SyncThru Web Service overview Some tabs may not appear depending on your model Information tab ...

Страница 108: ...stem Administrator 4 Enter the name of the administrator phone number location and E mail address 5 Click Apply Using the Smart Panel program The Smart Panel is a program that monitors and informs you of the machine status and allows you to customize the machine s settings For Windows and Macintosh Smart Panel is installed automatically when you install the machine software For Linux you can downl...

Страница 109: ...s b Select Samsung Printers SmarThru 4 Uninstall SmarThru 4 c When your computer asks you to confirm your selection read the statement and click OK d Click Finish Using the Linux Unified Driver Configurator The Unified Driver Configurator is a tool primarily intended for configuring machine devices You need to install Unified Linux Driver to use Unified Driver Configurator See Installing the Unifi...

Страница 110: ... machine Set as Default Sets the current selected machine as a default machine Stop Start Stops starts the machine Test Allows you to print a test page to ensure the machine is working properly Properties Allows you to view and change the printer properties Classes tab The Classes tab shows a list of available machine classes Refresh Renews the classes list Add Class Allows you to add a new machin...

Страница 111: ...nified Linux Driver package provides an appropriate port sharing mechanism that is used by Samsung printer and scanner drivers The drivers talk to their devices via so called machine ports The current status of any machine port can be viewed via the Ports configuration The port sharing prevents you from accessing one functional block of the machine device while another block is in use When you ins...

Страница 112: ...anel 2 Press the left right arrow until System Setup appears and press OK 3 Press the left right arrow until Maintenance appears and press OK 4 Press the left right arrow until Serial Number appears and press OK 5 Check your machine s serial number 6 Press Stop Clear to return to ready mode Cleaning the machine If printing quality problems occur or if you use your machine in a dusty environment yo...

Страница 113: ...d with toner we recommend you use a cloth or tissue dampened with water to clean If you use a vacuum cleaner toner blows into the air then might be harmful if inhaled After cleaning let the machine to dry completely 7 Holding the groove on the front of the imaging unit push imaging unit into the machine Do not touch the green surface of the drum located in the imaging unit Use the handle on the ca...

Страница 114: ...ipe the underside of the scanner lid and white sheet until it is clean and dry 5 Close the scanner lid The following procedure is for CLX 3185FN and CLX 3185FW 1 Slightly dampen a soft lint free cloth or paper towel with water 2 Open the scanner lid 3 Wipe the surface of the scanner glass until it is clean and dry 4 Wipe the underside of the scanner lid and white sheet until it is clean and dry 5 ...

Страница 115: ... you print on operating environment printing interval media type and or media size For example if you print a lot of graphics the consumption of the toner is high and you may need to change the cartridge more often Maintenance parts To avoid print quality and paper feed problems resulting from worn parts and to maintain your machine in top working condition the following items will need to be repl...

Страница 116: ...andles on the toner cartridge and pull to remove the cartridge from the machine 3 Thoroughly roll the cartridge five or six times to distribute the toner evenly inside the cartridge If toner gets on your clothing wipe it off with a dry cloth and wash clothing in cold water Hot water sets toner into fabric Do not touch the green underside of the toner cartridge Use the handle on the cartridge to av...

Страница 117: ...xed paper type originals 1 Remove any remaining pages from the document feeder 2 Open the document feeder cover 3 Gently remove the jammed paper from the document feeder If you see no paper in this area go to step 5 4 Close the document feeder cover Reload the pages you removed if any in the document feeder 5 Open the scanner lid 6 Seize the misfeed paper and remove the paper from the feed area by...

Страница 118: ...age 3 4 Insert the tray 1 back into the machine until it snaps into place Printing automatically resumes In the fuser unit area Click this link to open an animation about clearing a jam If paper is jammed in the fuser unit area follow the next steps to release the jammed paper 1 Open the scan unit first and then inner cover Do not touch the fuser inside the inner cover It is hot and could cause bu...

Страница 119: ...is automatically ejected from the machine 2 Gently pull the paper out the output tray If you do not see the jammed paper or if there is any resistance when you pull stop and go to the next step 3 Open the rear door 4 If you see the jammed paper pull it straight up Skip to step 10 If you do not see the paper or if there is any resistance when you pull stop and go to the next step 5 Pull up the fuse...

Страница 120: ... Meaning Suggested solutions COMM Error The machine has a communication problem Ask the sender to try again Incompatible The machine has received a fax from which is registered as a junk fax The received fax data will be deleted Reconfirm junk fax setup See Changing the fax setup options on page 1 Line Busy The receiving fax machine did not answer or the line is already engaged Try again after a f...

Страница 121: ...pts Try again Make sure that the receiving machine is operational Message Meaning Suggested solutions Not Compatible color toner The toner cartridge is not suitable for your machine Install the corresponding toner cartridge with a Samsung genuine cartridge See Replacing the toner cartridge on page 2 Not installed Waste tank The waste toner container is not installed Install the waste toner contain...

Страница 122: ...rint anymore without changing the cartridge If you select Continue the machine keeps printing but the printing quality cannot be guaranteed Replace the toner cartridge for the best print quality when this message appears Using a cartridge beyond this stage can result in printing quality issues See Replacing the toner cartridge on page 2 Samsung does not recommend using non genuine Samsung toner ca...

Страница 123: ...sung Scan and Fax Manager Problem on page 15 See Common Windows problems on page 15 See Common Linux problems on page 16 See Common Macintosh problems on page 17 Power problems Click this link to open an animation about solving power problems Self Diagnostics Please wait The engine in your printer is checking some problems detected Please wait a few minutes Toner Supply Err The machine cannot dete...

Страница 124: ...use some paper to stick together replace with a new stack Multiple sheets of paper do not feed Different types of paper may be stacked in the tray Load paper of only one type size and weight Paper does not feed into the machine Remove any obstructions from inside the machine Paper has not been loaded correctly Remove paper from the tray and reload it correctly There is too much paper in the tray R...

Страница 125: ... s driver on page 3 The machine is malfunctioning Check the display message on the control panel to see if the machine is indicating a system error If the error cannot be cleared contact a service representative The machine does not print The document size is so big that the hard disk space of the computer is not enough to access the print job Allocate more hard disk space on your computer for spo...

Страница 126: ...pplication the resolution will be reduced Before printing the machine emits vapor near the output tray Using damp paper can cause vapor during printing This is not a problem Just keep printing Condition Possible cause Suggested solutions The printed paper is curled Paper curl occurs due to many different factors such as temperature humidity paper type high coverage printing etc Use the Paper Curl ...

Страница 127: ...ecomes unacceptable Change to a lighter weight paper See Selecting print media on page 2 Check the environmental conditions very dry low humidity or high humidity higher than 80 RH conditions can increase the amount of background shading Remove the old toner cartridge and install a new one See Replacing the toner cartridge on page 2 Toner smear Clean the inside of the machine See Cleaning the insi...

Страница 128: ... Check for leaking toner Clean the inside of the machine See Cleaning the inside on page 1 Solid Color or Black pages The toner cartridge may not be installed properly Remove the cartridge and reinsert it The toner cartridge may be defective and need replacing Remove the toner cartridge and install a new one See Replacing the toner cartridge on page 2 The machine may require repair Contact a servi...

Страница 129: ...stack of paper then turn it over in the tray Replace the paper in the tray with a fresh supply Check adjust the paper guides if necessary Ensure that the paper is the proper paper weight Check for copy paper or pieces of copy paper remaining in the machine after a paper jam has been cleared Condition Suggested Solutions Toner cartridge produces fewer copies than expected before running out of tone...

Страница 130: ...blem The machine does not send Make sure that the original is loaded in the document feeder or on the scanner glass Check the fax machine you are sending to to see if it can receive your fax Condition Suggested solutions The incoming fax has blank spaces or is of poor quality The fax machine sending you the fax may be faulty A noisy phone line can cause line errors Check your machine by making a c...

Страница 131: ...and scanner share the same I O interface port the situation of simultaneous access of different user applications to the same port is possible To avoid possible conflicts only one of them at a time is allowed to gain control over the device The other user will encounter device busy response You should open ports configuration and select the port assigned to your machine In the Selected port pane y...

Страница 132: ...ion of simultaneous access of different user applications to the same port is possible To avoid possible conflicts only one of them at a time is allowed to gain control over the device The other user will encounter device busy response This usually happens when starting a scan procedure An appropriate message box appears To identify the source of the problem open the Ports configuration and select...

Страница 133: ...pan of each item has expired To purchase maintenance parts contact the source where you purchased the machine Replacing maintenance parts can be performed only by an authorized service provider dealer or the retailer where you purchased the machine The warranty does not cover the replacement of any maintenance parts after their lifespan Type Average yielda a Declared yield value in accordance with...

Страница 134: ...er Displays the number of pages scanned and printed 6 Press Stop Clear to return to ready mode Replacing the toner cartridge The machine uses four colors and has a different toner cartridge for each one yellow Y magenta M cyan C and black K The status LED and the toner related message on the display indicate which toner cartridge should be replaced At this stage the indicated toner cartridge needs...

Страница 135: ...e computer or warming up wait until the job ends Then turn the machine off 2 Using the handle completely open the front door 3 Grasp the handles on the front cartridge and pull to remove four cartridges from the machine 4 Pull the waste toner container out of the machine using its handle 5 Pull the imaging unit out of the machine using the groove on the front of the imaging unit 6 Take a new imagi...

Страница 136: ...cartridges open and close the front door If the problem persists turn the power button off and on Replacing the waste toner container When the life span of the waste toner container has expired the Smart Panel program window appears on the computer indicating the waste toner container needs to be replaced Otherwise your machine stops printing 1 Turn the machine off then wait a few minutes for the ...

Страница 137: ...ure that it is firmly seated in place 7 Close the front door firmly If the front door is not completely closed the machine will not operate Please make sure all toner cartridges are installed properly If any toner cartridge is installed improperly the front door do not close 8 Turn the machine on ...

Страница 138: ... mm 14 9 inches CLX 3185FN CLX 3185FW 378 mm 14 9 inches Width CLX 3185 CLX 3185N CLX 3185WK 416 mm 16 4 inches CLX 3185FN CLX 3185FW 416 mm 16 4 inches Weight Machine with consumables CLX 3185 CLX 3185N CLX 3185WK 14 24 Kg 31 39 lbs CLX 3185FN CLX 3185FW 15 25 Kg 33 62 lbs Item Description Noise Levela a Sound Pressure Level ISO 7779 Configuration tested machine basic installation A4 paper simple...

Страница 139: ...Item Description Power ratinga a See the rating label on the machine for the correct voltage V frequency hertz and type of current A for your machine 110 volt models AC 110 127 V 220 volt models AC 220 240 V Power consumption Average operating mode Less than 350 W Ready mode Less than 60 W Power save mode CLX 3185 CLX 3185N Less than 8 W CLX 3185WK CLX 3185FN CLX 3185FW Less than 11 W Power off mo...

Страница 140: ...d 5 sheets for manual feeding in the tray Thin paper Refer to the Plain paper section Refer to the Plain paper section 60 to 70 g m2 16 to 19 lbs bond Labelsc c The smoothness of the labels used in this machine is 100 to 250 sheffield This means the numeric level of smoothness Letter A4 Refer to the Plain paper section 120 to 150 g m2 37 to 40 lbs bond Card stock Post card 101 60 x 152 4 mm 4 x 6 ...

Страница 141: ...www samsung com ESTONIA 800 7267 www samsung com KAZAKHSTAN 8 10 800 500 55 500 www samsung com kz_ru KYRGYZSTAN 00 800 500 55 500 FINLAND 030 6227 515 www samsung com FRANCE 01 48 63 00 00 www samsung com GERMANY 01805 SAMSUNG 726 7864 0 14 min www samsung com GEORGIA 8 800 555 555 GUATEMALA 1 800 299 0013 www samsung com HONDURAS 800 7919267 www samsung com HONG KONG 852 3698 4698 www samsung co...

Страница 142: ...2 678 www samsung com SWEDEN 0771 726 7864 SAMSUNG www samsung com SWITZERLAND 0848 SAMSUNG 7267864 CHF 0 08 min www samsung com SYRIA 1825 22 73 TADJIKISTAN 8 10 800 500 55 500 TAIWAN 0800 329 999 www samsung com THAILAND 1800 29 3232 02 689 3232 www samsung com TRINIDAD TOBAGO 1 800 SAMSUNG 726 7864 www samsung com TURKEY 444 77 11 www samsung com U A E 800 SAMSUNG 726 7864 www samsung com U K 0...

Страница 143: ...dress automatically This is usually done in the bootstrap process of computers or operating systems running on them The BOOTP servers assign the IP address from a pool of addresses to each client BOOTP enables diskless workstation computers to obtain an IP address prior to loading any advanced operating system CCD Charge Coupled Device CCD is a hardware which enables the scan job CCD Locking mecha...

Страница 144: ... so that the second system behaves like the first system Emulation focuses on exact reproduction of external behavior which is in contrast to simulation which concerns an abstract model of the system being simulated often considering its internal state Ethernet Ethernet is a frame based computer networking technology for local area networks LANs It defines wiring and signaling for the physical lay...

Страница 145: ...l standards bodies It produces world wide industrial and commercial standards ITU T The International Telecommunication Union is an international organization established to standardize and regulate international radio and telecommunications Its main tasks include standardization allocation of the radio spectrum and organizing interconnection arrangements between different countries to allow inter...

Страница 146: ...l and has become an industry standard Originally developed for early inkjet printers PCL has been released in varying levels for thermal dot matrix printer and laser printers PDF Portable Document Format PDF is a proprietary file format developed by Adobe Systems for representing two dimensional documents in a device independent and resolution independent format PostScript PostScript PS is a page ...

Страница 147: ... Window NT and other Microsoft products The format of a UNC path is servername sharename Additional directory URL Uniform Resource Locator URL is the global address of documents and resources on the Internet The first part of the address indicates what protocol to use the second part specifies the IP address or the domain name where the resource is located USB Universal Serial Bus USB is a standar...

Страница 148: ...1 default settings changing the default mode 2 setting a fax header 2 tray setting 6 direct USB 3 6 7 display 3 6 document feeder 1 duplex printing manual printer driver 3 E eco copy 3 Entering using the number keypad 2 eoc copy 6 error message 5 extension telephone 4 F favorites settings for printing 2 fax 6 fax receiving activating secure receive 5 changing the receive mode 4 DRPD mode 4 extensi...

Страница 149: ...ed 4 printer properties 8 printing 7 scanning 7 supplied software 2 system requirements 3 unified driver configurator 3 using SetIP 3 loading in the document feeder 1 originals on the scanner glass 1 special media 4 M Macintosh common Macintosh problems 17 driver installation for network connected 5 driver installation for USB cable connected 4 printing 6 scanning 7 sharing a machine locally 6 sup...

Страница 150: ...t of paper Macintosh 7 Windows 3 poster 3 printing a document Windows 1 printing on both sides of paper Windows 3 printing to a file 6 USB memory 2 using overlay 5 using watermarks 4 printing a document Linux 7 Macintosh 6 problems copying problems 14 paper feeding problems 9 power problems 8 printing quality problems 11 R rear view CLX 3185 CLX 3185N 2 rear view CLX 3185FN CLX 3185FW 5 redial pau...

Страница 151: ... width and length 2 changing the tray size 2 setting the paper size and type 6 TWAIN scan 6 U USB cable driver installation 3 USB flash memory data backup 2 managing 3 printing 2 scanning 1 using help 3 W watermark create 4 delete 5 edit 4 print 4 WIA scan 6 Wi Fi Protected Setup WPS 9 Windows common Windows problems 15 driver installation for network connected 3 driver installation for USB cable ...

Отзывы: