- 10 -
3-8 Replacement of Assy Control Box
Parts
Explaination Photo
Assy
Control Box
Motor Fan Cooling
Assy PCB Parts
(Main PCB)
Buzzer
Assy Knob Dial
Select Parts
Assy Display
Assy Knob Dial
Encoder Parts
Pump Motor
Assy Inlet
Explaination Photo
Explaination
1.
Remove one connector from the main
pcb.
2.
Remove two Tubes and one connector at
assy inlet.
3.
Remove 3 screws at both sides and top
inside of assy control box, lift up assy
control box and pull forward to separate.
The Assembly is reverse order of disjointing.
Содержание BQ1AD4T013/XEF
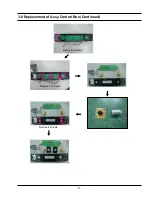
Страница 13: ... 11 3 8 Replacement of Assy Control Box Continued Remove 2 screws Remove 11 screws Remove 4 screws ...
Страница 46: ... 44 5 2 Main Parts List No Code No Description Specification Q ty SA SNA Remark ...
Страница 51: ... 49 7 Wiring Diagram This Document can not be used without Samsung s authorization 7 1 Wiring Diagram ...

