background image

Tel: 886.2.2175 2930 Email: [email protected] 

www.salukitec.com


57 


6.2


Example 2: Taking Cursor Measurements 

You can use the cursor to quickly measure the time and amplitude of a waveform. 
Measuring Ring Time (convertible to Frequency) and Amplitude on Rising Edge of Pulse 
To measure the ring time on the rising edge of the pulse, follow the steps below. 
1.


Push the CURSOR button to view the Cursor menu. 

2.


Push F1 the Type option button and select Time. 

3.


Push F2 or F3 the Source option button and select CH1. 

4.


Push F4 to select a cursor. If S is selected, turn V0 to move Cursor S on the screen; if E is selected, turn V0 to 
move Cursor E; if both are selected, turn V0 to move them at the same time. 

5.


Put Cursor S on the first peak of the ring. 

6.


Put Cursor E on the second peak of the ring. 

7.


At Delta displays the measured time and at Cursor S an Cursor E display the positions of these two cursors.   

8.


Push the Type option button and select Voltage.   

9.


Put Cursor S on the highest peak of the ring. 

10.


Put Cursor E on the lowest point of the ring. The amplitude of the ring will be displayed at Delta. 

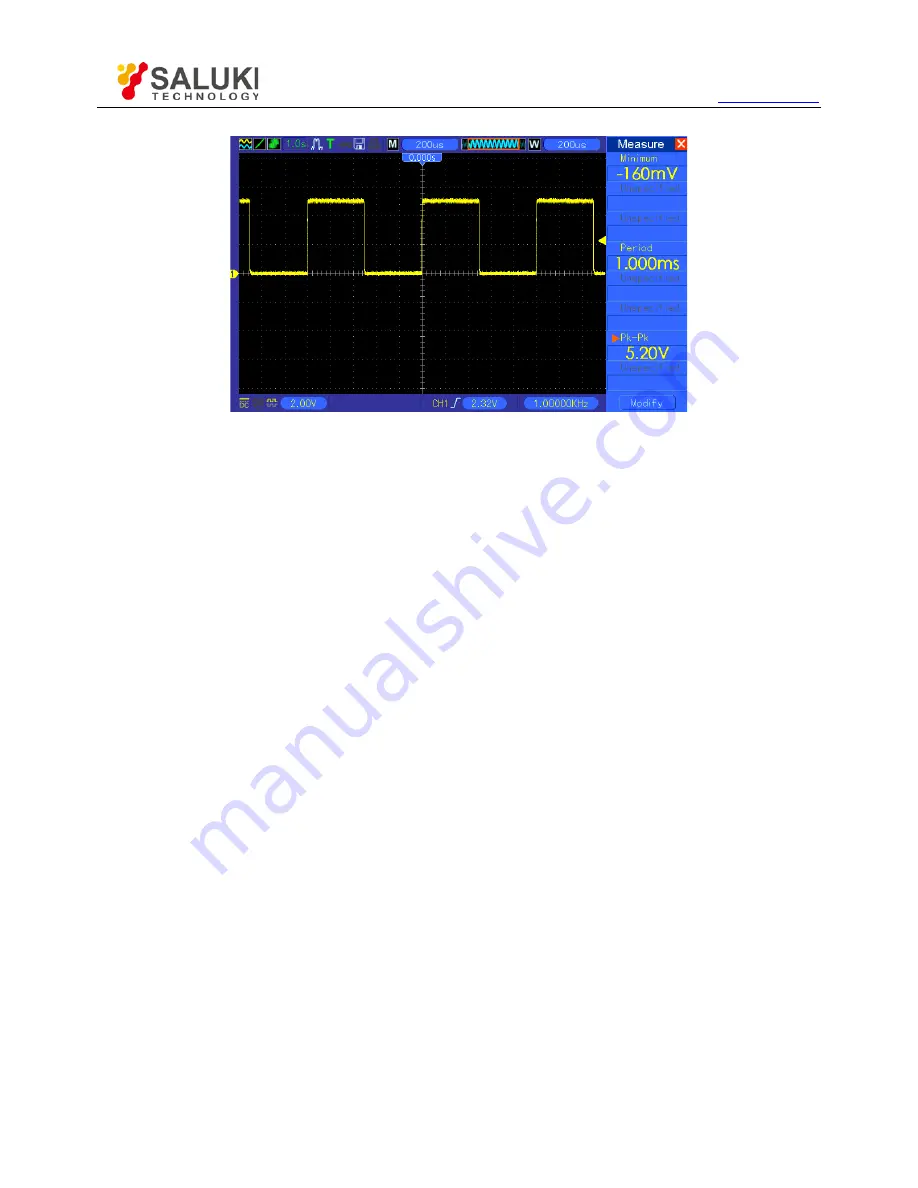
See figures below for better understanding. 

Содержание MSO1000

Страница 1: ...MSO1000 Mixed Signal Oscilloscope User Manual Saluki Technology Inc...

Страница 2: ...to the Mixed Signal Oscilloscopes of the following models MSO1062 Mixed Signal Oscilloscope 2CH L16 MSO1102 Mixed Signal Oscilloscope 2CH L16 MSO1202 Mixed Signal Oscilloscope 2CH L16 MSO1000 Mixed S...

Страница 3: ...which should not be modified or tampered by any organization or individual or reproduced or transmitted for the purpose of making profit without its prior permission otherwise Saluki will reserve the...

Страница 4: ...886 2 2175 2930 Email sales salukitec com www salukitec com 4 Contacts Service Tel 886 2 2175 2930 Website www salukitec com Email info salukitec com Address No 367 Fuxing N Road Taipei 105 Taiwan R...

Страница 5: ...3 Data Acquisition 17 4 4 Waveform Scaling and Positioning 18 4 5 Waveform Measurement 19 5 Basic Operation 20 5 1 User Interface 20 5 2 Horizontal System 22 5 3 Vertical Controls 25 5 4 Trigger Contr...

Страница 6: ...ger to Measure Long Pulse Signal 66 6 10 Example 10 Using Math Functions to Analyze Waveforms 67 6 11 Example 11 Measuring Data Propagation Delay 68 6 12 Example 12 Using Trigger to Measure Digital Si...

Страница 7: ...hock the grounding conductor must be connected to earth ground Before making connections to the input or output terminals of the product ensure that the product is properly grounded Connect the probe...

Страница 8: ...this mark personal injury may be caused to immediately Waning The term Warning is used in the manual to indicate that when you read this mark personal injury may not be caused to you immediately but y...

Страница 9: ...et the Probe option attenuation factor By using the three methods the oscilloscope provides context sensitive hyperlinks and an index you may master all operations on the device in quite a short time...

Страница 10: ...et They are links to other topics Turn the HELP SCROLL knob to move the highlight from one link to another Push the Show Topic option button to display the topic corresponding to the highlighted link...

Страница 11: ...below to perform a quick functional check to your oscilloscope 3 2 1 Power on the oscilloscope Plug in the oscilloscope and press the ON OFF button Then push the DEFAULT SETUP button The default Probe...

Страница 12: ...electric shock Do not touch metallic portions of the probe head while it is connected to a voltage source Connect the probe to the oscilloscope and connect the ground terminal to ground before you sta...

Страница 13: ...pe of the displayed waveform 3 If necessary use a nonmetallic screwdriver to adjust the variable capacity of your probe until the shape of the waveform turns to be the same as the above figure Repeat...

Страница 14: ...pe and wait for 20 minutes until it has adequately warmed up To compensate the signal path disconnect any probes or cables from the front panel input connectors Then push the UTILITY button select the...

Страница 15: ...ukitec com 15 2 Flat Cable Plug Plug the flat cable into the logic signal input port in accordance with the sequence of the input port Note When connect with device please insert input terminals gentl...

Страница 16: ...d setups and the default factory setup Default Setup The oscilloscope is preset for normal operations when it is shipped from the factory This is the default setup You may recall this setup at any tim...

Страница 17: ...y view the effectively triggered waveforms In this mode the oscilloscope displays waveforms only after the first trigger To perform a single sequence acquisition push the SINGLE SEQ button Trigger Cou...

Страница 18: ...lloscope digitizes waveforms by acquiring the value of an input signal at discrete points The time base helps to control how often the values are digitized Use the SEC DIV knob to adjust the time base...

Страница 19: ...nd maximum values of a waveform and knew you had a scale factor of 50mV division you could easily calculate your peak to peak voltage as follows 6 divisions x 50mV division 300mV Cursor This method al...

Страница 20: ...nto several functional areas In this chapter we will give a quick overview of all control buttons and knobs on the front panel as well as the displayed information on the screen and relative testing o...

Страница 21: ...sequence acquisition 5 Tool Icon If this icon lights up it means the keyboard of the oscilloscope is locked by the host computer via USB control If this icon lights up it means the USB disk has been...

Страница 22: ...y view the same waveform in XY format To perform this operation stop the acquisition and change the display format to XY The table below shows how to operate some controls in XY format Controls Usable...

Страница 23: ...row Left arrow Set Clear Clear All This function is usable only in dual window mode It sets marks at some waveform record locations that users are interested in and searches for these marks by right a...

Страница 24: ...ly If the waveform acquisition is stopped by using the RUN STOP or SINGLE SEQ button the SEC DIV control will expand or compress the waveform In dual window mode push this knob to select major or mino...

Страница 25: ...om left to right without any trigger or horizontal position control 5 3 Vertical Controls Vertical controls can be used to display and remove waveforms adjust vertical scale and position set input par...

Страница 26: ...volt waveform Internally the channel input is connected with a zero volt reference level Fine Resolution In the fine resolution setting the vertical scale readout displays the actual VOLTS DIV setting...

Страница 27: ...of filters and systems Analyze vibration To use the Math FFT mode perform the following tasks Set the source time domain waveform Display the FFT spectrum Choose a type of FFT window Adjust the sampl...

Страница 28: ...ch is called the Nyquist frequency Frequency information beyond the Nyquist frequency is undersampled which brings about the FFT aliasing The math function can convert the center 2048 points of the ti...

Страница 29: ...cond 8 FFT window type 5 3 1 3 Selecting FFT Window Using windows can eliminate the spectral leakage in the FFT spectrum The FFT algorithm assumes that the YT waveform repeats all the time When the nu...

Страница 30: ...three FFT Window options There is a trade off between frequency resolution and amplitude accuracy for each type of window You shall determine which one to choose according to the object you want to me...

Страница 31: ...cies Use zoom controls and cursors to magnify and measure the FFT spectrum 5 3 1 6 Magnifying and Positioning FFT Spectrum You may scale the FFT spectrum and use cursors to measure it through the FFT...

Страница 32: ...hen use the V0 knobs to move Cursor S and Cursor E Use the horizontal cursor to measure the amplitude and the vertical cursor to measure the frequency Now the display at the DELTA menu is just the mea...

Страница 33: ...igger level range of 8V to 8V AC Line Uses a signal derived from the power cord as the trigger source Mode Auto Normal Select a trigger mode By default the oscilloscope uses the Auto mode In this mode...

Страница 34: ...r for the Sync option you may use the User Select knob to specify a line number Standard NTSC PAL SECAM Choose a video standard for sync and line number count Note When you choose Normal Polarity the...

Страница 35: ...tch between submenu pages Trigger When The pulse width of the source must be 5ns so that the oscilloscope can detect the pulse Within a 5 tolerance triggers the oscilloscope when the signal pulse widt...

Страница 36: ...nob to set the time span 8 Swap Trigger As a feature of analog oscilloscopes it gives stable displays of signals at two different frequencies Mainly it uses a specific frequency to switch between two...

Страница 37: ...Positive Negative When Select by F3 Set Pulse Width Pulse Width Push F4 to select Adjust the multi functional knob V0 to set the pulse width Coupling AC DC Noise Reject HF Reject LF Reject Select by...

Страница 38: ...ettings Comments Type OT Source CH1 CH2 Select the trigger source Polarity Positive Negative Select to trigger on positive or negative pulses Mode Auto Normal Overtime Press F5 to select Overtime opti...

Страница 39: ...Displays the Acquire menu UTIILITY Displays the Utility menu CURSOR Displays the Cursor menu DISPLAY Displays the Display menu 5 5 1 Save Recall Press the SAVE RECALL button to save or recall oscillo...

Страница 40: ...lloscope settings stored in the location selected in the Setup field Push the Default Setup button to initialize the oscilloscope to a known setup See below for waveform menus Note The oscilloscope wi...

Страница 41: ...te the actual RMS measurement of the first complete cycle in the waveform 7 Min The most negative peak voltage measured over the entire waveform 8 Max The most positive peak voltage measured over the...

Страница 42: ...64 128 Select the number of averages by pressing F3 or F4 Memory Depth Real Time 4K 40K 512K 1M Select the memory depth for different board models Normal For the oscilloscope model with the bandwidth...

Страница 43: ...Update Program button and the Software Upgrade dialog pops up Push F6 to upgrade or push F2 to cancel Save Waveform Insert a USB disk and the disk icon at the top left corner is highlighted Click on t...

Страница 44: ...r 2 A selected cursor is highlighted which can be moved freely Both cursors can be selected and moved at the same time The box behind the cursor displays the location of the cursor Delta Display the d...

Страница 45: ...descriptions on XY format in the following text Contrast 0 15 16 ranks adjustable with a progress bar to display Press F5 to select this option Turn the multi functional knob to adjust Next Page Grid...

Страница 46: ...o 50 Trigger Mode Auto Trigger Source Adjusted Autoset can not be used for the EXT TRIG signal Trigger Slope Adjusted Trigger Type Edge Trigger Video Sync Adjusted Trigger Video Standard Adjusted Vert...

Страница 47: ...options Square Wave Options Details Multi cycle Square Display multiple cycles that have appropriate vertical and horizontal scales Single cycle Square Set the horizontal scale to display about one c...

Страница 48: ...indow Trigger Knob Level Position 0 00s SEC DIV 200 s Math Operation Source CH1 CH2 Position 0div FFT Vertical Scale 20dB FFT Operation Source CH1 Window Hanning FFT Zoom X1 Measure Source CH1 Type No...

Страница 49: ...Mode Auto Coupling DC Level 0 00v CH2 Type Edge Slope Rising Mode Auto Coupling DC Level 0 00v Trigger OT Source CH1 Polarity Positive Mode Auto Time 20ns Vertical System All Channels Coupling DC Ban...

Страница 50: ...ertime of the overtime trigger and slope trigger select menu options and so on Easy to operate F7 Push this button in single window mode to switch between dotted line display and cross display Push it...

Страница 51: ...logical analyzer which provides 16 logical channels is able to carry out the measurement on mixed signals with the other 2 analog oscilloscope channels You may open or close a single channel or a grou...

Страница 52: ...al channels 2 Press F7 F7 Current to enable the multifunction knob to select digital channels Turn the multifuction knob to select the digital channels and the number of the selected channel will be d...

Страница 53: ...splay 16 channels Reset Reset the waveforms in D7 D0 channel group 1 Open and close single digital channel Press F7 F7 D7 D0 channel setup turn the multifuction knob to select the digital channel you...

Страница 54: ...com 54 Press F7 F7 D7 D0 waveform size or push D15 D8 waveform size to select the size of the digital channel waveforms 4 Reset the display of the digital channel waveforms Press F7 F7 D7 D0 reset or...

Страница 55: ...Y mode 6 Triggering on a pulse width 7 Triggering on a video signal Observing triggers on video fields and video lines 8 Using Slope Trigger to capture a particular slope signal 9 Using Overtime Trig...

Страница 56: ...the MEASURE button to see the Measure menu 2 Turn the knob V0 to select the first unspecified option marked by red arrow press V0 or F6 to enter the submenu 3 Select CH1 for the Source option Then re...

Страница 57: ...he Source option button and select CH1 4 Push F4 to select a cursor If S is selected turn V0 to move Cursor S on the screen if E is selected turn V0 to move Cursor E if both are selected turn V0 to mo...

Страница 58: ...F3 the Source option button and select CH1 4 Push F4 to select a cursor If S is selected turn V0 to move Cursor S on the screen if E is selected turn V0 to move Cursor E if both are selected turn V0 t...

Страница 59: ...sh the CH1 MENU button 4 Push the VOLTS DIV option button and select Fine Turn the VERTICAL POSITION knob to accurately separate the waveform into 5 divisions 5 Turn the VERTICAL POSITION knob to cent...

Страница 60: ...to analyze this signal Observing Noisy Signal 1 Press the ACQUIRE button to see the Acquire menu 2 Push the Type option button and select Real Time 3 Push the Peak Detect option button 4 If necessary...

Страница 61: ...c signals like pulses and glitches To set for a single shot acquisition follow the steps below 1 First set up the oscilloscope probe and the attenuation factor of CH1 2 Turn the vertical VOLTS DIV and...

Страница 62: ...ISPLAY button to see the Display menu 7 Push the Format option button and select XY 8 Now the oscilloscope displays a Lissajous pattern to characterize the input and output of the circuit 9 Turn the V...

Страница 63: ...Push F1 to select Pulse for the Type option push F2 to select CH1 for the Source option turn the TRIGGER LEVEL knob to set the trigger level at the bottom of the signal 6 Push F6 to enter the next pa...

Страница 64: ...eo Fields To trigger on the video fields follow the steps below 1 Push the TRIG MENU button to see the Trigger menu 2 Push F1 to select Video for the Type option 3 Push the Source option button to sel...

Страница 65: ...to select Line Number 4 Turn the Trigger Level knob to adjust the trigger level and stabilize video signals 5 Turn V0 to adjust the line number NTSC 0 525 lines 6 Turn the horizontal SEC DIV and the v...

Страница 66: ...See the figure below 6 9 Example 9 Using Overtime Trigger to Measure Long Pulse Signal It is not easy to observe some part of a long pulse signal by using the edge or pulse width trigger In such case...

Страница 67: ...forms By using the math function of the oscilloscope you can get a better representation of the waveform on the screen To observe this signal follow the steps below 1 Set the Probe option attenuation...

Страница 68: ...bilities in a serial data propagation control circuit you can set the oscilloscope to measure the propagation delay between the enable signal and the transfer data To set the propagation delay measure...

Страница 69: ...See the figure below 10 Read the data propagation delay in the Delta readout 6 12 Example 12 Using Trigger to Measure Digital Signal Edge Trigger To observe digital signal by using the edge trigger pl...

Страница 70: ...menu 2 Push F1 button to select Pulse as the trigger type 3 Push F2 button to select trigger source D0 D15 4 Push F3 button to select the pulse polarity positive or negative 5 Push F4 button to selec...

Страница 71: ...on to select the trigger source channel D0 D15 4 Push F3 button to select the code pattern H L or X 5 Push F4 button to select the trigger mode as Auto or Normal 6 Turn the timebase knob SEC DIV and a...

Страница 72: ...d adjust the time until you get a stable display of waveforms See the picture below Queue Trigger To observe digital signal by using the queue trigger please follow the step as below 1 Push the TRIG M...

Страница 73: ...tton to see the trigger menu 2 Push F1 button to select Iteration as the trigger type 3 Push F2 button to select the trigger source channel D0 D15 4 Push F3 button to select the pattern H L or X 5 Pus...

Страница 74: ...C signals with large magnitude 6 In addition you may press the Auto Measure button to perform an automatic detection of signals at first Contact our Technical Support department in time if there is st...

Страница 75: ...mine the oscilloscope and probes as often as operating conditions require To clean the exterior surface perform the following steps 1 Use a lint free cloth to remove floating dust on the outside of th...

Страница 76: ...Fastener and Installed Hardware X 0 X X 0 0 Other Accessories including probes X 0 0 X 0 0 Others 0 0 0 0 0 0 X means that at least the content of this poisonous and harmful substance in a homogeneous...

Отзывы: