hold down
TARE
and
ON/OFF/ZERO
buttons to enter calibration mode.
2.
When the indicator shows” CAL-?”, the scale is ready for calibration. Press
TARE
to confirm and go to next step, or press
ON/OFF/ZERO
to exit the
calibration mode.
3.
The 140 indicator will display “CAP.--”, that means the following data is the
full capacity according to your setting of display resolution (P7), display
division value (P8) , location of decimal point-dot in calibration unit
(P9) and
capacity’s unit in calibration (P10). If the setting of FS is more than 199999
(regardless of decimal point and weight unit), the FS capacity will be shown
by first four digits and last four digits: “Hxxx” and “Lxxx”.
For example, the display resolution is selected to 100000(P7=31), the display
division is selected to 5(P8=2), the position of decimal point is selected to
one point after zero (P9=1). The calibration unit is chosen as lb (P10=1), so
the full capacity 50000.0lb will be shown as H 50 and L000.0 in lb unit. Also,
in other modes, the data will be shown as “Hxxx” and “Lxxx” when current
display data is larger than 199999 kg/lb (not include decimal point).
Press
TARE
to go to next step directly; press
ON/OFF/ZERO
to exit
the calibration mode; or after a few seconds, it will automatically to next
step.
4.
The scale will automatically display the setting of division. Firstly it will
display “d.--”, and then the data according to your setting of P8, P9 and P10.
You may choose division among these as below:
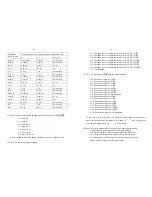
Table1:
0.0001kg/lb 0.0002kg/lb 0.0005kg/lb
0.001kg/lb 0.002kg/lb 0.005
kg/lb
0.01kg/lb
0.02 kg/lb
0.05 kg/lb
0.1kg/lb
0.2 kg/lb
0.5 kg/lb
1kg/lb
2 kg/lb
5 kg/lb
10kg/lb
20 kg/lb
50 kg/lb
Press
TARE
to go to next step directly; press
ON/OFF/ZERO
to exit
the calibration mode; or after a few seconds, it will automatically to next
step.
5.
When ‘
CAL.P0
’ is displayed, that means the scale will begin to calibrate
7
scale’s zero-point. Move away any weight on the scale. Press
TARE
button
to confirm, or press
ON/OFF/ZERO
to exit this mode.
6.
When ‘
CAL.P1
’ is displayed, the scale will be calibrated on second
calibration point. The default standard weight is 50%FS, and at the same, you
can press
ON/OFF/ZERO
to exit the calibration mode. Or load
12.5%-100%FS weight, and use
PRINT/HOLD
and UNIT
keys to input
the loaded weight. If the input data is larger than 199999, it will show as
“Hxxx” and “Lxxx”. If the triangular symbol on the left bottom of LCD
window appears, it means that the digit being changed is the displayed most
significant bit which can only be 0/blank or 1. Press TARE key to confirm
your setting and the indicator will flash the input standard weight. Wait till
the scale comes steady, and input A/D data as per the standard weight.
The indicator will automatically go to next step, if the second point can be
calibrated correctly. If there’s an error occurred, the scale will display “CAL.
Er” and return back to step 5 for re-calibration.
7. When ‘
CAL.P2’
is displayed, the scale will be calibrated on third
calibration point. When xxxxxx kg (or lb) is displayed (100% FS is default),
you can press
ON/OFF/ZERO
to exit the calibration mode or Place a
standard weight (must be in the range of 25%-100% FS, and equal or larger
than that for the second calibration point; this is also the range of your input
number) on the scale. Use PRINT/HOLD and
UNIT
key to input the
standard weight’s value. Use
TARE
key to confirm the standard weight and
input number are correct. If the calibration weight for third point is same
with that for second point and the calibration weight is more than 25%FS,
input the standard calibration weight same as second point calibration and
press
TARE
key to confirm the setting. The indicator will flash the input
weight. If the indicator get reasonable data (the input weight is correct, and
the calibration weight of third calibration is more than equal to the
calibration weight of second calibration), it will go to next step automatically.
If there’s an error occurred, the scale will display “CAL. Er” and return back
to step 5 for re-calibration.
8. When
‘
CAL.P0
’ is shown again, that means the scale will calibrate scale’s
zero-point again. Now, you can press
ON/OFF/ZERO
to exit the calibration
mode; or Move away any weight on the scale, press
TARE
key to confirm;
8


