19
DRIVING RECORDER CAMERA
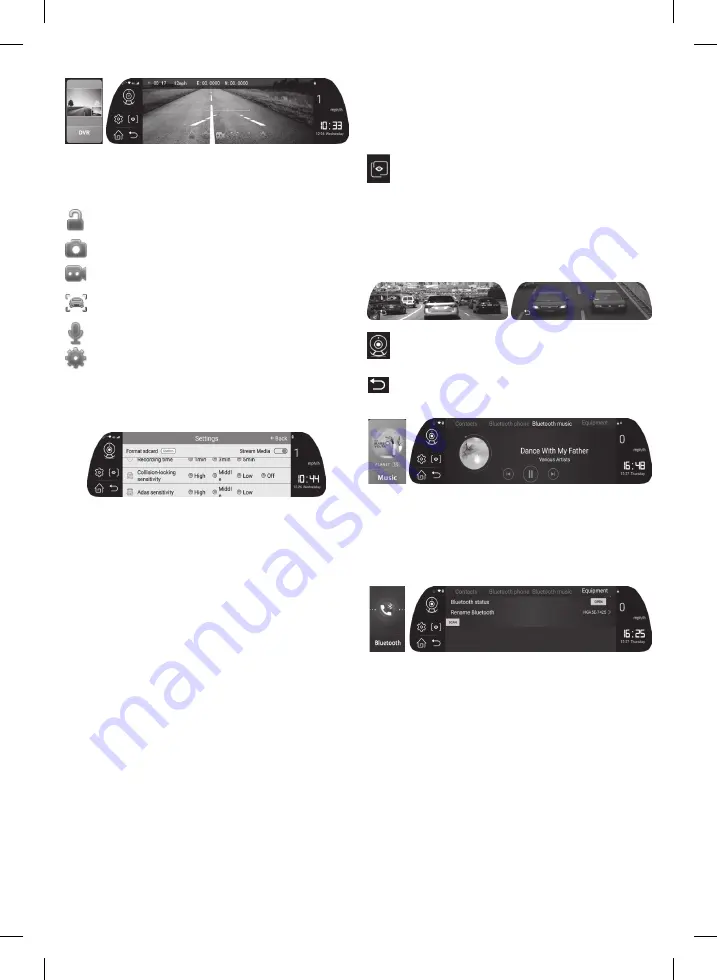
Tap the
DVR
icon and the image of the rear camera will appear. The top line
shows speed and coordinate data – if the GPS receiver is working properly.
Buttons in the bottom row: lock recording, photo, video recording, driving
assistant, voice recording, setup menu
prevents the current recording from being overwritten automatically
later, and also starts recording
take a photograph
start and stop video recording
switching ADAS on and off, then tap and hold for calibration when
accessing the internet, the pictogram changes
turns audio recording on and off when recording a video
DVR setting menu
Setting
menu: formatting SD card (confirm: confirm deletion) / media
playback (on/off) / continuous recording duration of stages (1/3/5 min)
/ (G-sensor) collosion sensor sensitivity (high/medium//low/off) / ADAS
sensitivity (high/medium/low) / speed unit (km/mile)
It is recommended that you format the inserted memory card (not supplied)
before use. It is not possible to access the DVR setup menu during
recording. To make the settings, stop recording first. An ongoing recording
is indicated by a striking red dot on the screen. You can toggle between
and double-click one of the two views displayed on the split screen at the
same time.
• After installing the unit, adjust the front camera to the correct position by
tilting it and pulling it to the side
• After installing the rear camera, you can view the images of both cameras
at the same time and shoot both.
• Insert a high speed memory card required for recording and other DVR
functions. (min.Class10 or better / 4… 64GB, contacts facing up)
• The supplied USB / miniUSB cable allows you to transfer recorded
videos to a computer. If you have a card reader, you can also manage
the recordings with the card reader by removing the card from the turned
off camera.
• Length of recording sections: Cyclic recordings of a few minutes are
concatenated continuously, but when deleting automatically (when the
card is full), only the oldest recording of a few minutes is always deleted.
• Content of the “watermark” to be recorded: date, time, speed, geographical
coordinates.
• In the event of a collision, the G-sensor will lock the affected recording
against auto erase. You can also lock the current recording manually with
the “padlock” button. In parking guard mode, a recording is taken in the
event of a collision.
• The operation of ADAS (driving assistant) requires mobile internet and its
applicability depends on geographical location, service provider, weather,
pavement, etc. may be dependent. Operation cannot be guaranteed in
all situations. Policy options: LDWS (lane departure), FCWS (tracking
distance warning). During calibration, the top, horizontal (red) line
represents the distance of the vehicle in front of us, the bottom the front
of our vehicle. The vertical signal denies the lane markings in the lane.
When standing in a car park, adjust to the desired view according to the
vehicle's capabilities.
• The availability of all displayed functions is not guaranteed because the
software version, application, geographical location, service provider, etc.
may be dependent.
• Warning! For lost or damaged data, etc. the manufacturer accepts no
liability, even if the data, etc. they are lost while using this product. It is
recommended that you back up the recordings on the connected media to
your computer beforehand. Do not remove the memory card during use.
Reversing camera and full screen mode
Tap the icon above to switch between the front and rear camera
image if the rear camera is also properly connected and positioned.
The rear camera can also be used inside a vehicle if it has a good view of
the area behind the vehicle. Alternatively, you can use it to control children
or cargo traveling in the back.
• When the red wire is connected to the reversing lamp, it is automatically
displayed in full screen when reversing.
• IP44: protected against solid objects that are >1 mm, and water splashing
from any angle.
Tap for quick access to cameras, tap x1, x2 on the displayed images
to switch between the two cameras or between split screen and rear
full screen mode.
Tap to return to the main menu.
MUSIC PLAYBACK
Tap the
Music
icon and the music player interface will appear; e.g. Spotify, if
installed. You can select and scroll through the songs you want.
The wireless BT connection allows you to access and play songs stored
on your phone or available online from the Internet, internet radios, etc.
through the car speakers. The latter function also requires the setting of
the FM transmitter.
WIRELESS BT
Tap the
BT
icon. The main functions that can be selected above are:
Contacts
: view and synchronize the phone’s contacts and call list
Phone
: dial pad
Music
: play music from your phone (stored songs, internet radios, online
music, Spotify, YouTube…)
Manage
: you can turn the wireless connection on and off (
Open / Close
) or
rename the smart mirror ID name.
SCAN
: searches for nearby paired devices, including your phone. Pair the
two devices as usual.
The available functions
: accepting an incoming call without touching the
phone, phonebook, call list, dialer, hands-free via the car sound system,
playing music from the phone or from numerous online sources…
• Keep windows closed during a call, as driving noise significantly impairs
speech intelligibility. The microphone is at the bottom of the mirror, speak
in its direction.
• A mirror can be paired with one phone at a time.
• The volume and sound quality of the BT connection are affected by the
audio settings of the connected mobile phone.
• In some cases, some characters may not appear on the screen properly
or at all. This can mainly affect special or accented characters and is not
a malfunction of the device.


