MF5462
- 68 -
12 - PC Features
For the second step:
Now that the background image is created in directory in
C:\Program Files\Companion Suite Pro
LL 2\Documents\FAX\Temporary, you can add the fields
on top of the background image.
Please follow the procedure below:
(a) Launch MFManager, select New Fax, click on the
tab Cover Page, and check the check box named
With the cover page.
(b) Click on the button New, this displays a new window
with the title Creation of the cover page.
(c) Press the button Open in the toolbar, change the file
filter to *.fax and browse to the directory C:\Program
Files\Companion Suite Pro LL 2 \Documents\FAX
\Temporary that contains the background image that
you have created in the First step.
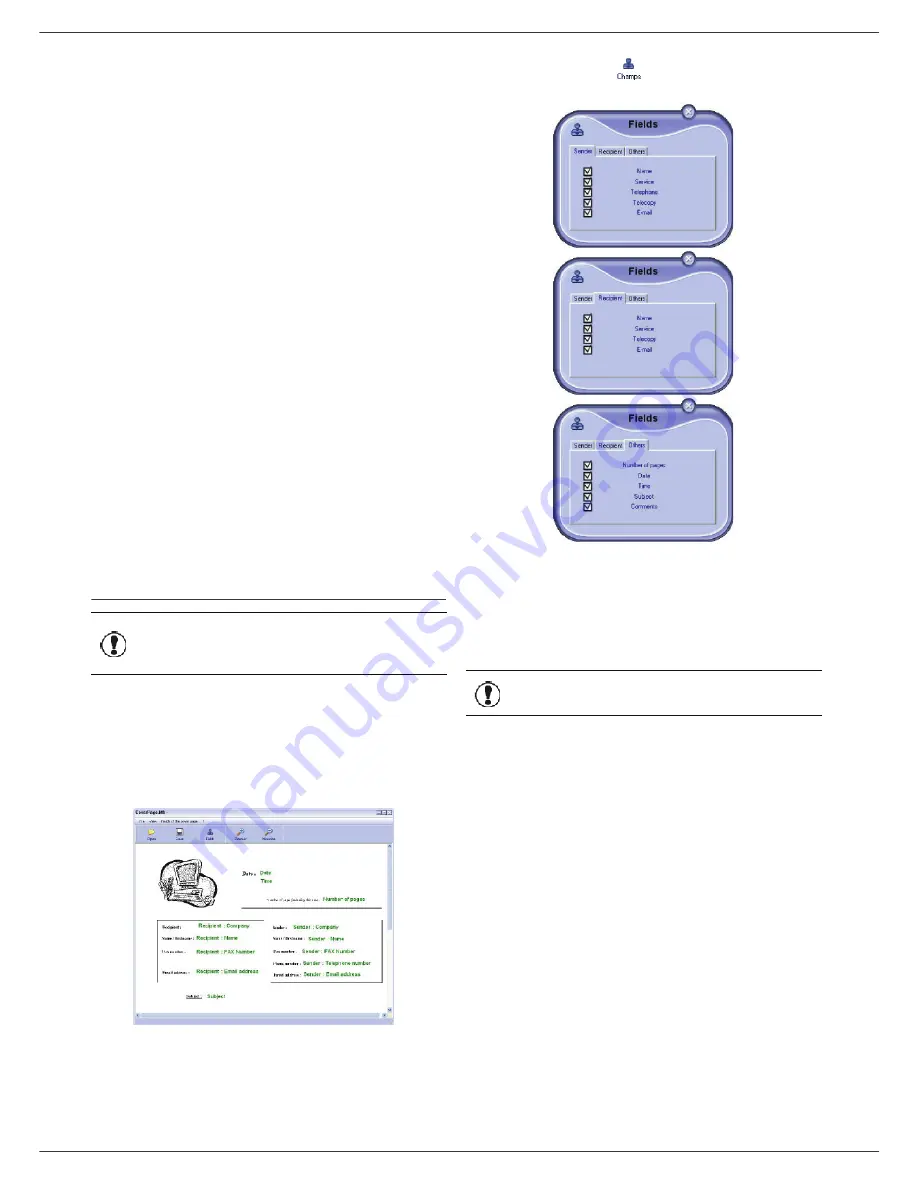
(d) Click on the button Fields in the toolbar, a window
pops up allowing you to add the fields on top of the
background image.
(e) Click on the button Save to save the Cover Page
template and exit this window.
(f)
The window New Fax is displayed, you can now
choose the Cover Page template that you want to
use. When you double click the preview image in the
lower right corner, another window pops up giving
you a preview of the cover page with the fields filled
with the recipient's information.
Creating a cover page
1
From the tab
C
OVER
PAGE
, click on the button N
EW
.
2
Select the model cover page you have created
using the menu
F
ILE
.
A window with the model cover page you have
created is displayed:
3
Click on the icon
to display the available
fields.
To add a field, proceed as follows:
- Select the field you want to insert by clicking the
field palette. A stamp replaces the cursor of your
mouse.
- Click the location where you want to put the field
on the model.
- You can move or enlarge the field as you like.
4
As soon as fields are inserted, save the cover
page.
This cover page can be selected in the tab C
OVER
PAGE
of
the fax send window.
Important
It is necessary to create a model
cover page before sending a fax
with it.
Important
Adjust the size of your field so that
the text is readable.


