


Installation
Runco VX-44d/-55d Installation/Operation Manual
41
PRE
L
IMINAR
Y
3.9
Primary Lens
Adjustments
To access the motorized primary lens controls:
1.
Press
MENU
on the remote control or DHD Controller front panel.
2.
Select
S
ervice
from the Main Menu and enter the Service Menu passcode.
3.
Select
Di
s
play Device
from the Service Menu.
4.
Select
Configure
from the Display Device menu, then select
Len
s
.
The Lens menu gives you a great deal of control over the picture size, position and focus.
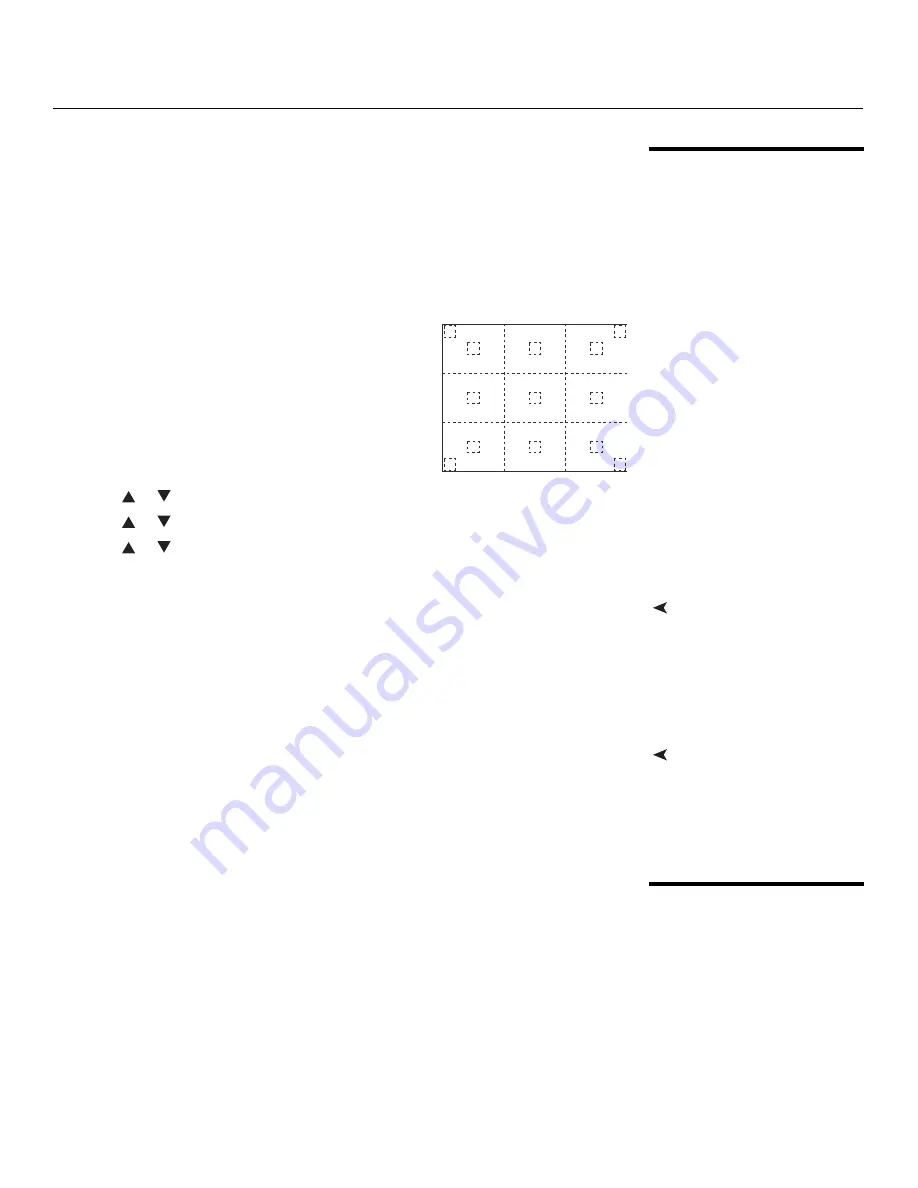
For best results, use the internal 13-point test pattern
on the VX-44d/-55d when making these adjustments.
(You cannot access this test pattern from the DHD
Controller.) This pattern provides nine screen “zones”
with 13 targets.
To access this test pattern:
1.
On the VX-44d/-55d built-in keypad
(see Figure
2-3), press
MENU
.
2.
Press
or
to highlight
In
s
tallation
, then press
ENTER
.
3.
Press
or
to highlight
Calibration and Te
s
t Pattern
s
, then press
ENTER
.
4.
Press
or
to highlight
Te
s
t Pattern
, then press
ENTER
.
5.
Select the
13 Point
test pattern from the pull-down list, then press
ENTER.
Focus and Zoom
To focus the projected image, use the cursor buttons to highlight “In” or “Out.” Then,
press and hold the
ENTER
button.
To make the picture smaller (zoom out), use the cursor buttons to highlight the minus sign
(-). Then, press and hold the
ENTER
button.
To enlarge the picture (zoom in), use the cursor buttons to highlight the plus sign (+).
Then, press and hold the
ENTER
button.
Vertical and Horizontal
Lens Shift
To change the lens position, use the cursor buttons to highlight “Left,” “Right,” “Up” or
“Down” in the Lens menu. Then, press and hold the
ENTER
button to shift the lens in that
direction.
When finished adjusting the lens, press
EXIT
repeatedly on the VX-44d/-55d built-in
keypad to exit test pattern mode.
3.10
Adjusting the Picture
Orientation
By default, the VX-44d/-55d is configured for a “floor/front” installation, in which the
projector is installed upright and in front of the screen. If it is installed behind the screen
and/or mounted on a ceiling, you must change the picture orientation. To do this:
1.
Press
MENU
on the remote control or DHD Controller front panel.
2.
Select
S
ervice
from the Main Menu and enter the Service Menu passcode.
3.
Select
Di
s
play Device
from the Service Menu.
4.
Select
Configure
from the Display Device menu, then select
In
s
tallation
.
5.
Select
Orientation
.
6.
Choose Floor/Rear, Ceiling/Front or Ceiling/Rear, to match the installation method.
Содержание Video Xtreme VX-44d
Страница 2: ......
Страница 10: ...x Runco VX 44d 55d Installation Operation Manual P R E L I M I N A R Y Notes...
Страница 14: ...Table of Contents xiv Runco VX 44d 55d Installation Operation Manual P R E L I M I N A R Y Notes...
Страница 68: ...Installation 52 Runco VX 44d 55d Installation Operation Manual P R E L I M I N A R Y Notes...
Страница 102: ...Maintenance and Troubleshooting 86 Runco VX 44d 55d Installation Operation Manual P R E L I M I N A R Y Notes...
Страница 118: ...Specifications 102 Runco VX 44d 55d Installation Operation Manual P R E L I M I N A R Y Notes...
Страница 119: ......
Страница 120: ...Runco International 800 23RUNCO Fax 503 748 8161 www runco com 020 0826 02 Rev B April 2009...


