ENGINE K SERIES 1.8 VVC
Technical Academy
Page 22 of 28
01-34-RG-W-Ver:1
•
Fit new rack seal to plate, then slide rack through the seal.
•
Using fingers only, lubricate and fit new seal to piston, then secure the rack in the soft-
jawed vice and fit piston to rack securing it with its screw.
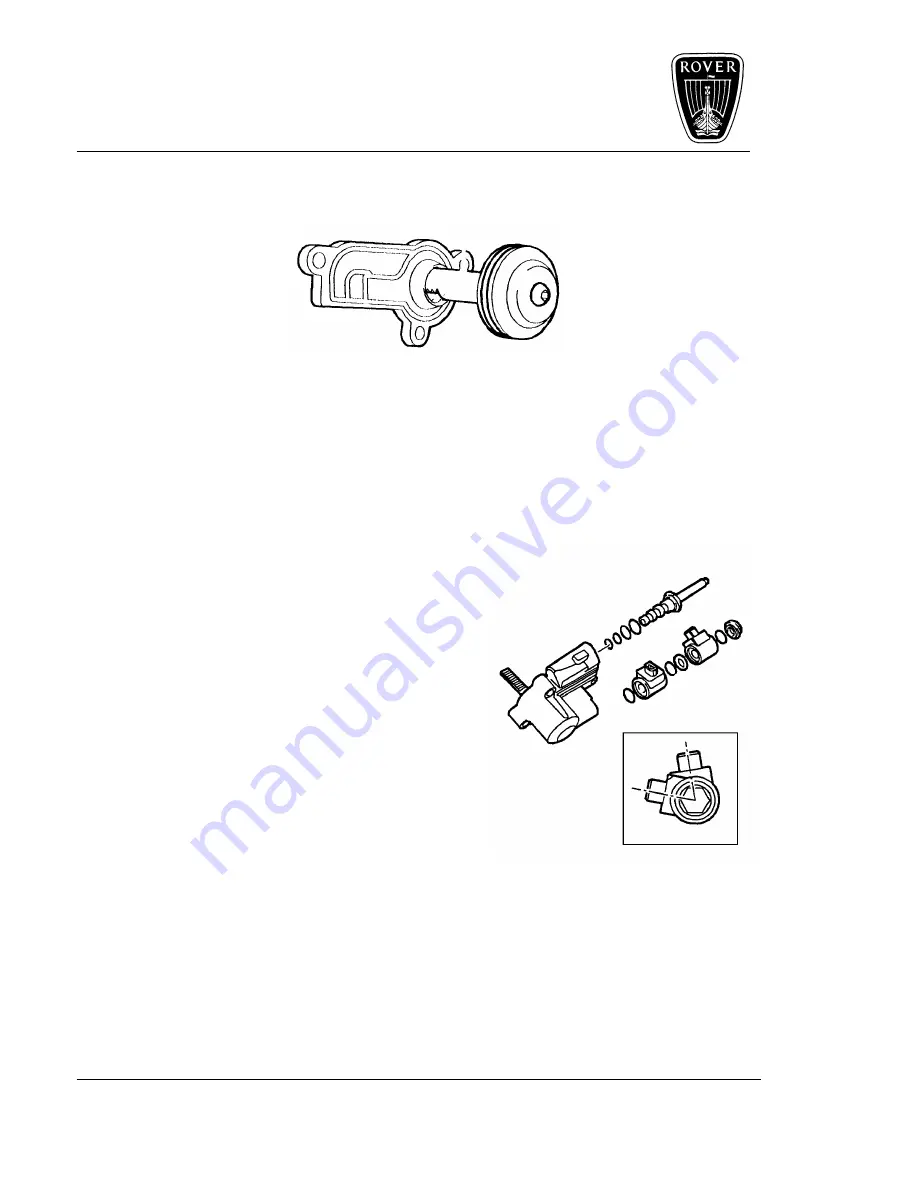
Figure 24
•
Lubricate piston bore with engine oil, then position the seal plate, piston and rack
assembly to the HCU with the rack teeth facing towards the fixing hole which is adjacent
to the solenoid side of the unit.
•
Enter piston assembly into bore at an angle to the cut-out in the bore to prevent damage
to piston seal.
•
Lubricate 3 new ‘O’ rings with engine oil and fit to the spool valve porting grooves.
•
Lubricate new ‘O’ rings and fit to the spool valve
nut side of the inner solenoid, and washer and
bolt side of the outer solenoid.
•
Fit spool valve into HCU, twisting the valve
slightly as it is inserted into the bore to avoid
damaging the ‘O’ rings, then tighten spool valve
nut to 26Nm.
•
Position inner solenoid on spool valve with the
lettering on the end of the solenoid facing away
from the control unit, then fit washer and new ‘O’
ring .
•
Position outer solenoid on spool valve, also with
lettering on the end of solenoid facing away from
the control unit.
•
Position both solenoids as shown in figure 26,
then fit and tighten sleeve bolt to 6Nm
CAUTION:
DO NOT exceed the specified torque, and do not fit oil temperature transmitter
at this stage, but plug the port in the HCU to prevent dirt ingress. It may also be necessary
to re-position the solenoids to clear breather pipes when the engine is fitted to vehicle.
Figure 25
Содержание K Series 1.8 VVC
Страница 2: ......


