20
FA ROTEX Solaris DrainBack - 09/2016
4
x
Installation
With flat roof mounting:
The flat roof penetration must be professionally sealed in the
roof (e.g. by means of bitumen sheeting). Involve a roofer if
necessary.
Depending on the type of connection, seal off the unused
cable screw fittings in the flat roof penetrations with the
matching seal screw fittings.
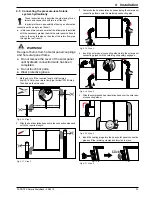
8. Tighten the M-screw fittings of the connection pipes and ca-
bles.
4.4
Mounting the flat solar panels
Carry out the following steps:
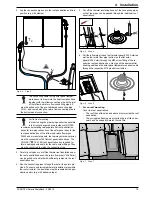
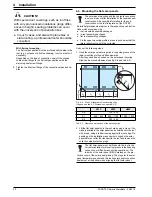
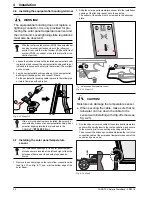
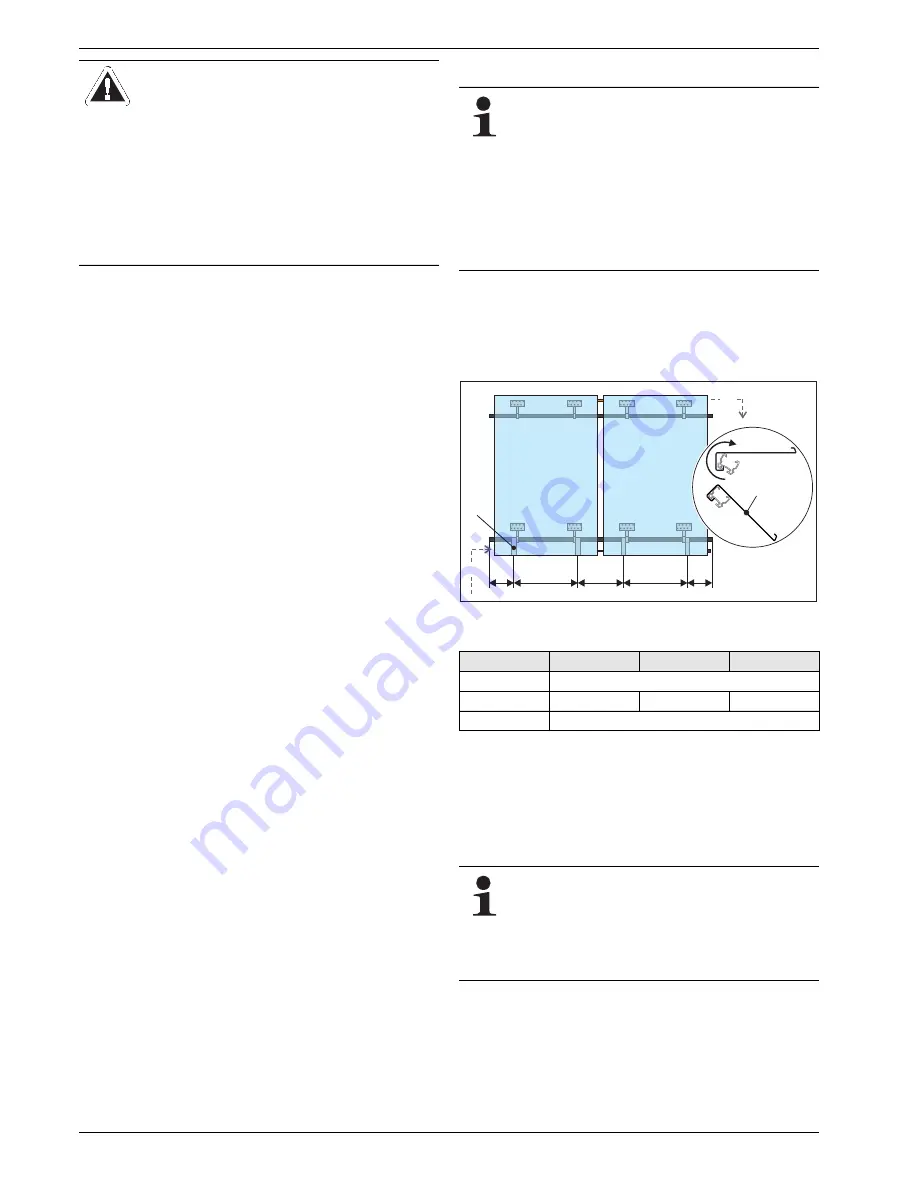
1. Hook the solar panel securing clips in the guide groove of the
lower mounting profile and tilt downwards.
After they have been hooked on, the solar panel securing
clips can be moved sideways (see fig. 4-8 and tab. 4-3).
Tab. 4-3 Clearance dimensions of the securing clips
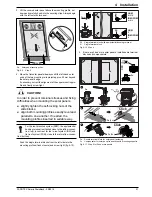
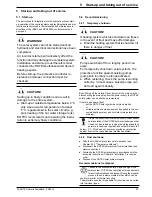
2. Lift the flat solar panel onto the roof area using a crane. If no
crane is available, the solar panel can be hoisted onto the roof
with a rope, using a ladder leaning against the roof edge. De-
pending on the installation requirements, unpack the solar
panel before or after the transport to the roof and remove the
collection pipe protective plugs.
CAUTION!
With special roof coverings, such as roof tiles
with very pronounced undulations (large differ-
ences in height), sealing problems can occur
with the universal roof penetration box.
●
In such cases, and also with plane tiles or
slate roofing, a professional roofer should be
consulted.
The solar panel mounting and the hydraulic connection
is only carried out after installation of the requisite sub-
construction. All assembly information for the sub-
construction or the roof integration of the ROTEX
Solaris flat plate panels are given in the respective quick instruc-
tions which accompany the
●
roof-mounted assembly packages
●
in-roof assembly packages
●
flat roof assembly packages.
●
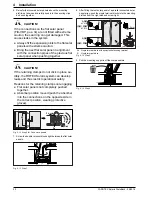
Fix the upper mounting profile in place in such a way that the
lateral alignment can still be corrected.
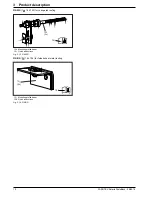
Fig. 4-8
Step 1: Alignment of the securing clips
(Legend, see tab. 4-1, Dimensions, see tab. 4-3)
V21P
V26P
H26P
A0
100 – 250
A1
650 – 850
800 – 1100
1600 – 1800
A2
240 – 440
The flat solar panel must be lifted onto the roof in the
correct orientation for mounting (prevents faults during
connection or difficult manoeuvring operations). The
top side of the solar panel (DB) is marked on the pro-
tective cover of the solar panel glazing. The plugs for the solar
panel temperature sensor and the round solar panel connection
seals must at the bottom when aligning the flat solar panel.
A
0
A
1
A
1
A
2
A
0
2b
2b
(8)
(9)

