


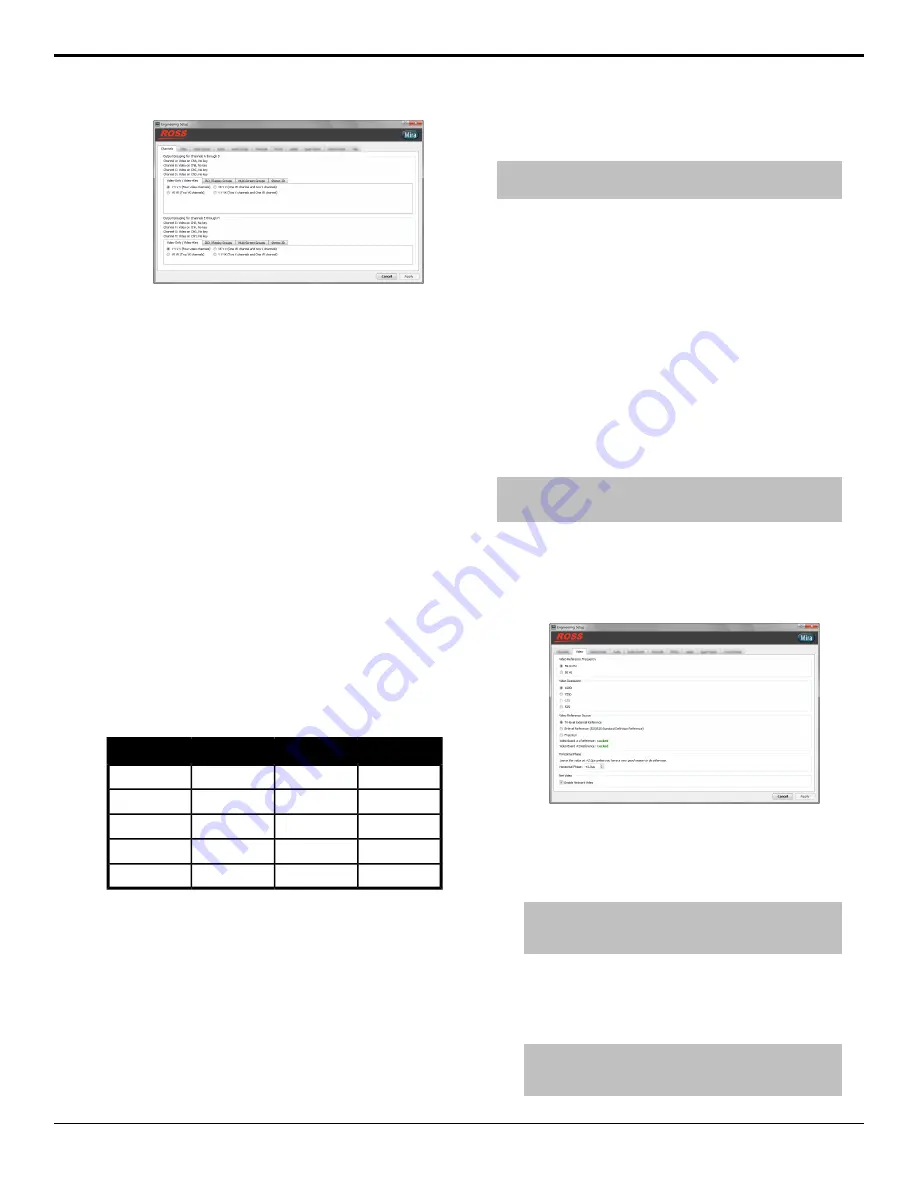
Figure 2: 8-Channel Shown
3.
Select the video processing mode and how you want
the channels grouped.
4.
Select the default alpha (key) output that is used on
a VKA channel transport when no alpha channel is
present in the clip.
•
Output BLACK on key output
— the key
(alpha) channel outputs a full frame of internally
generated black.
•
Output WHITE on key output
— the key
(alpha) channel outputs a full frame of internally
generated white. Use this selection if the output
is going to a switcher as an auto-select key. The
full-frame white alpha will force the entire video
image onscreen.
5.
Click
Apply
.
Video Formats
When working in 3G video formats, or outputting for
UHDTV1, the available formats and number of channels
depends on the hardware you have installed in your
server.
DVCPRO HD
AVC-Intra
JPEG 2000
4/8*
4/8*
4/8*
1080i
0
4/8*
0
1080p
Not Supported
Supported
Not Supporter
3G Level A
Not Supported
Not Supported
Supported
3G Level B
0/0*
1/2*
0/1*
UHDTV1
* Video channels supported by the 4-channel and
8-channel servers.
UHDTV1 Support
The video server requires at least 8 server channels and
the
JPEG 2000
or
AVC-Intra
video processing boards
to output a UHDTV1 video signal.
When operating in UHDTV1 the server records and plays
four (4) 3G video signals (quads) that make up the
UHDTV1 video. You can preview all four streams at
once from the Quad Viewer in a single down sampled
1080i output.
Note:
The Replay Event and File Export features are not
available for UHDTV1 at this time.
With the 8-channel
JPEG 2000
board operating in a
UHDTV1 mode, the eight (8) channels are converted
into one (1) UHDTV1 channel (ChA).
With the 8-channel
AVC-Intra
board operating in a
UHDTV1 mode, the eight (8) channels are converted
into two (2) UHDTV1 channels. These two channels
provide two separate record/play background channel
transport (ChA and ChB) or a single keyer channel
transport.
To Configure the Video Format
The server can only operate in one video format at a time.
This is the format that all video clips will be recorded
and played out in.
Note:
Not all video resolutions and frequencies are compatible.
Some selections will be grayed out if they are not compatible.
1.
Launch the Mira Config application.
You may be prompted to allow the program to make
changes on the computer, click
Yes
.
2.
Click the
Video
tab.
3.
In the
Video Reference Frequency
area, select
the frequency you want the server to operate in.
4.
In the
Video Resolution
area, select the video
resolution you want the server to operate in.
Note:
If you want to operate in UHDTV1 you must select
4K and then click Restart Mira. After the server has
restarted continue this procedure and select 3G Level B.
5.
In the
Video Reference Source
area, select the
type of input reference signal that the server is using.
This is the video signal that is connected to the
Analog REF IN
BNC on the back of the server.
Note:
You should only use Free Run when the server is
not receiving video from, or outputting video to, another
device.
48
• Server Configuration — Mira Manual (v6.1)
Содержание Abekas Mira
Страница 1: ...Mira Manual v6 1 ...


